Sweet • Sour • Savory

Food blog on scandinavian style food done right.

breakfast

Shakshuka a la the Danes

Breakfast, Brunch, Vegetables, VegetarianTove Balle-PedersenComment

Shakshuka a la the Danes

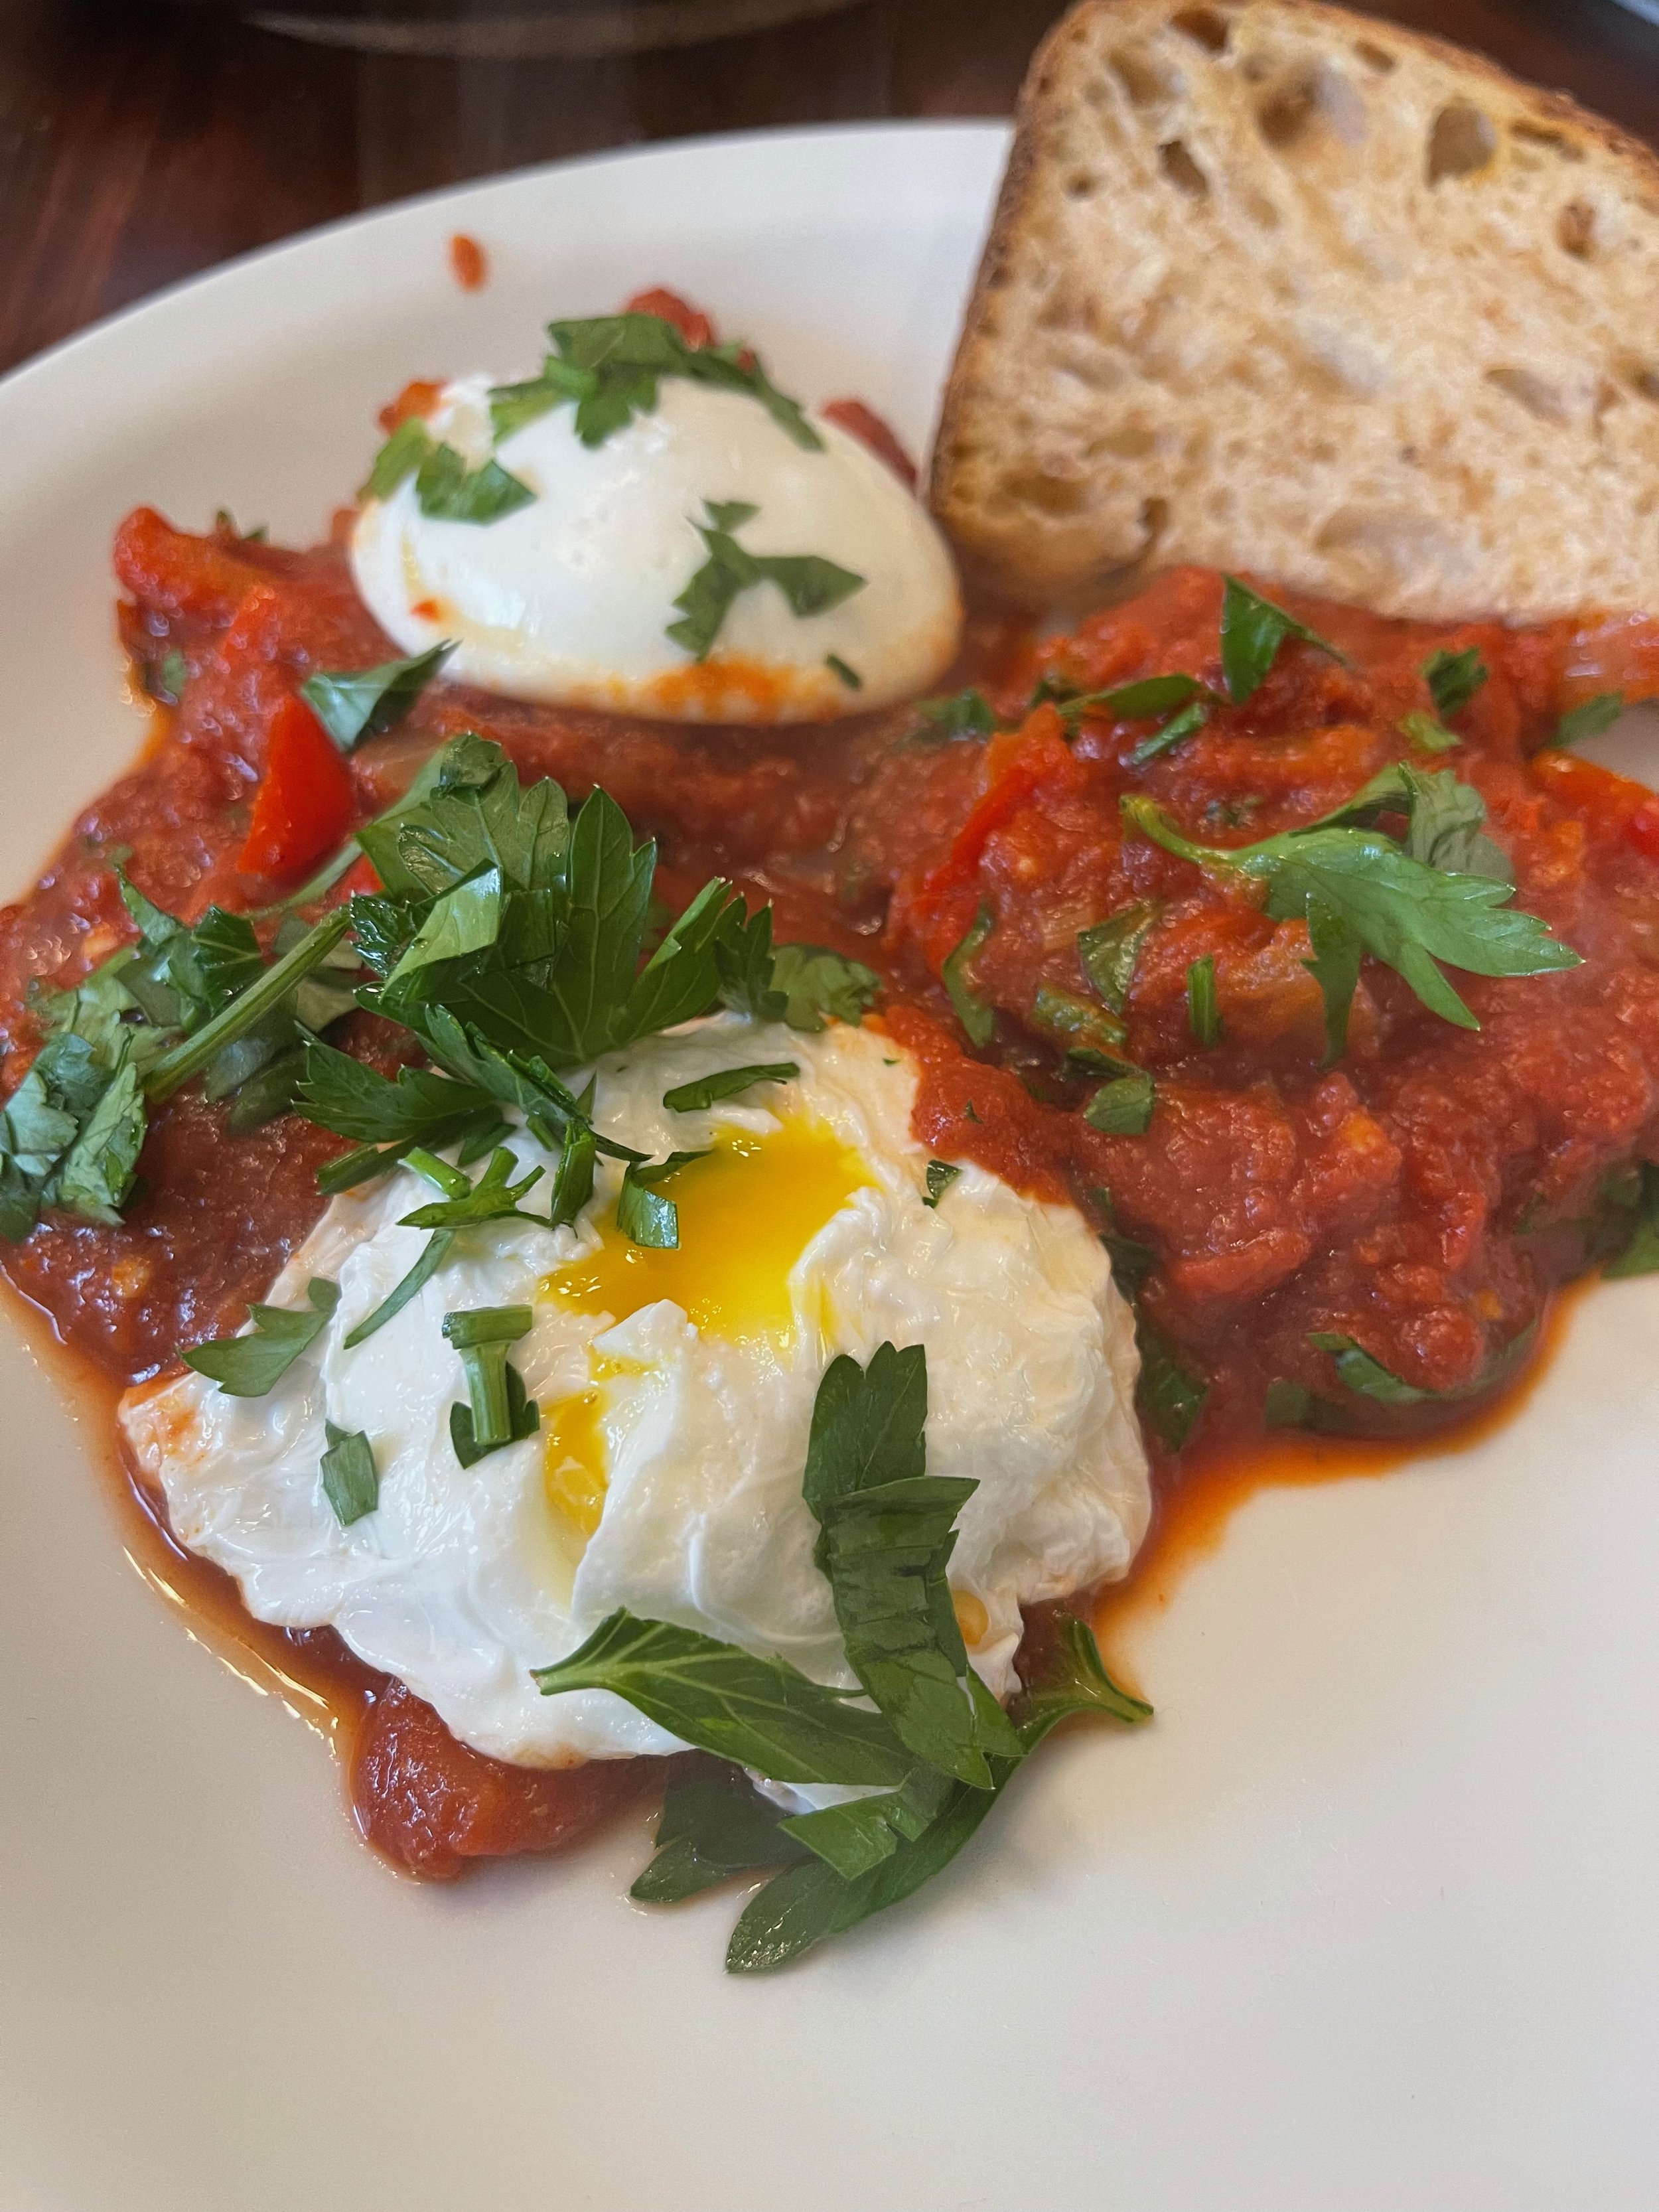
Shakshuka is a spicy sauce of tomatoes and other vegetables with poached eggs originating from North Africa, Tunisia. I first had it at a humus place, and remember it as kinda bland. But I liked the idea of the dish, and my version of the dish is not even close to bland. After serving this to my husband, it went into his top of breakfast dishes. I poach the eggs separately, so I can make a large pot of the sauce, even adding whatever vegetables I have on hand, and freeze it in smaller portions. By doing this Shakshuka becomes a quick breakfast, just heating the sauce, and poaching the eggs.

Serves 2-3.

Ingredients:

  • 1 onion, diced

  • 1 red bell pepper, diced

  • 2 garlic clove, minced

  • 1 can diced tomatoes

  • 1½ teaspoon cumin

  • ¼ teaspoon cayenne pepper or red chili flakes

  • 1 teaspoon paprika (½ mild and ½ smoked)

  • salt, to taste

Topping

Directions:

In a deep frying pan, heat the oil and cook the onion and bell pepper for around 5 minutes, until the onion is translucent. Stir in the spices and garlic and cook for a couple more minutes. Add the tomatoes and season with salt and pepper to taste. Let the sauce simmer gently for 15 minutes, letting the sauce thicken a bit.

(For the traditional shakshuka make up 4 hollows in the sauce, and crack an egg in each one, cover the pan with a lid and cook for another 5-8 minutes until the desired doneness of the eggs.)

I make poached eggs and serve them on top, because I think it’s easier to control.

Now, with a large spoon, make four hollows at the points of the compass in the mixture.

Just before serving place the poached eggs on top, and sprinkle with chopped chili and parsley.

Serve the dish immediately with a slice of good bread, preferably toasted.

Enjoy!
Poached Eggs version 2

Breakfast, Brunch, techniqueTove Balle-PedersenComment

Poached Eggs.

I really love poached eggs, but it’s kinda a new love. Before we moved to California, it wasn't really a thing for me. Back then I preferred soft boiled eggs. But a poached egg is pretty much a naked soft boiled egg 😆, so maybe I didn’t change much 😳

I thought I had found a foolproof method, but it was hard to make more eggs at a time, when making a whirlpool in the pot. So with this newer (to me) method, I’m able to make 4 eggs at the same time. And I perfected this method to fit my family.

I use my thick bottomed sauté pan, it is wide and shallow, and works perfect.

Eggs in general: When you want poached eggs, you need to use fresh eggs. When you crack the egg you can tell that you have a fresh egg, when the yolk is firm and plump, and the white consist of two parts: a gelatinous mass around the yolk and a runnier liquid.  As the egg ages, the white becomes more runny.  So the runnier the white, -  the older the egg. 

If you don't want to crack the eggs to figure out the freshness, here's a quick guide:

Place your eggs in a cup or bowl of fresh water

  • If the egg sinks and lays flat on the bottom, it's very fresh.

  • If the egg sits on the bottom at an angle,it's a bit older.

  • If the egg stands on end but still sits on the bottom, use for baking.

  • If the egg floats, it is old and you don't want to use it.

Serves 2-4

Ingredients:

  • 4 eggs

  • 2 tablespoons vinegar

Equipment needed:

  • Shallow saucepan with cover

  • Slotted spoon

Directions:

Crack the eggs into a cup each.

Bring the water to a boil, add the vinegar.

Turn off the heat.

Gently place the eggs in the pan with some space between them. Put on the lid.

Set the timer for 4 minutes when you have placed the first egg in the water.

Remove the eggs from the water with a slotted spoon in the same order as you put them in.

Serve immediately. Alternatively, place the egg in an ice bath and refrigerate up to 8 hours. Reheat in warm water just before serving.

Enjoy!


Panettone French Toast

Breakfast, Brunch, Christmas, HolidayTove Balle-PedersenComment
Panettone French Toast

Panettone French Toast

The past few years we bought a panettone from Manresa Bread for Christmas. This traditional Italian Christmas bread is a mix between a bread and a cake. I’ve see the ones at the grocery stores for years, but it was first when I got interested in sourdough bread baking and saw the panettone at our Local Manresa Bread store, I wanted to try it. It is as yummy in the morning with coffee as it is in the afternoon with a glass of something sweet. But the panettone is a large bread/cake, so I wanted to see if you could use the leftovers in another way, and here, French Toast a very good option. I do like French toast, but often it is very sweet and I find it to lack texture. But the panettone version add a more complex flavor profile and the breads own texture and the dried berries make it a very delicious breakfast. But I like a bit of salt with my sweets in the morning, so we added some bacon to our plates, and it was just perfect. when serving people with a larger appetite, add a sunny side up egg to the mix.

Serves 2.

Ingredients:

  • 1 large slice Panettone (1-inch/2-3 cm) thick (I used a ginger lemon cherry panttone from Manresa Bread)

  • 1 egg

  • 4 tablespoons heavy whipping cream

  • ½ teaspoon vanilla

  • 1 lemon, the zest of

  • 1 pinch salt

Directions:

723E7C65-4146-4C6A-8900-B4CCB369436E.jpeg

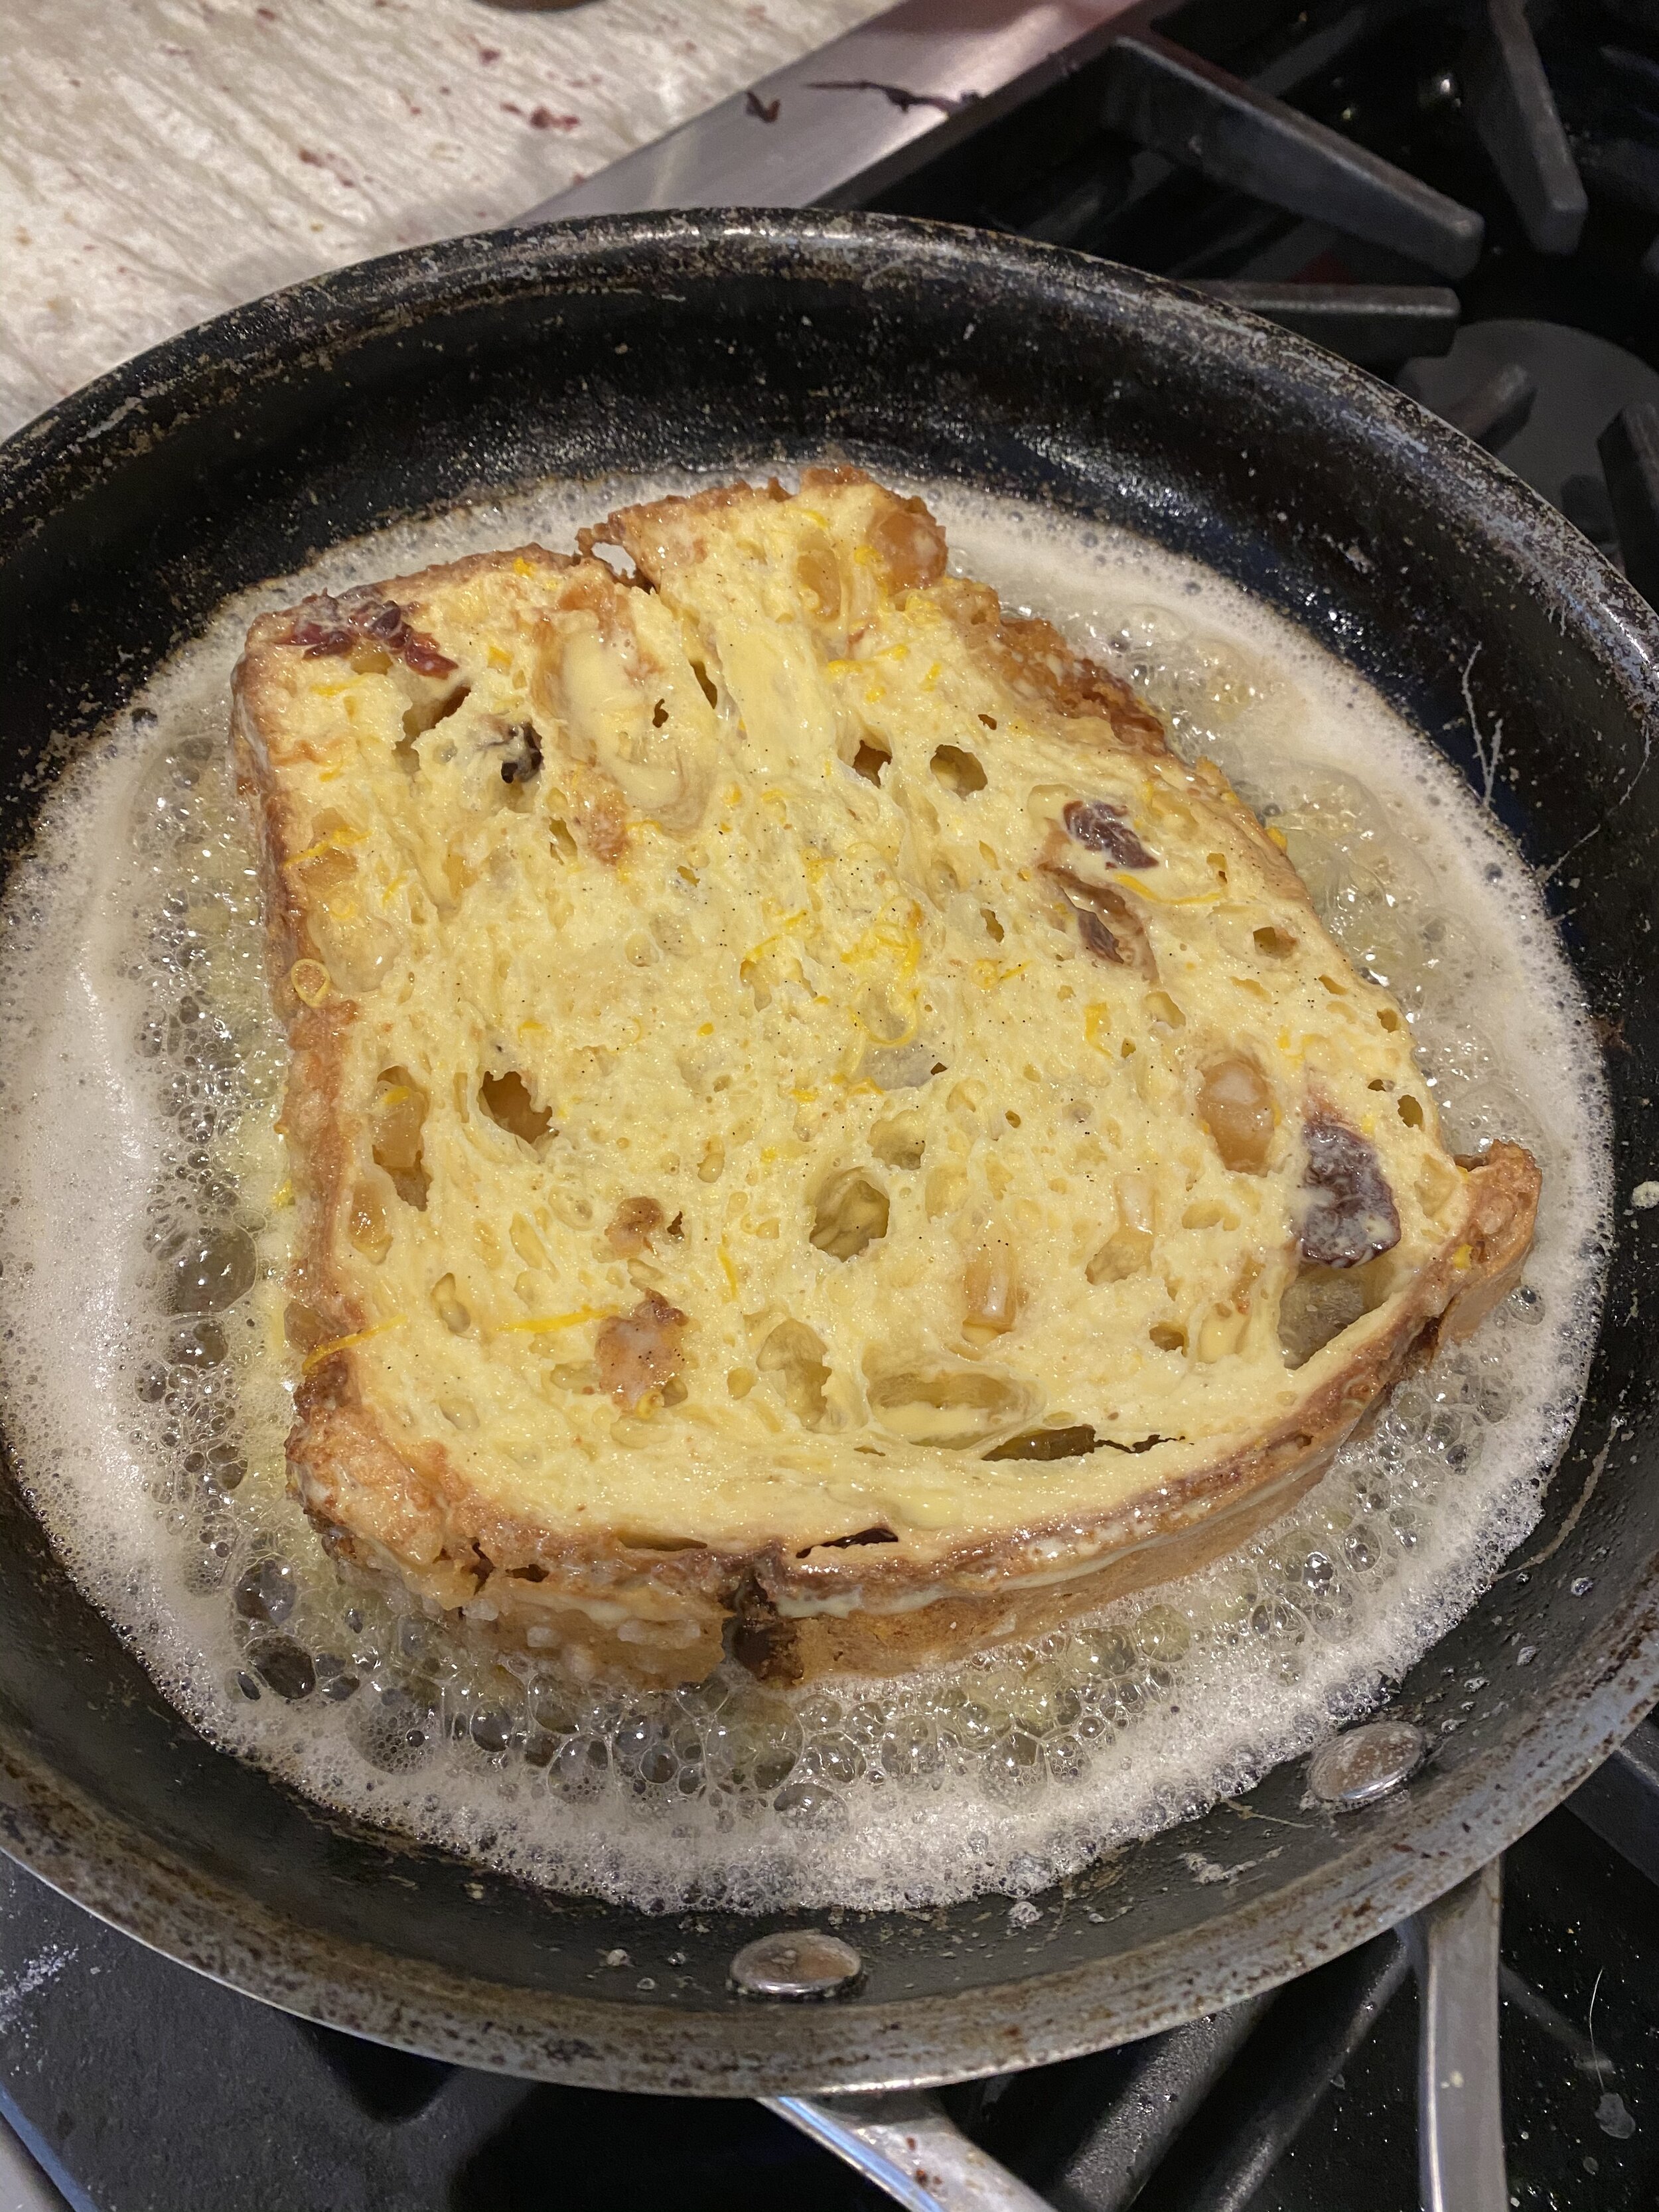
In a wide, shallow bowl, beat the egg, cream, vanilla, and salt together with a whisk until well-combined. Place the bread slice in the custard and gently press it down to help the bread absorb the custard, then flip it over and do the same to the other side of the bread. 

Heat a good amount of butter in a large skillet over medium heat. Add the custard-soaked bread to the pan and cook until it’s browned, it takes about a minute. Flip the bread and fry on the other side until it is browned. Serve the French toast immediately with a light sprinkle of powdered sugar and a drizzle of marble syrup. I served with a couple of slices of bacon, to bring some saltiness to the plate.

Enjoy!

Lobster Benedict- Sous Vide

Breakfast, Brunch, Fish & seafoodTove Balle-PedersenComment
Lobster Benedict- Sous Vide

Lobster Benedict- Sous Vide

Lobsters are a creature with a delicate taste and texture. So by poaching it in butter, you get the purest and cleanest lobster taste ever. Making it Sous Vide you are getting the perfect texture to your liking. The temperature is controlling the texture. Well time is too, but by poaching the lobster for 45-60 minutes, temperature is the controlling factor. 

Different cooks choose different poaching temperature. Thomas Keller calls for 139℉ (59℃) and Modernist Cuisine calls for 115℉ (46℃).

Serious Eats tested different temperature, and this were their finings:

Temperature - texture

120℉ (49℃) - Soft and translucent

130℉ (54℃) - Tender and succulent

140℉ (69℃) - Firm

I decided to go with 135℉ (57℃) and the result was fantastic, I got a tender and somewhat firm juicy lobster. This one is a winner.

Serves 2.

Ingredients:

Butter poached lobster tail:

  • 4 lobster tails, shells removed and deveined

  • 113 g salted butter (1 stick butter)

  • sprinkle of salt

Benedict:

Hollandaise in blender:

  • 250 g salted butter, clarified

  • 4 egg yolks

  • ¼ teaspoon salt

  • ¼ teaspoon ground white pepper

  • ½ lemon, the juice from

  • 1 pinch cayenne

Directions:

Butter poached lobster tail:

Set you sous vide to 135℉ (57℃).
Place the lobster tails and butter in a vacuum sealer bag, sealing with the moist setting. Place the bag in the water bath, making sure that the lobster is fully submerged. Set timer for 50 minutes.
Remove lobster tails from the bag, discarding the liquid, when it is time to serve your benedict.

Hollandaise:

Melt the butter in a sauce pan over very low heat.  Let simmer gently until the foam rises to the top of the melted butter. Once the butter stops spluttering, and no more foam seems to be rising to the surface, remove from heat and skim off the foam with a spoon. The foam is the milk solids from the butter. Ladle the butterfat into another saucepan leaving the water and residue behind. You can also pour the butterfat through some cheesecloth. Keep the butterfat warm.
The clarified butter should be about 172℉ (77℃).

Add the rest of the ingredients, except cayenne, in a blender. Blend until foaming. With the blender running add ⅓ of the butter in a slow steady stream, yes it will splatter. Once it emulsifies, turn the blender speed up to high and add the remaining butter. Season with salt and pepper and blend for another second. Sprinkle the cayenne on top when serving.

* Instead of regular hollandaise sauce, you can use the more healthier avocado hollandaise 

Benedict:

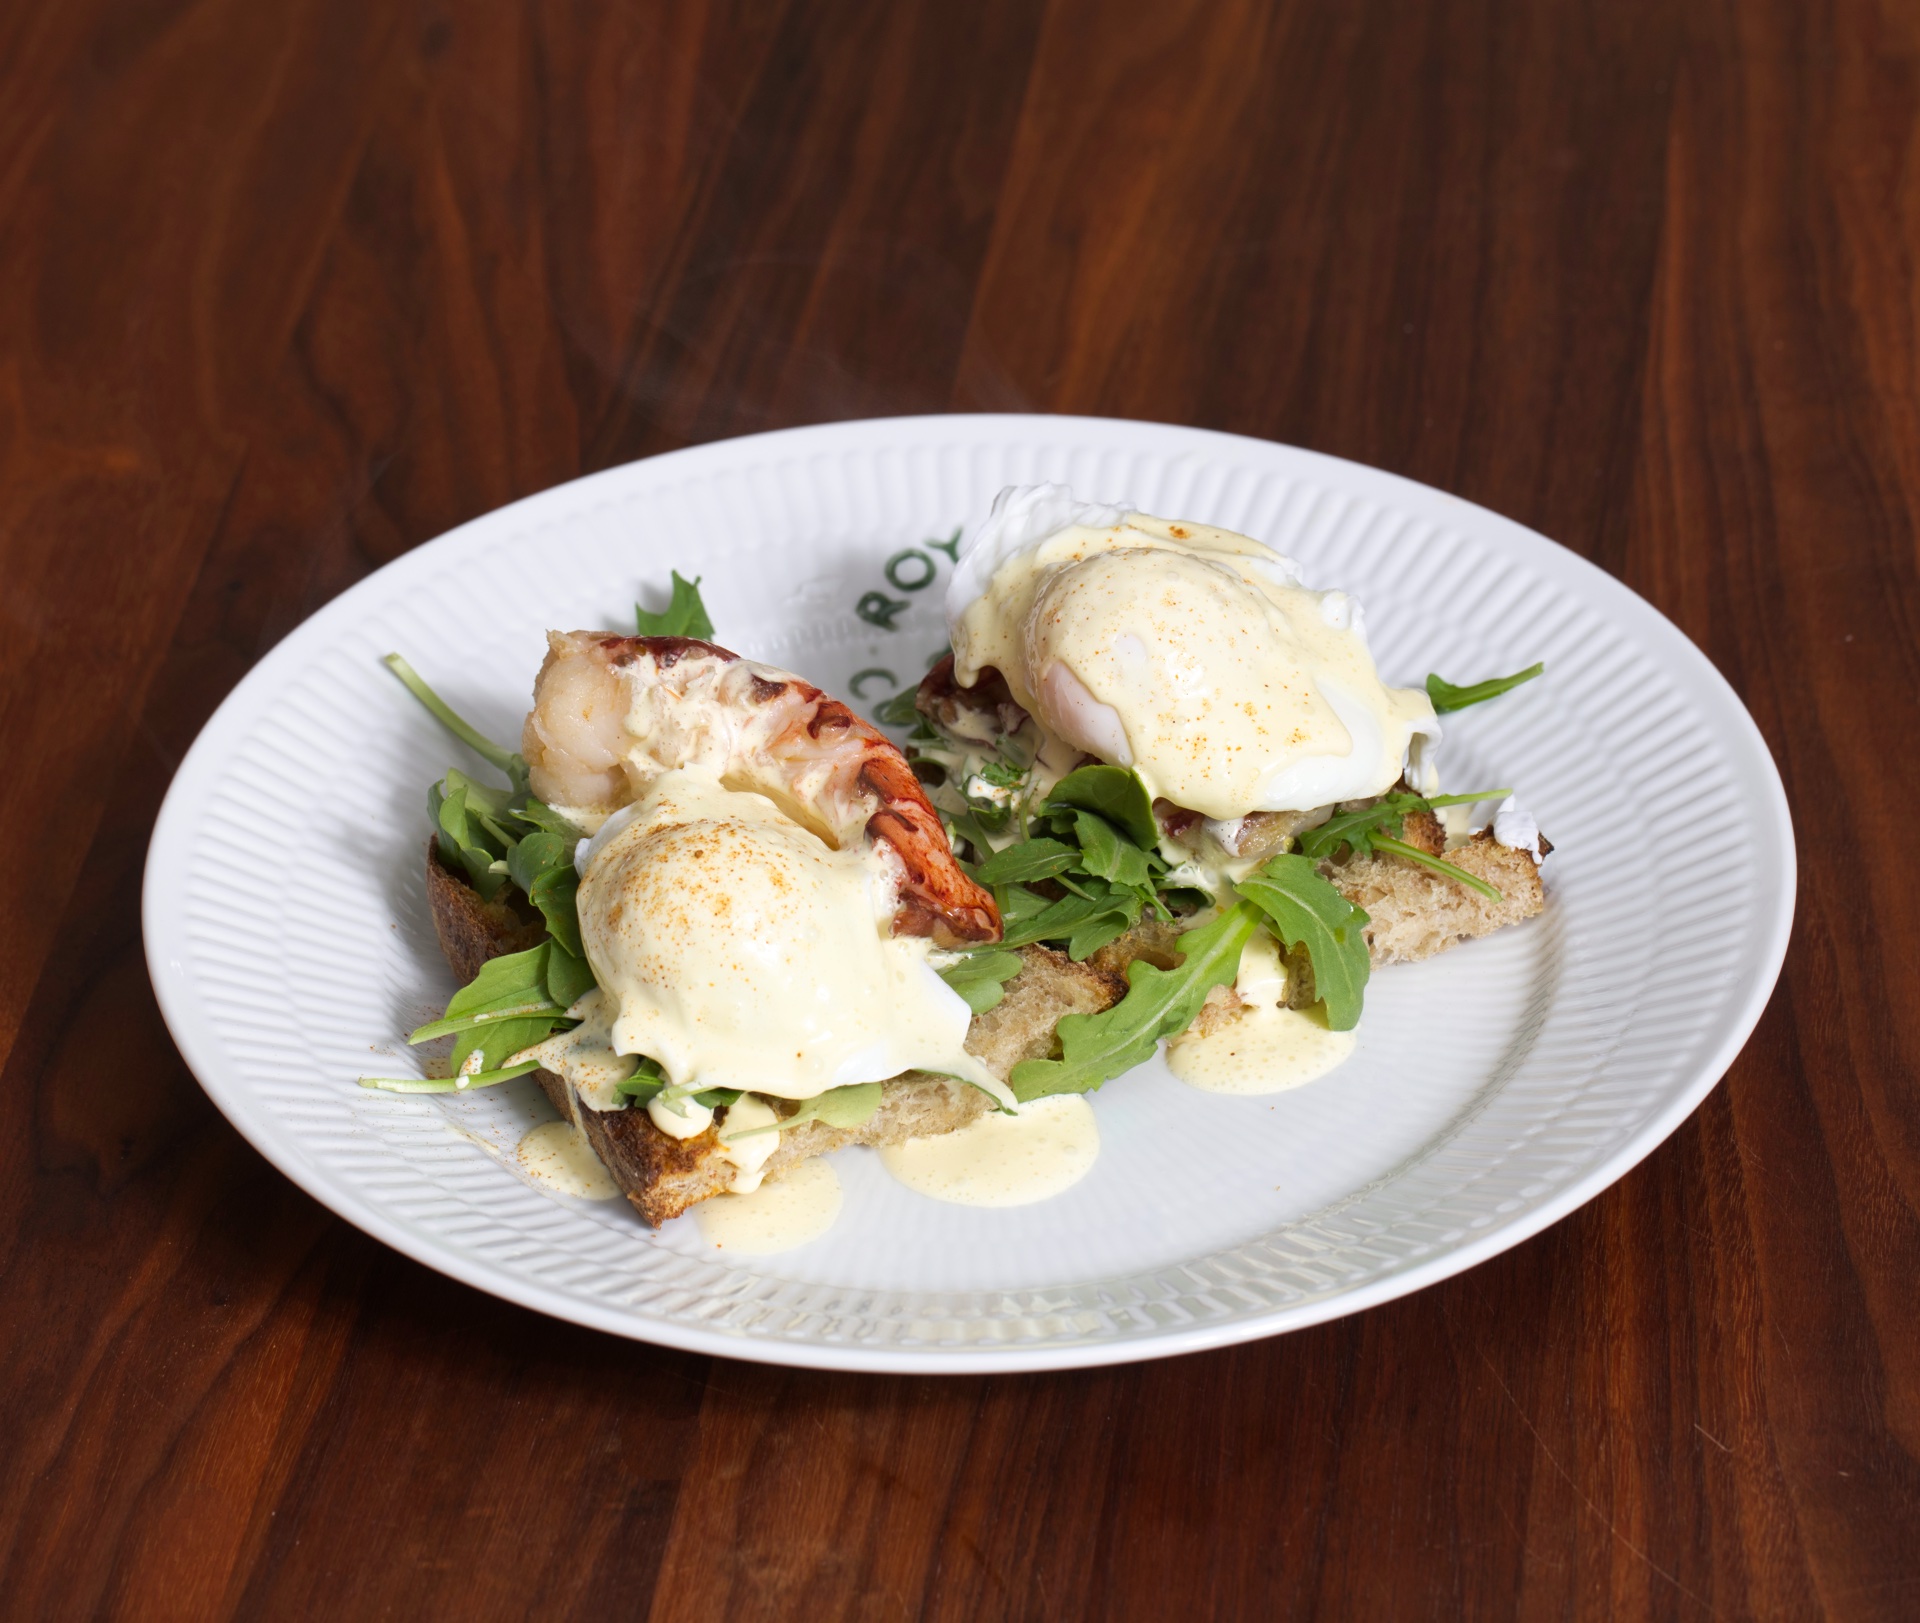
Toast the bread, place a handfull arugula on it, placing a lobster tail and a poached egg on top. Ladle a spoonful warm hollandaise over, sprinkling with some cayenne.

Serve immediately. 

Enjoy!


Sifted Rye Bread - Sigtebrød

Bread, Breakfast, BrunchTove Balle-PedersenComment
Sifted Rye Bread - Sigtebrød.

Sifted Rye Bread - Sigtebrød.

This is a very old type of Danish bread. When I worked at a Bakery in Denmark, we only sold a few, if non, sifted rye breads a day. And the customer would most likely be an old person. I think younger people wanted the fancy seeded breads. But quite frankly the sifted rye bread is very tasty. The crumb is a little more compact, without being dense. The recipe calls for "sigtemel" which is a sifted flour made from 30% rye and 70% wheat.

Makes 2 breads.

Ingredients:

  • 50 g live yeast (4 teaspoons dry yeast)
  • 400 ml tempered water
  • 3 tablespoons honey
  • 300 ml (1¼ cup) buttermilk
  • 300 g all-purpose flour
  • 700 g sigtemel (210 g dark rye flour + 490 g all-purpose flour)
  • ½ teaspoon ground caraway seeds
  • 5 teaspoons salt

Directions:

Dissolve the yeast in the water. If you use dry yeast add a few pinches of sugar. 

Add buttermilk, flours, ground caraway seeds, salt and honey, and knead the dough for 5-8 minutes to build up the gluten. Let the dough rise for about 60 minutes in a warm spot.

Knead the dough for a few minutes, and divide the dough in two.

Use the heels of your hands to gently flatten the dough into a rough rectangle. Fold the bottom third up, like a letter fold. Fold the bottom third of the dough over on itself. Press the folds with the heels of your hands, to seal. Fold the dough once more, building up the surface tension. This will help the loaf rise evenly and keep its shape. 

Place the loaf in a greased pan with the seam facing down. Repeat with the second loaf. I have a large pan that will hold both loafs, letting them “grow” together.

Preheat oven to 400℉ (200℃).

Let the loaf rise for another 40 minutes. Poke the top with a fork, and brush it with some milk. Bake loaf for 30-40 minutes. Let cool on a wire rack.

Enjoy!