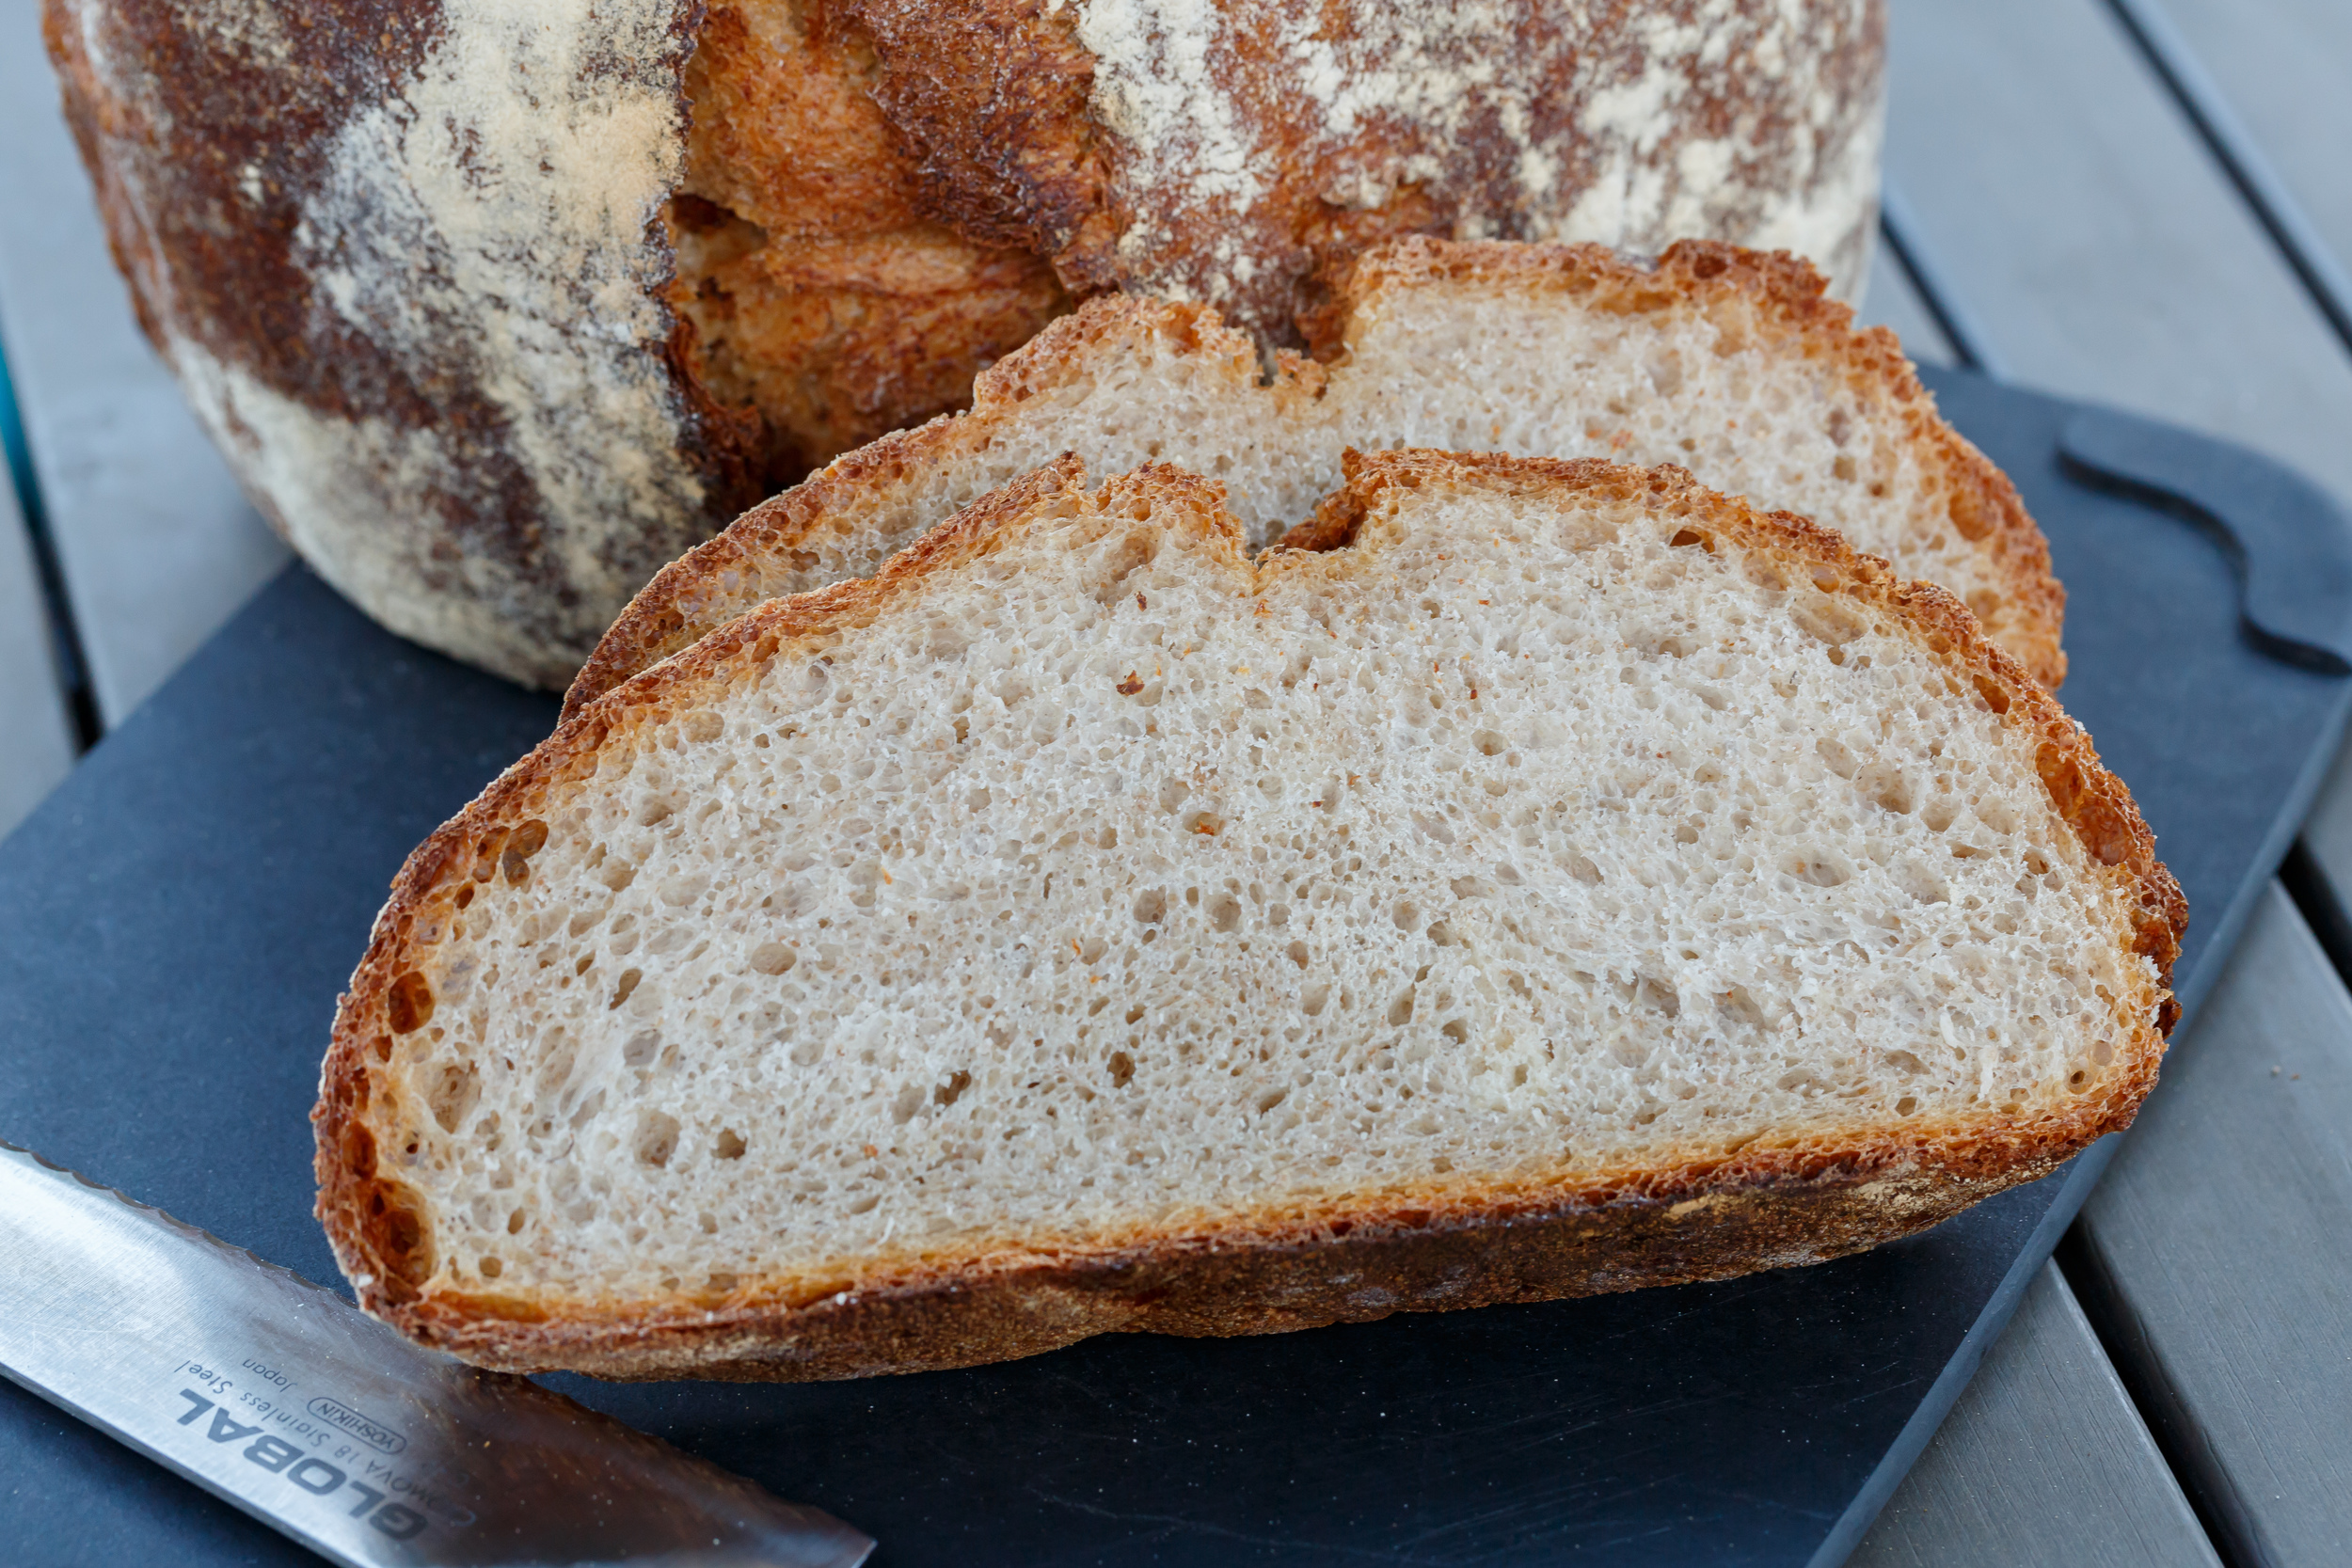
Sweet • Sour • Savory

Food blog on scandinavian style food done right.

Breakfast

Levain Bread

Bread, Breakfast, BrunchTove Balle-Pedersen2 Comments
Levain Bread

Levain Bread

Levain means wild yeast in French, but is also covers the use of sourdough. A bread kan be called a Levain if the amount of compressed yeast (live yeast) doesn't exceeds 0.2%

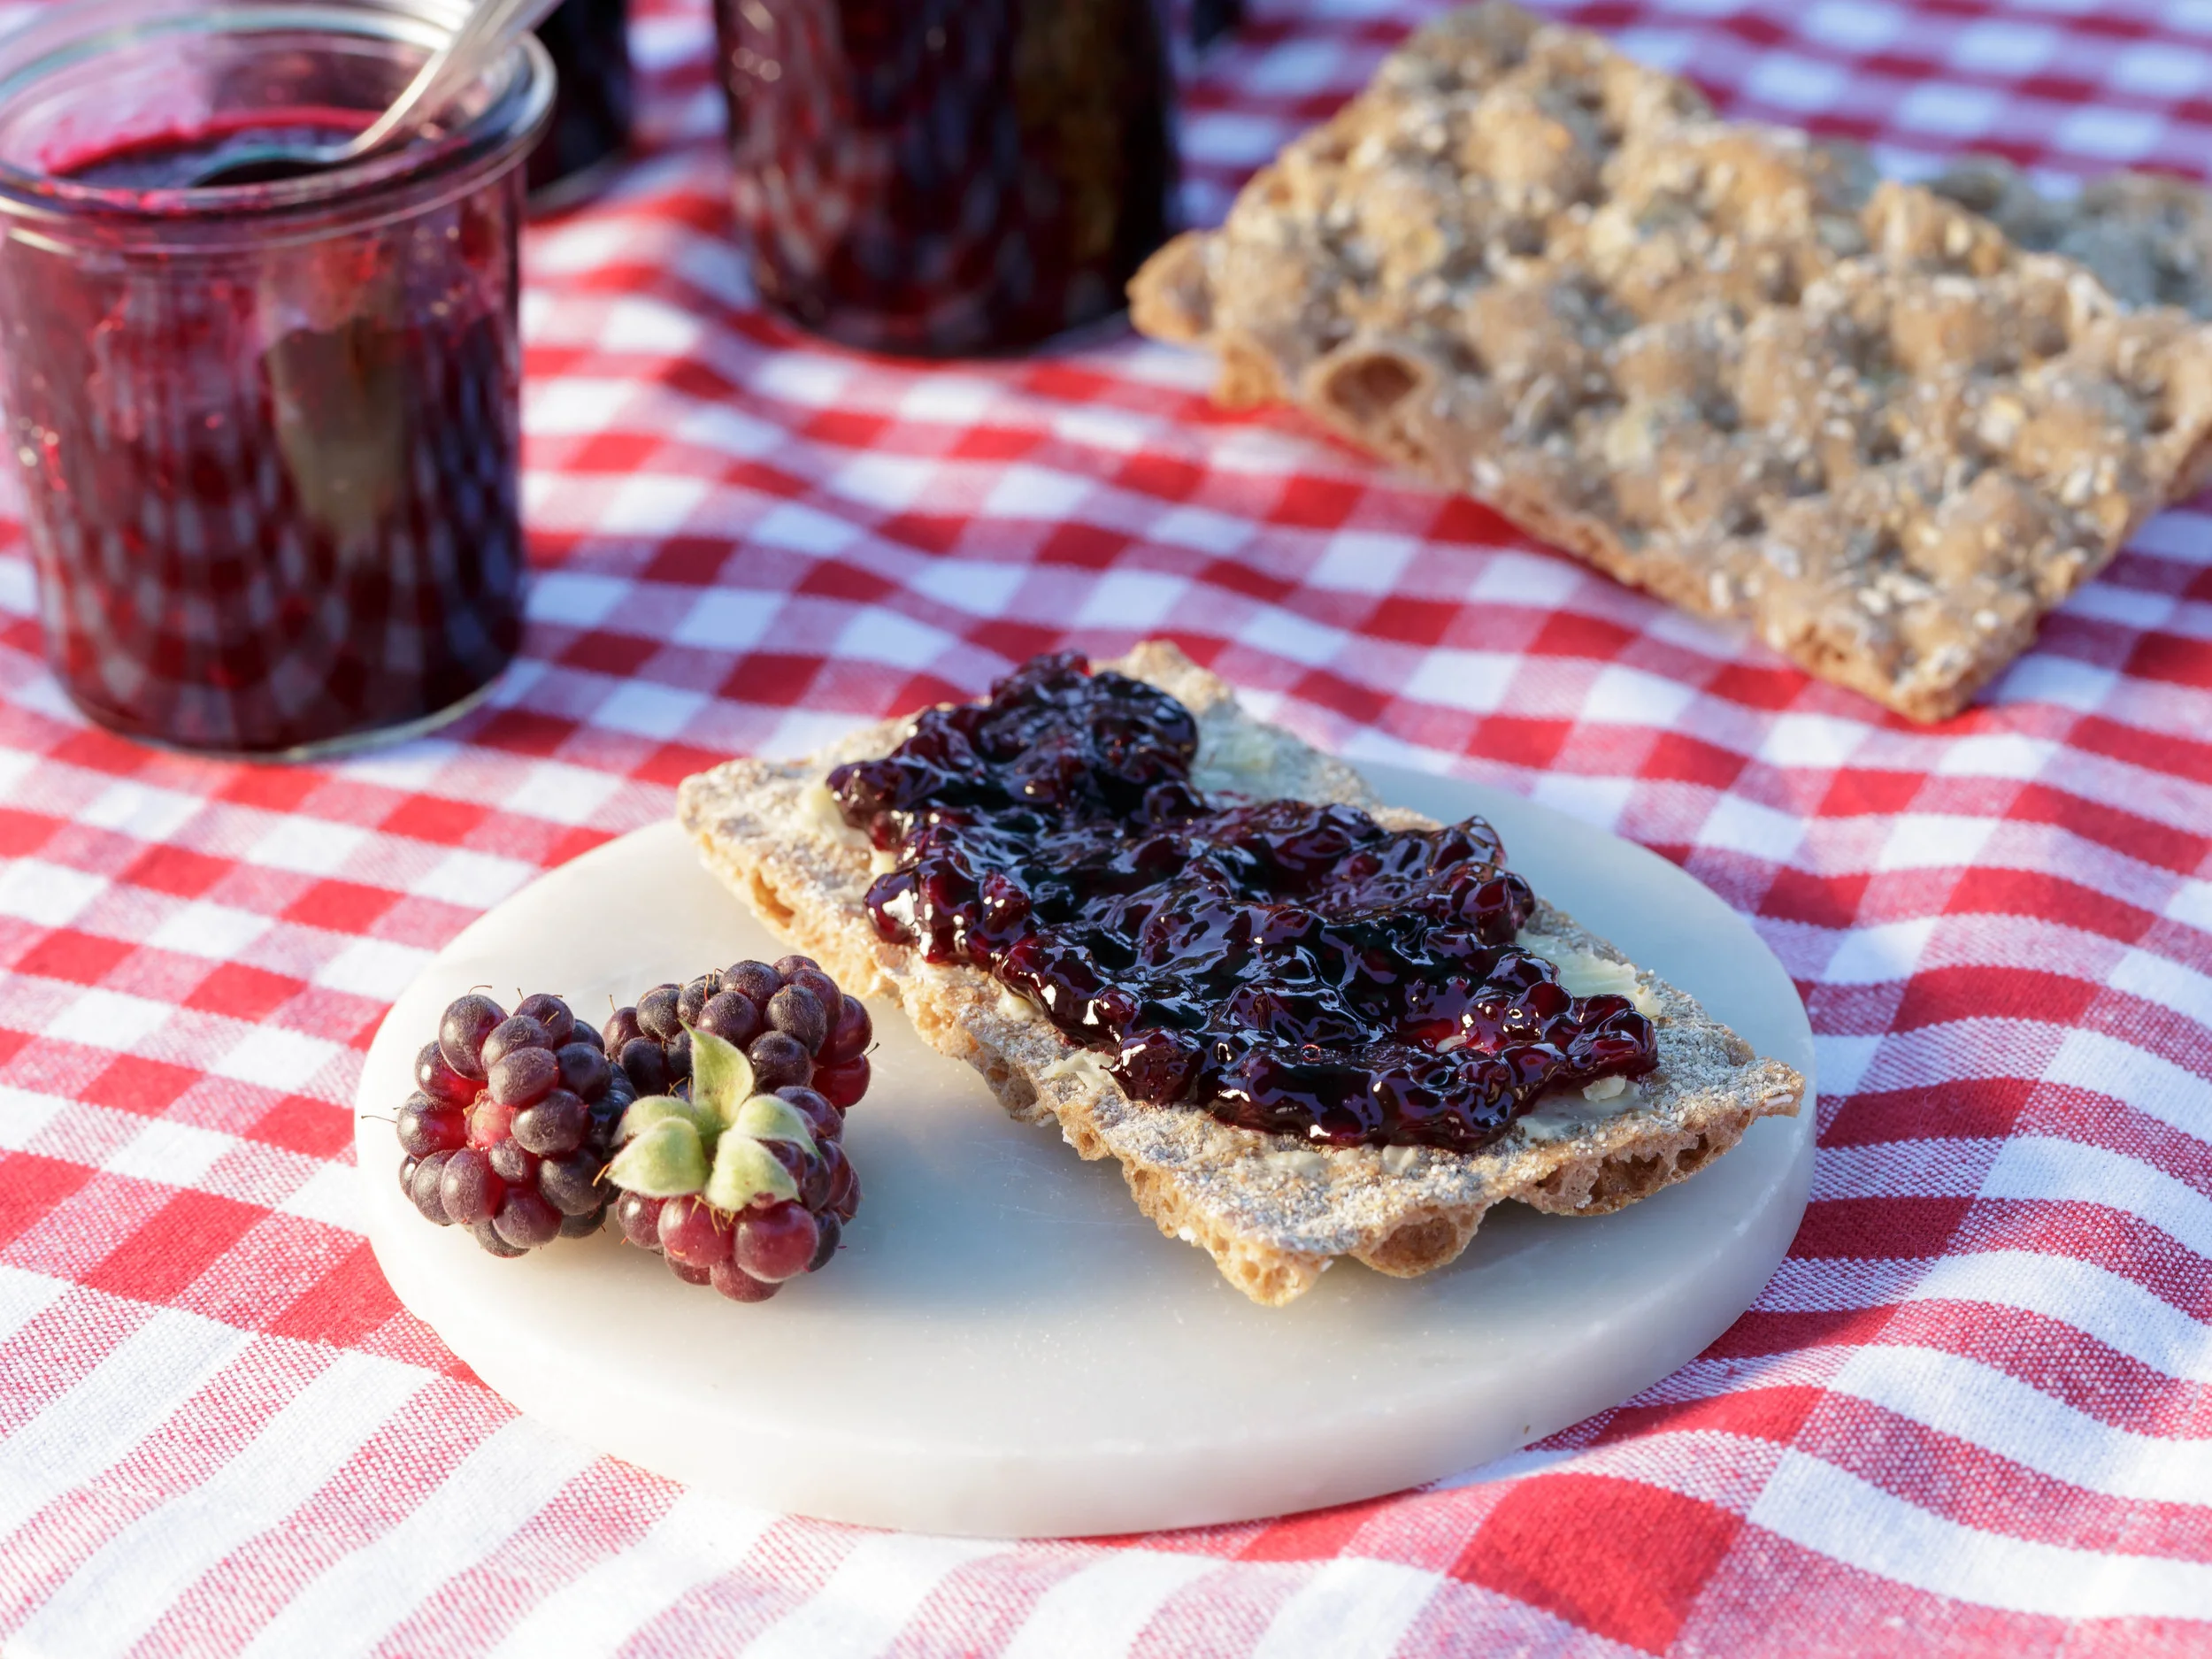
This Levain is more sour than the breads I normally bake, but I really like the sourness with the rye flour. This bread is a good bread for artisan cheeses or as a side for dinner.

This bread came about by mistake. I was making the leaven for the basic country bread a la Tartine, but I used rye flour instead of whole wheat flour by mistake. So instead of discarding the leaven, I came up with this bread.

Makes 2 breads

Ingredients:

Leaven:

  • about 2 tablespoons sourdough (the starter you keep in the refrigerator and feed every other week) 
  • 200 g water (78℉)
  • 70 g all-purpose flour
  • 65 g rye flour

Bread:

  • 600 g water
  • 10 g live yeast (¾ teaspoon dry yeast)
  • 3½ dl (275 g) leaven 
  • 3 dl (200 g) rye flour 
  • 12 dl (840 g )all-purpose flour
  • 1½ tablespoons salt

Directions:

Leaven:

Make the leaven the night before you want to bake the bread. If you like a more sour note to your bread, make the leaven in the morning, and after about 8 hours fermentation, put the leaven in the refrigerator until next morning.

Mix all the ingredients well in a bowl, and let the leaven rest covered on the counter for 8-10 hours. To test leaven's readiness, drop a spoonful into a bowl of room-temperature water. If it sinks, it is not ready and needs more time to ferment and ripen. If it floats, it's ready to use. As it develops, the smell will change from ripe and sour to sweet and pleasantly fermented.

This time I just used 275 g of the sourdough 8 hours after the feeding instead of making the leaven.

Bread:

Next morning:

In a large bowl, pour in the water, yeast, sourdough, and rye flour, mix it well. Add salt and  the all-purpose flour a little at a time, until you have a firm but slightly sticky dough. You might not need all the flour.

I always knead my doughs in my stand mixer, and I knead the dough for about 8-10 minutes until the dough is a bit shiny and elastic. 

Cover the bowl with a clean kitchen towel and let the dough rise for about 4 hours.

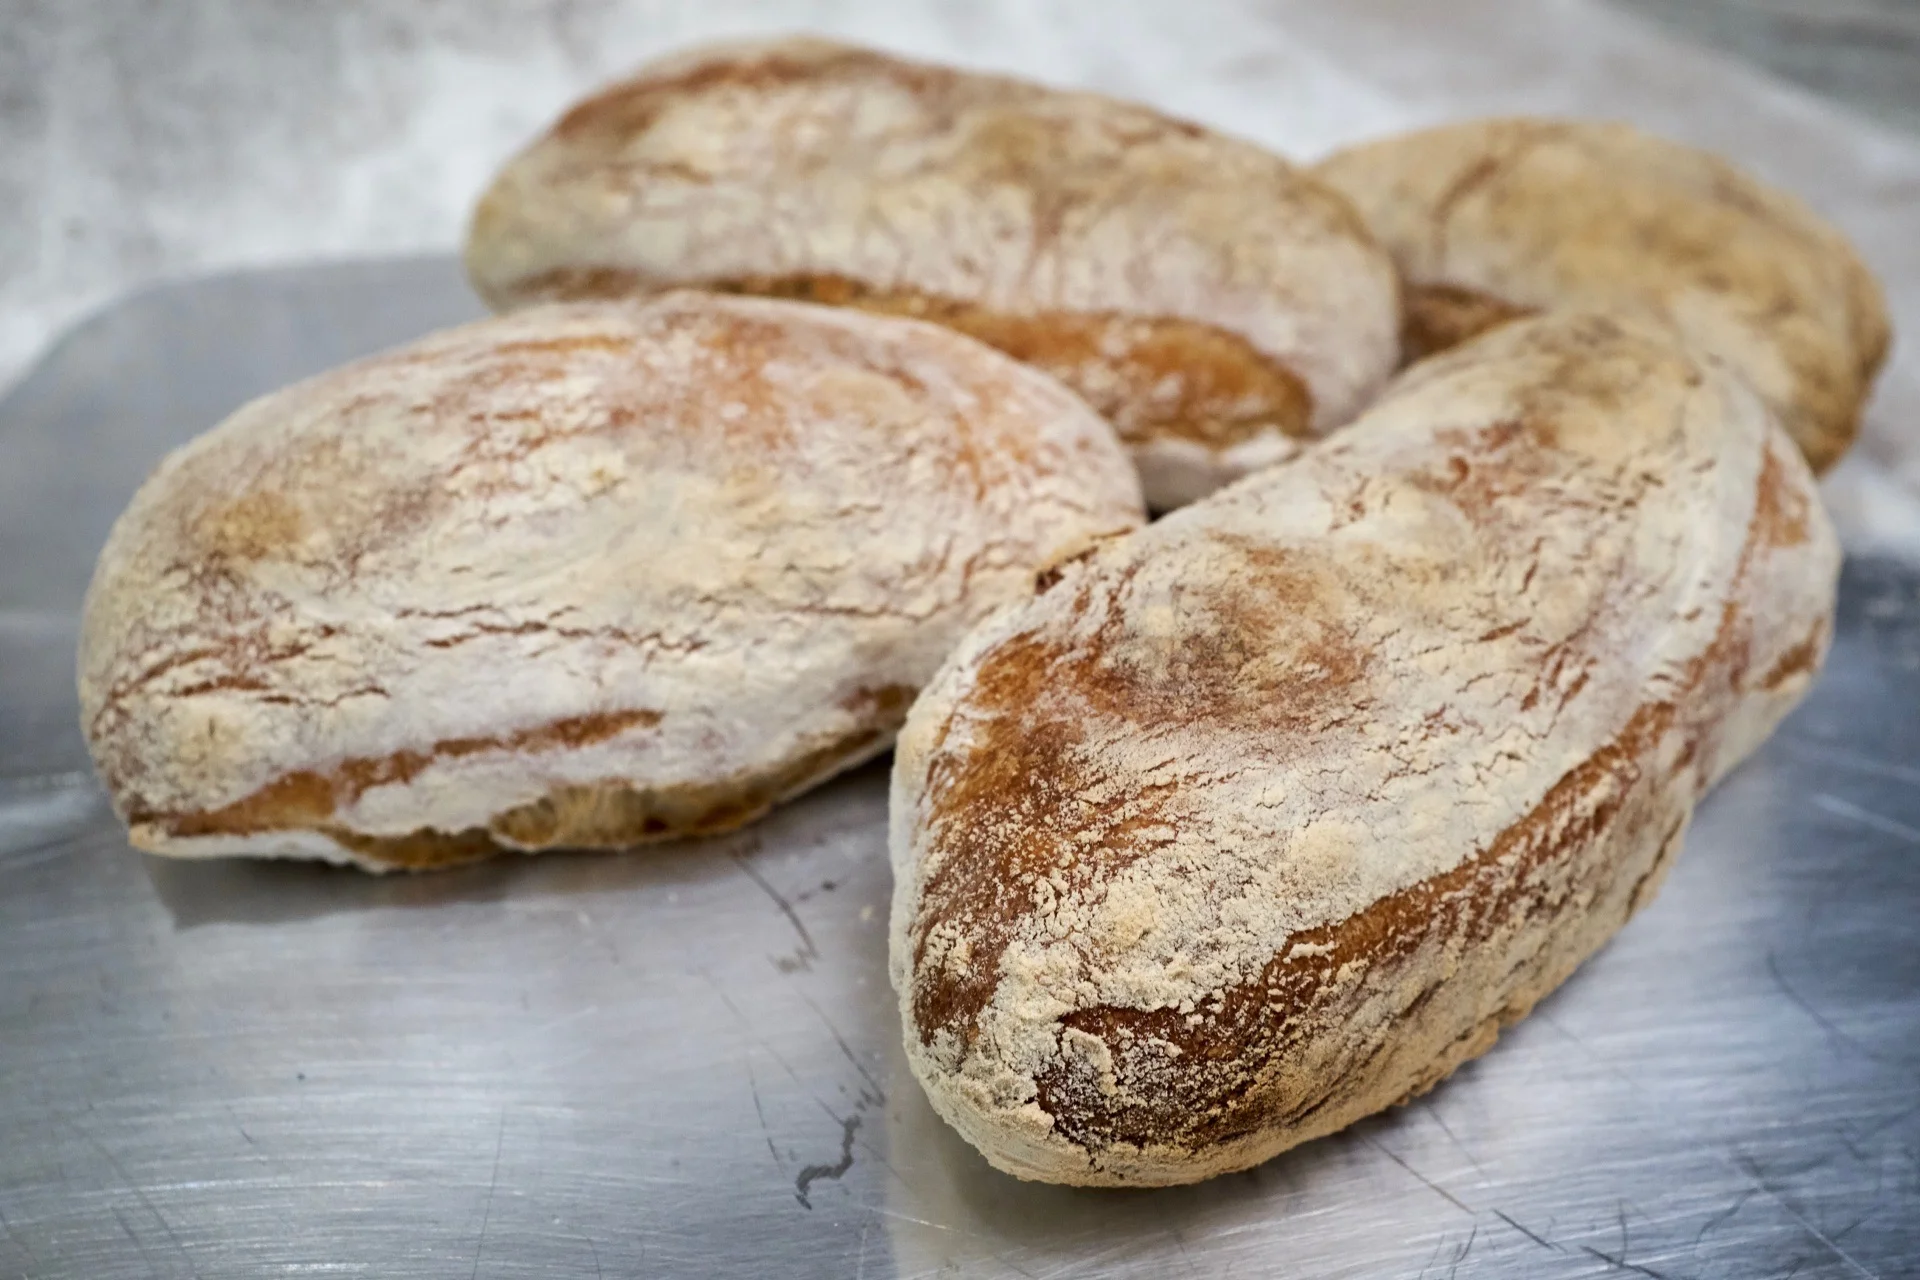
Pour the dough out on a non-floured kitchen table, divide the dough in 2 and shape them into rounds.

Line 2 baskets with clean kitchen towels, generously dusted with flour. Transfer each round to a basket, smooth side down and let to rest, covered, at room temperature, about 3 hours before baking.

Baking the Bread:

Twenty minutes before you are ready to bake the bread, preheat oven and dutch/french oven to 500 degrees, with rack in lowest position.

Gently flip one bread into heated dutch/french oven. Score top twice using a razor blade matfer lame. Cover with lid. Return to oven, and reduce oven temperature to 450℉. Bake for 20 minutes.

Remove lid and continue to bake until crust is deep golden brown, 20 to 25 minutes more.

Transfer loaf to a wire rack, and let it cool completely.

To bake the second loaf, raise oven temperature to 500 degrees, wipe out dutch/french oven with a dry kitchen towel, and reheat with lid for 10 minutes.

Enjoy!

This post has been submitted to the Yeast Spotting Site.


Blackberry Jam

Breakfast, Brunch, Jam, PreserveTove Balle-PedersenComment
Blackberry Jam

Blackberry Jam

Blackberry jam is my favorite. It reminds me of my mom. She made the best blackberry jam. My parents had a few blackberry plants in their yard. During summer we picked the berries as they ripened, and were frozen until there was enough to make a batch of jam. 

At least one jar was saved for christmas, to be served with the ebelskiver. I intend to do the same.

My blackberry jam is, like my moms jam, a thin jam. If you don't like your jam to be runny, you can add pectin to the jam according to the instructions on the package.

Ingredients:

  • 500 g blackberries
  • 325 g sugar
  • ½ lemon, the juice of

Directions:

Rinse the berries and discard the bad or unripe berries.

Preheat the oven to about 390℉ (200℃), and heat the sugar in a ovenproof bowl. (This will prevent the jam from cooling too much, and will make the sugar dissolve more quickly).  

In a small saucepan heat the berries and lemon juice over medium low heat, until it comes to a simmer. Let the berries simmer for about 5 minutes, remove from heat.

Add the sugar, stir carefully so you don’t break the berries up too much.

Scald the jars and lids with boiling water. Be careful not to touch the inside. Use tongs to handle jars and lids. Fill jars while still hot. 

Pour the hot jam into hot, scalded jars and seal with scalded lids. See National Center for Home Food Preservation for additional information on safe food preservation.

Enjoy!


Boysenberry Jam

Breakfast, Brunch, Jam, PreserveTove Balle-PedersenComment
Boysenberry Jam

Boysenberry Jam

Jam is one of the best ways to save the taste of summer for later. My mom always made a lot of fruit jams. It might not be the cheapest way, but by far the most flavorful. And by making your own you know what's in it.

Makes about 1 liter.

Ingredients:

  • 1000 g boysenberries
  • 725 g sugar
  • 1 tablespoon lemon juice

Directions:

Set aside approximately ¼ of the berries in the refrigerator. Combine the remaining berries and  sugar in a large bowl, and set them aside to macerate overnight in the fridge.

Next morning the berries has released their juice and some of the sugar has dissolved. When you do this, you don't have to add any water. (By adding water, you just have to evaporate it again by boiling the jam for longer time and this will have a negative effect on the flavors in your jam. 

Put the berries, lemon juice and sugar into a saucepan over medium heat. Stir gently until all the sugar has dissolved.

Turn up the heat and bring the mixture to a boil, stirring only to prevent sticking or burning.

After the mixture has thickened a bit, add the remaining berries. This will give the jam more texture and whole berries in the jam.

Boil the jam to your preferred consistency, skim the stiff foam off the top, while the jam cooks. Test the thickness by putting jam on a very cold spoon, and if the jam is not running or running very slowly, the jam has the right thickness.

Scald the jars and lids with boiling water. Be careful not to touch the inside. Use tongs to handle jars and lids. Fill jars while still hot. 

Pour the hot jam into hot, scalded jars and seal with scalded lids. See National Center for Home Food Preservation for additional information on safe food preservation.

Enjoy!

Danish Rye Bread revisited

Bread, Breakfast, Brunch, Dinner, LunchTove Balle-Pedersen3 Comments
Danish Rye Bread revisited

Danish Rye Bread revisited

I really like my other recipe for the rye bread, I think It is close to perfect to my taste. But I needed to make the process easier. I love using a scale for baking, but just adding the flour in deciliters makes it so much easier, when baking 2 breads at the time. 

Makes 2 big loafs

Ingredients:

Sourdough Leaven: (You are not using it all in the recipe, you need to save some for next bake)

  • 200 g sourdough/starter (the starter you keep in the refrigerator and feed every other week)

  • 400 g water

  • 2 dl (110 g) rye flour

  • 2 dl (120 g) all-purpose flour

Berries and seeds:

  • 2 dl (135 g) flaxseeds

  • 2 dl (135 g) sunflower seeds

  • 2 dl (140 g) cracked rye

  • 2 dl (180 g) rye berries

  • 2 dl (160 g) bulgur (100% whole grain quick cooking bulgur wheat)

  • 2 dl (190 g) wheat berries (hard red spring wheat berries)

Dough:

  • 1500 g water (use this to soak the berries and seeds)

  • 600 g sourdough leaven

  • 3 tablespoons salt

  • 1 splash food coloring (kulør) - optional

  • 2 teaspoons malted barley flour

  • 8 dl (440 g) rye flour (dark rye flour)

  • 4 dl (240 g) all-purpose flour

Sprinkles:

  • sunflower seeds, pumpkin seeds, sesame seeds or poppy seeds.

Directions:

Day 1, morning: 

Feed the starter to make the leaven. The leaven will be ready to use when the leaven is bubbling and smells like beer, after about 8 hours at room temperature. Cover the leaven with a clean towel. 

Soak the berries and seeds in water in a large bow (I use to bowl because of the big amount). Cover the bowls with large plates. Let them soak at room temperature until the leaven is ready.

Day 1, night: 

Add the leaven to the soaked berries and seed. Cover the bowls with large plates. Let the mixture ferment overnight at room temperature . 

Save the leftover leaven and put it in the refrigerator in a sealed container. This will be your sourdough starter for the next batch of bread. It will keep without feeding for about 14 days in the refrigerator. *

Day 2, morning: 

Add the salt, coloring and the flours to the dough and mix thoroughly, to make sure all the flour is fully incorporated, let rise for about two hours.

Add the dough to two rye bread baking forms. (I use Eva Professionel Rye Bread Tin which holds 3,3 liters).

Let the bread rise for about an hour, covered with a clean towel. The longer you let it rise, the more sour the bread becomes.

Poke a few holes with a cake tester or a knitting needle, to prevent the crust to rise and crack.

Brush the bread with water and sprinkle with your favorite seeds.

Place the baking form in a preheated oven for 1 hour 15 minutes at 350°F (175℃). 

Turn off the heat, remove the breads from the baking forms, spray with water on all sides and place them back in the oven directly on the rack for about an hour, while the oven cools.

Take the breads out and wrap them in an clean kitchen towel. This will help softening the crust. Let breads cool completely.

Rye bread

Rye bread

It's best to wait cutting the bread until the next day. 

Enjoy the bread with your favorite deli meat or cheese. 

* Feeding: Discard half of the sourdough/starter and add ½ cup rye flour, ½ cup all-purpose flour and 1 cup water. Mix well, and let ferment for about 8 hours at room temperature.


The Danish version:

Rugbrød

Ingredienser:

Surdej: 

  • 200 g surdej/starter (Den surdej du har i køleskabet og fodre hver 14. dag)

  • 400 g vand

  • 2 dl (110 g) rugmel

  • 2 dl (120 g) hvedemel

Korn og frø:

  • 2 dl (135 g) hørfrø

  • 2 dl (135 g) solsikkefrø

  • 2 dl (140 g) knækkede rugkerner

  • 2 dl (180 g) hele rugkerner

  • 2 dl (160 g) bulgur (grov bulgur)

  • 2 dl (190 g) hele hvedekorn

Dej:

  • 1500 g vand

  • 600 g nyfodret surdej

  • 3 spsk salt

  • 1 slat kulør - valgfrit

  • 2 tsk maltmel

  • 8 dl (440 g) rugmel

  • 4 dl (240 g) hvedemel

Drys:

  • solsikkefrø, græskarkerner, sesamfrø eller birkes.

Directions:

Dag 1, morgen: 

Fodr surdejen for at gøre den klar til bagningen. Lad surdejen stå tildækket på køkkenbordet i ca 8 timer, indtil den bobler lystigt og lugter af øl. 

Udblød frø og kerner i vandet i et par store skåle ved stuetemperatur. Dæk skålene med store tallerkener. Lad kernerne stå indtil surdejen også er klar til brug.

Dag 1, aften: 

Kom de 600 g surdej over i de udblødte kerner. Dæk skålene med store tallernener igen og lad blandingen fermentere/gære natten over ved stuetemperatur.

Gem resterne af surdejen i en lufttæt beholder. Dette er surdejen du skal fodre inden næste bagning. Surdejen kan holde sig i ca. 14 dage i køleskabet imellem fodringer.*

Dag 2, morgen: 

Tilsæt salt og kulør til kernerne. Tilsæt melet, bland det godt sammen, indtil der ikke er mellommer i dejen. Lad dejen hæve i ca 2. timer på køkkenbordet. 

Fordel dejen i 2 rugbrødsforme. (Jeg bruger Eva Professionel Rye Bread Tin).

Lad brødene hæve tildækket på køkkenbordet i endnu 1 time. Jo længere brødene hæver jo mere surt bliver brødet.

Prik små huller med en nål eller strikkepind, for at undgå at skorpen hæver og knækker under bagningen.

Pensl brødene med vand og drys med frø på toppen.

Bag brødene 1 time og 15 minuttewr ved 180℃. 

Sluk for ovnen, og tag brødene ud af formene. Dryp vand på brødene og sæt dem tilbage i ovnen på eftervarmen i omkring 1 time.

Tag brødene ud og pak dem ind i et rent viskestykke, og lad dem køle helt af.

Brødene er letteste at skære dagen efter de er bagt.

Nyd brødet med dit yndlings pålæg.

Velbekomme!

* en fodring er: smid halvdelen af surdejen ud og tilsæt 1 dl hvedemel, 1 dl rugmel og 2 dl vand. Rør det sammen og lad det fermentere/gære på køkkenbordet i ca 8 timer.


This post has been submitted to the Yeast Spotting Site.

Sourdough Chocolate Bread

Bread, Breakfast, BrunchTove Balle-Pedersen4 Comments
Sourdough Chocolate Bread

Sourdough Chocolate Bread

In Denmark you can bye rye bread with chocolate, and I've seen a lot of sweet chocolate breads with dried fruits. But until I stumbled across this bread from Chocolate & Zucchini, I had no intention off making a chocolate bread. I liked the idea of an unsweetened sourdough bread with small chunks of good dark chocolate. 

This bread is perfect for an afternoon snack, with a thin layer of cream cheese and sliced strawberries on top. It tastes a bit like a piece of cake, but not as sweet, you may even say that it’s healthy, since chocolate is considered a vegetable by some.

Ingredients:

Leaven:

  • 1 dl sourdough starter (the leaven you saved in the refrigerator, from last time you baked)
  • 2 dl water
  • 1 dl whole wheat flour
  • 1 dl all-purpose flour

Bread:

  • 200 g leaven
  • 525 g bread flour (high in protein)
  • 50 g dutch processed cocoa powder
  • ½ teaspoon dry yeast
  • 425 g water
  • 2 teaspoons salt
  • 125 g dark chocolate, Valrhona, chopped

Directions:

Leaven:

Feed the starter to make the leaven. The leaven is ready to use when the leaven is bubbling and smells like beer - after about 8 hours at room temperature. Cover the bowl with the leaven with plate or a clean towel. 

Save about 200 g leaven and put it aside in a sealed container. This will be your sourdough starter for the next batch of bread. It will keep without feeding for about 14 days in the refrigerator.

Feeding it is like making the leaven. Just pour out the liquid on top of the starter, and discard all but 1 dl of the starter. Mix in flour and water, and leave it on the kitchen counter for about 8 hours, until it's nice and bubbly. Now it will keep for another 14 days in the refrigerator before feeding.

Dough:

In the large bowl for you stand mixer, combine water, leaven and yeast with flour and cocoa powder. Mix for about 3-5 minutes, and then set to rest for 20-30 minutes. 

Mix in salt and chocolate. Let the dough start fermentation at room temperature for about an hour. 

Cover the bowl with plastic wrap, and place it in the refrigerator for 8-12 hours.

Take the dough out of the refrigerator and pour it onto the floured kitchen counter. Cover it with a clean kitchen towel, and let it get to room temperature, 2-3 hours. Make two rounds, and let them rise for another hour. 

Folding:

Fold the third of the dough closest to you up and over the middle third of the round. Stretch out the dough horizontally to your right and fold this right third over the center. Stretch the dough to your left and fold this third over the previous fold. You are now starting to get a neat package. Stretch out the third of the dough farthest from you and fold this flap toward you, while rolling the whole package away from you, that the smooth underside of the loaf now is on the top and all the seams are on the bottom. Let the shaped loaf rest on the counter for a minute. Fold the other loaf the same way.

Let the dough rest in baskets generously dusted with rice flour. Using the dough scraper, transfer each round to a basket, smooth side down, with seam centered and facing up. Let rest at room temperature (75℉ to 80℉), covered with towels for 3 to 4 hours before baking.

Baking the Bread:

Twenty minutes before you are ready to bake the bread, pre-heat oven and  dutch/french oven to 500 degrees, with rack in lowest position.

Flip one bread into heated dutch/french oven. Score top twice using a razor blade matfer lame. Cover with lid. Return to oven, and reduce oven temperature to 430℉. Bake for 20 minutes.

Carefully remove lid and continue to bake another 15-20 minutes.

Transfer loaf to a wire rack. It will feel light and sound hollow when tapped. Let cool.

Enjoy!

Adapted from chocolate&zucchini.


The danish version:

Chokoladebrød bagt på surdej

Ingredienser:

Surdej:

  • 1 dl surdej (den surdej du har haft i køleskabet siden du bagte sidst)
  • 2 dl vand
  • 1 dl grahams mel
  • 1 dl hvedemel

Brød:

  • 200 g surdej
  • 525 g hvedemel (gerne med højr proteinindhold)
  • 50 g kakaopulver (Valrhona)
  • ½ tsk tørær eller 5 g alm. gær
  • 425 g vand
  • 2 tsk salt
  • 125 g mørk chokolade, Valrhona, groft hakket

Fremgangsmåde:

Surdej:

For at kunne bruge surdejen til bagning, skal du fodre den. Jeg plejer at tage ca. 1 dl "gammel" surdej og blande den med 2 dl vand, 1 dl hvedemel og 1 dl grahamsmel, og så røre det godt sammen. Lad den nye surdej stå tildækket på køkkenbordet i ca. 8 timer, indtil den bobler lystigt og dufter af øl. Herefter tager du det fra du skal bruge til bagningen og kommer resten i køleskabet i et syltetøjsglas eller lignende. Nu kan surdejen holde sig 14 dage i køleskabet, inden du skal fodre den igen. 

Dejen:

Kom vand, surdej, mel, gær og kakao i skålen til din røremaskine og ælt dejen sammen i ca. 3- 5 minutter. Lad derefter dejen hvile i 20-30 minutter før du går videre.

Bland salt og chokolade i, og start hævningen ved stuetemperatur den første times tid. Dæk skålen til med plastisk film og kom den i køleskabet i 8-12 timer.

Tag dejen op og hæld den ud på et meldækket bord og dæk den til med et rent viskestykke. Lad dejen ligge og komme op til stuetemperatur i ca 2-3 timer. Del herefter dejen i 2 kugler og lad dem hæve yderligere 1 time.

Foldning:

Fold den trediedel der er tættest på dig hen over midten af dejen. Stræk dejen ud til siderne og fold siderne indover midten på dejen en ad gangen. Til sidst tages den del længest væk fra dig og foldes godt ind over de andre foldninger, men du spænder dejen op, så den bliver glat. Gør det samme med den anden dejklump.

Drys rismel (eller hvedemel) i hævekurvene og læg dejen i med samlingen øverst, og lad brødene hæve ved satue temperatur i 3-4 timer.

Bagning:

Omkring 20 minutter før du skal bage brødene, forvarm ovnen med en støbejernsgryde (med låg) til 260℃.

Vend brødet ud i den varme støbejernsgryde, snit i toppen af brødet med et barberblad og læg låget på. Kom gryden tilbage i ovnen og skru temperaturen ned til 220℃. Bag brødet under låg i ca. 20 minutter.

Fjern låget og bag videre i 15-20 minutter, indtil brødet er færdigt, og lyder hult, når du banker på bunden af det.

Afkøl brødet helt før du serverer det.

Velbekomme!

This post has been submitted to the Yeast Spotting Site.