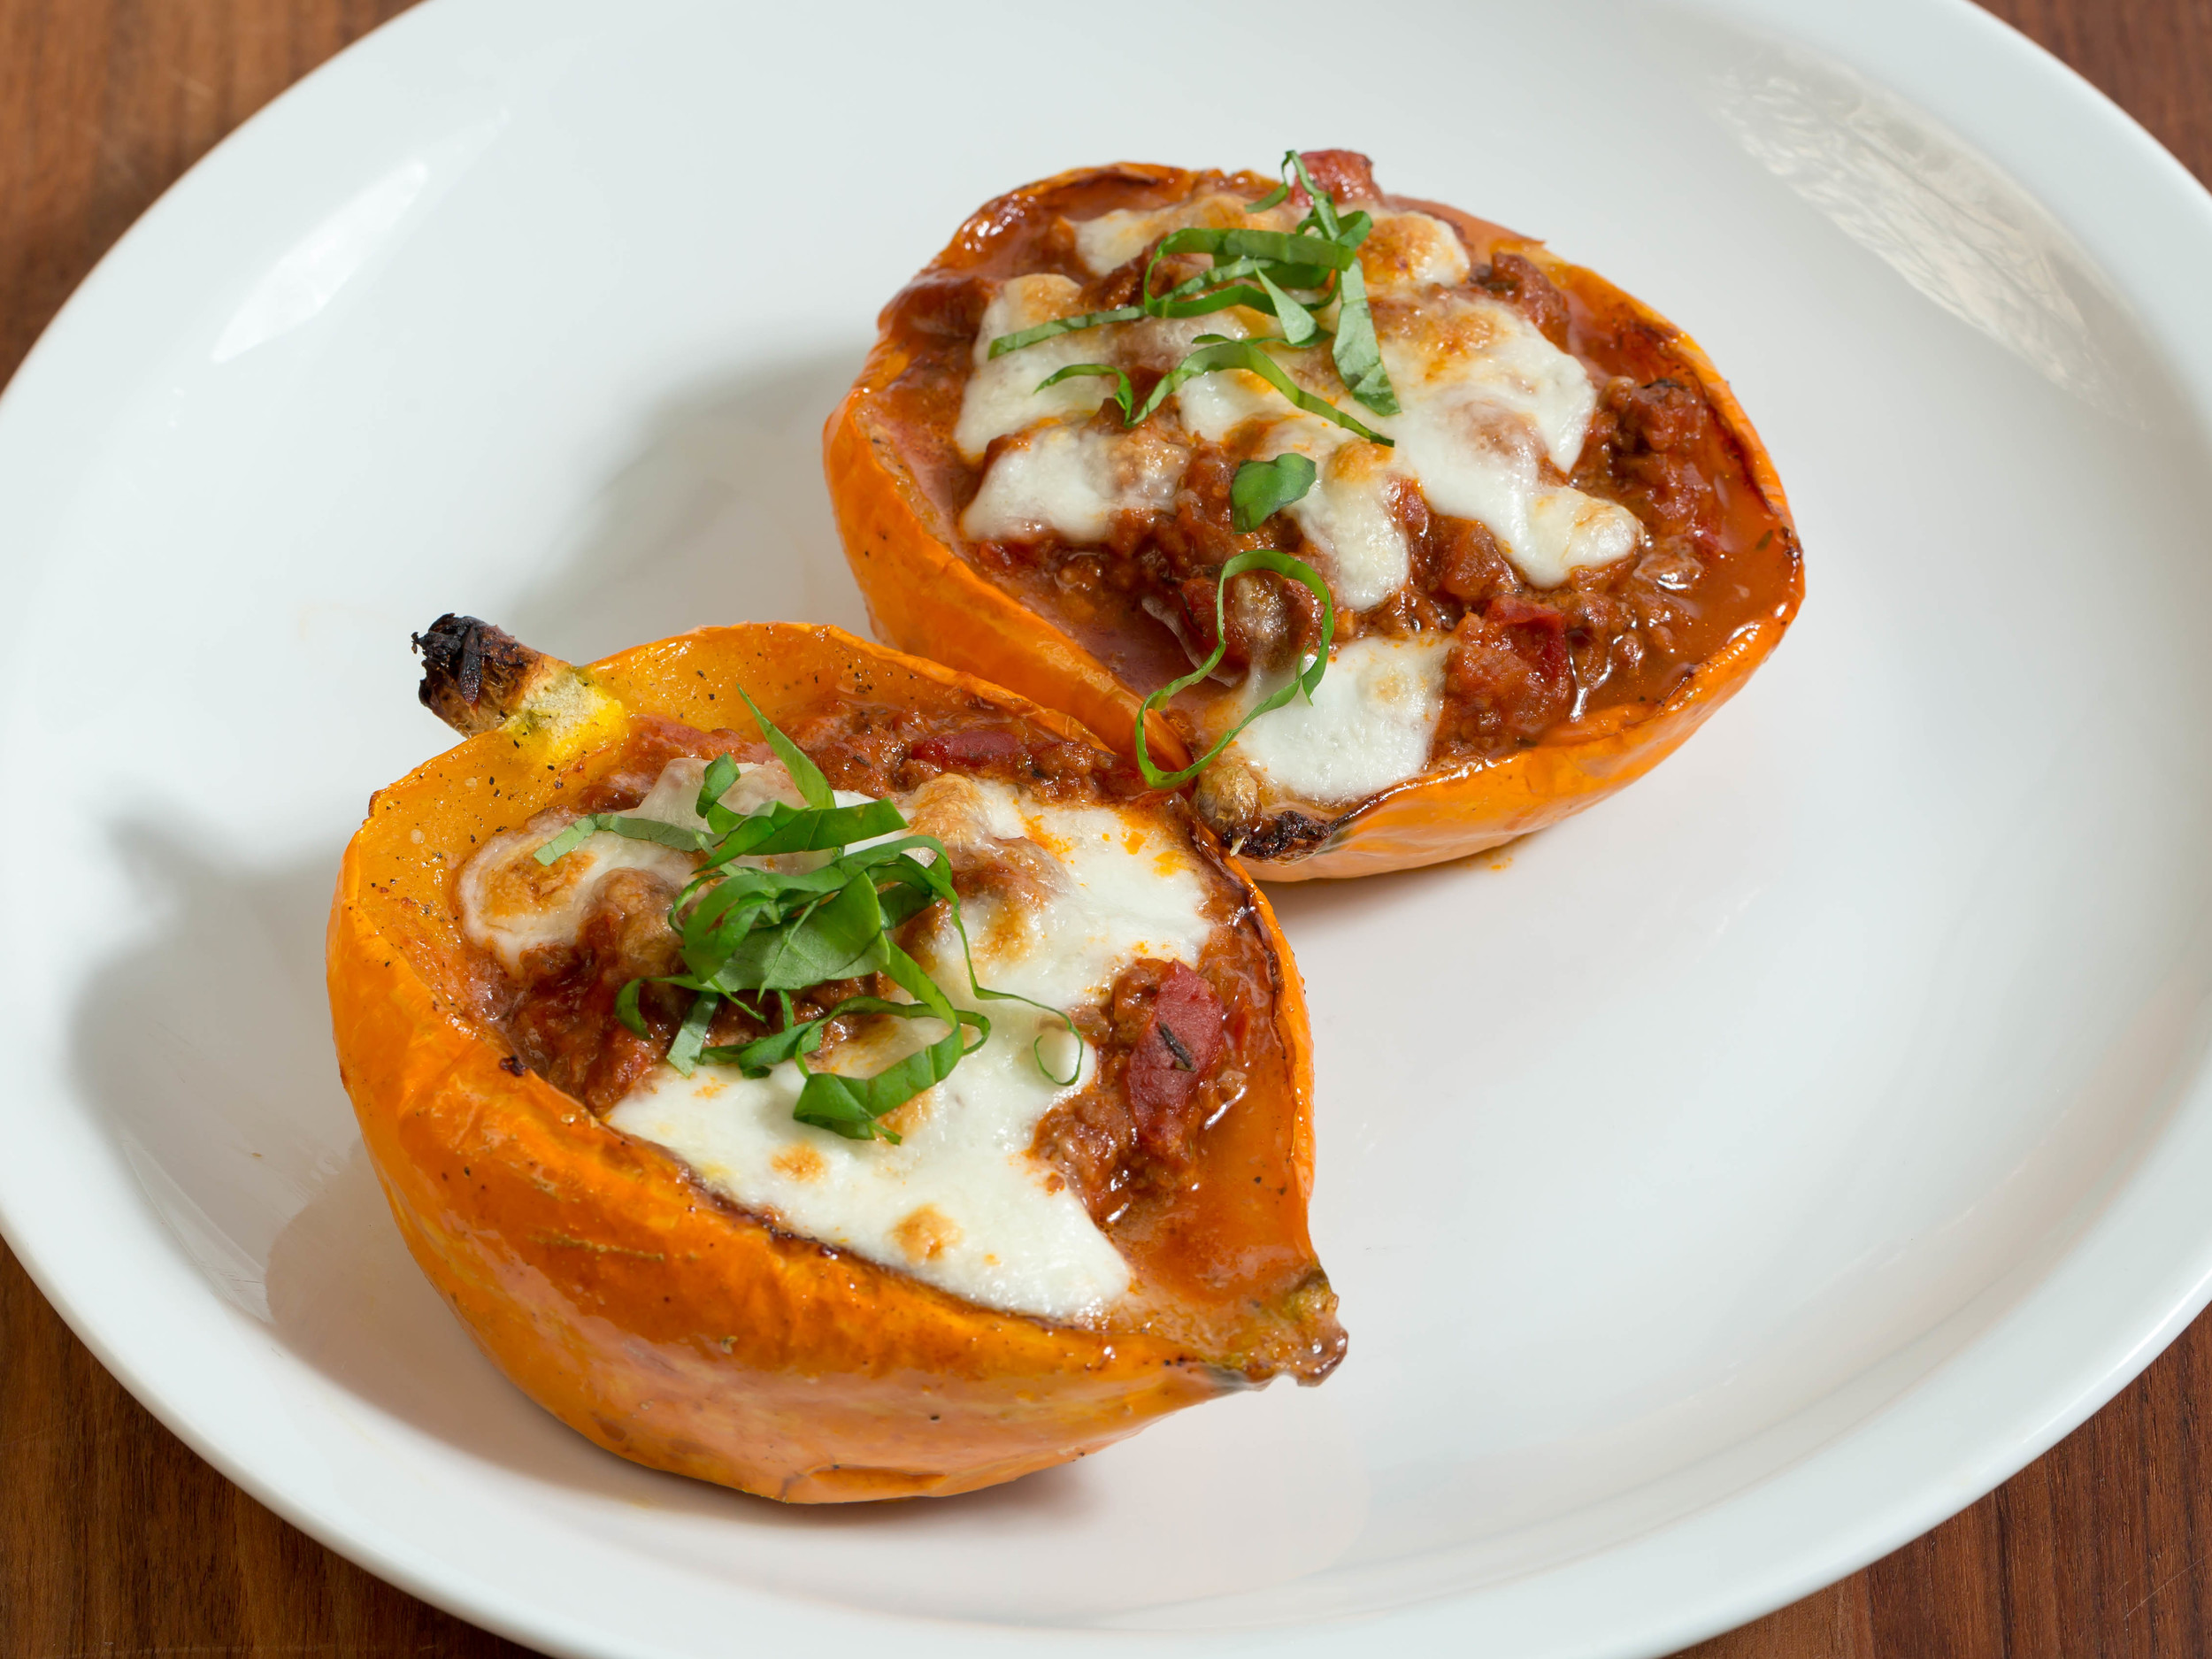
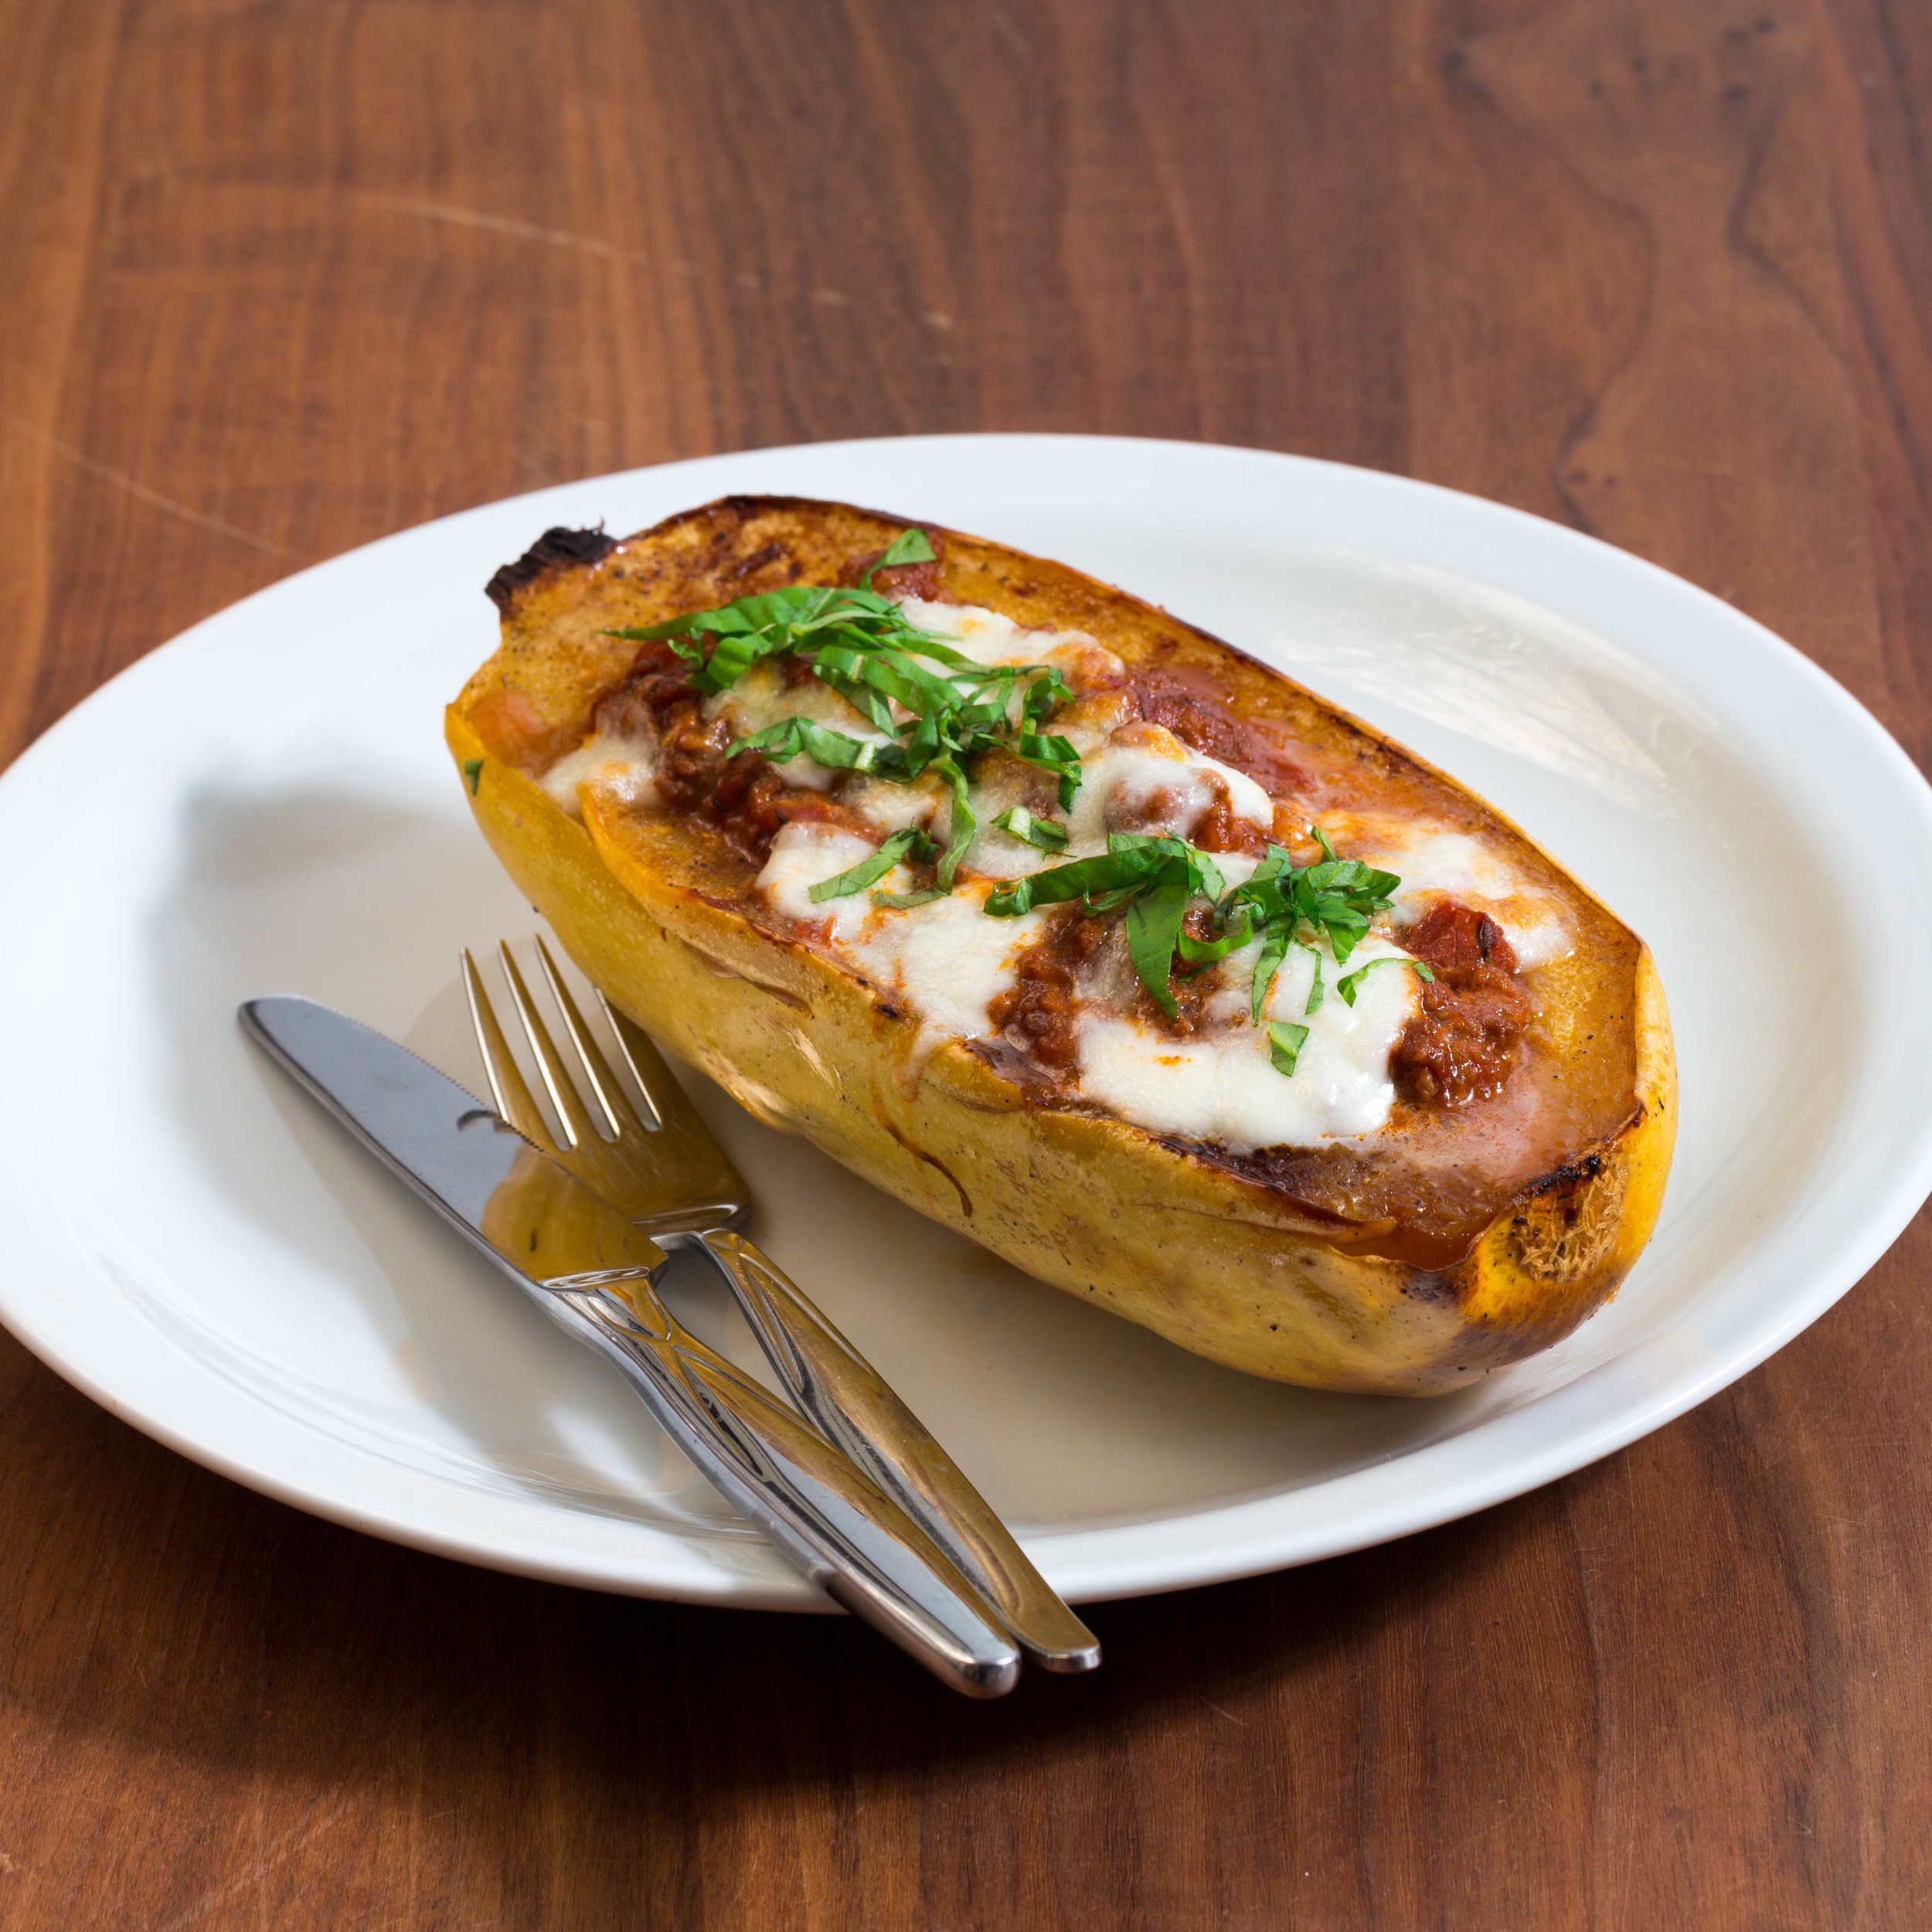
Lasagna stuffed squash
This is another take on my vegetable spaghetti with meat sauce, this time using my favorite winter squash as serving bowls, and as the "spaghetti". I really liked the color of the gold nugget squash at the store, but thought that the spaghetti squash would be more appealing for my I'm-not-into-squash-husband. Oddly enough he liked the god nugget squash better, so I might have to end bashing him here, for not liking squash, I might.
You can change up this dish, by using another meat, adding bacon or vegetables, or go all in and just make a veggie bolognese. You can even use these roasted squash to dress up a leftover curry, the possibilities are endless.
Serves 2-3.
Ingredients:
Squash:
Spaghetti squash
- 1 small spaghetti squash
- 1 small gold nugget squash
- 1 tablespoons olive oil, divided
- salt and pepper
Meat Sauce:
- 1 tablespoon extra virgin olive oil
- 1 medium onions, chopped
- 2 cloves garlic, minced
- 1 pound (450 g) ground beef (lean)
- 1 can tomato paste
- ½ teaspoon beef base (bouillon)
- 1 cup (2 dl) water
- ½ cup (1 dl) red wine
- ½ teaspoon rosemary
- ½ teaspoon thyme
- salt and pepper to taste
Topping:
- some mozzarella cheese
- chopped fresh basil
Direction:
Preheat oven to 400℉ (200℃).
Slice squashes length wise and scrape out the seeds. Rub each squash half with olive oil and season generously with salt and pepper. Place each squash half cut-side down on a parchment paper lines baking sheet, and bake for 40-60 min until the squash is tender.
Meat sauce:
Heat a drizzle of oil in a pot over medium heat and brown the onions. Add the garlic after a few minutes. Add the ground beef and brown it, crumbling the meat with a wooden spoon. Add the tomato paste and cook it until tomato paste turns a deeper red, about 1 to 2 minutes. Add the rosemary, thyme, a little salt and pepper. Cook, stirring frequently, for 5 minutes. Add the wine, beef base and water. Simmer for at least 30 minutes. The longer it simmers, the better it gets.
Let the Squash cool slightly, so you can handle them. Flip them cut-side up.
Scoop the meat sauce into each squash half, and top with mozzarella cheese. (You can add a cheese sauce or ricotta cheese to the squash, if you like)
Turn oven to broil, and cook the squash for another 2 minutes, until cheese is browned and bubbling. You have to keep an eye on this process, because this happens very quickly.
Sprinkle with fresh basil and serve immediately.
Enjoy!