Sweet • Sour • Savory

Food blog on scandinavian style food done right.

Pickled Chilies

condiments, Preserve, VegetablesTove Balle-PedersenComment

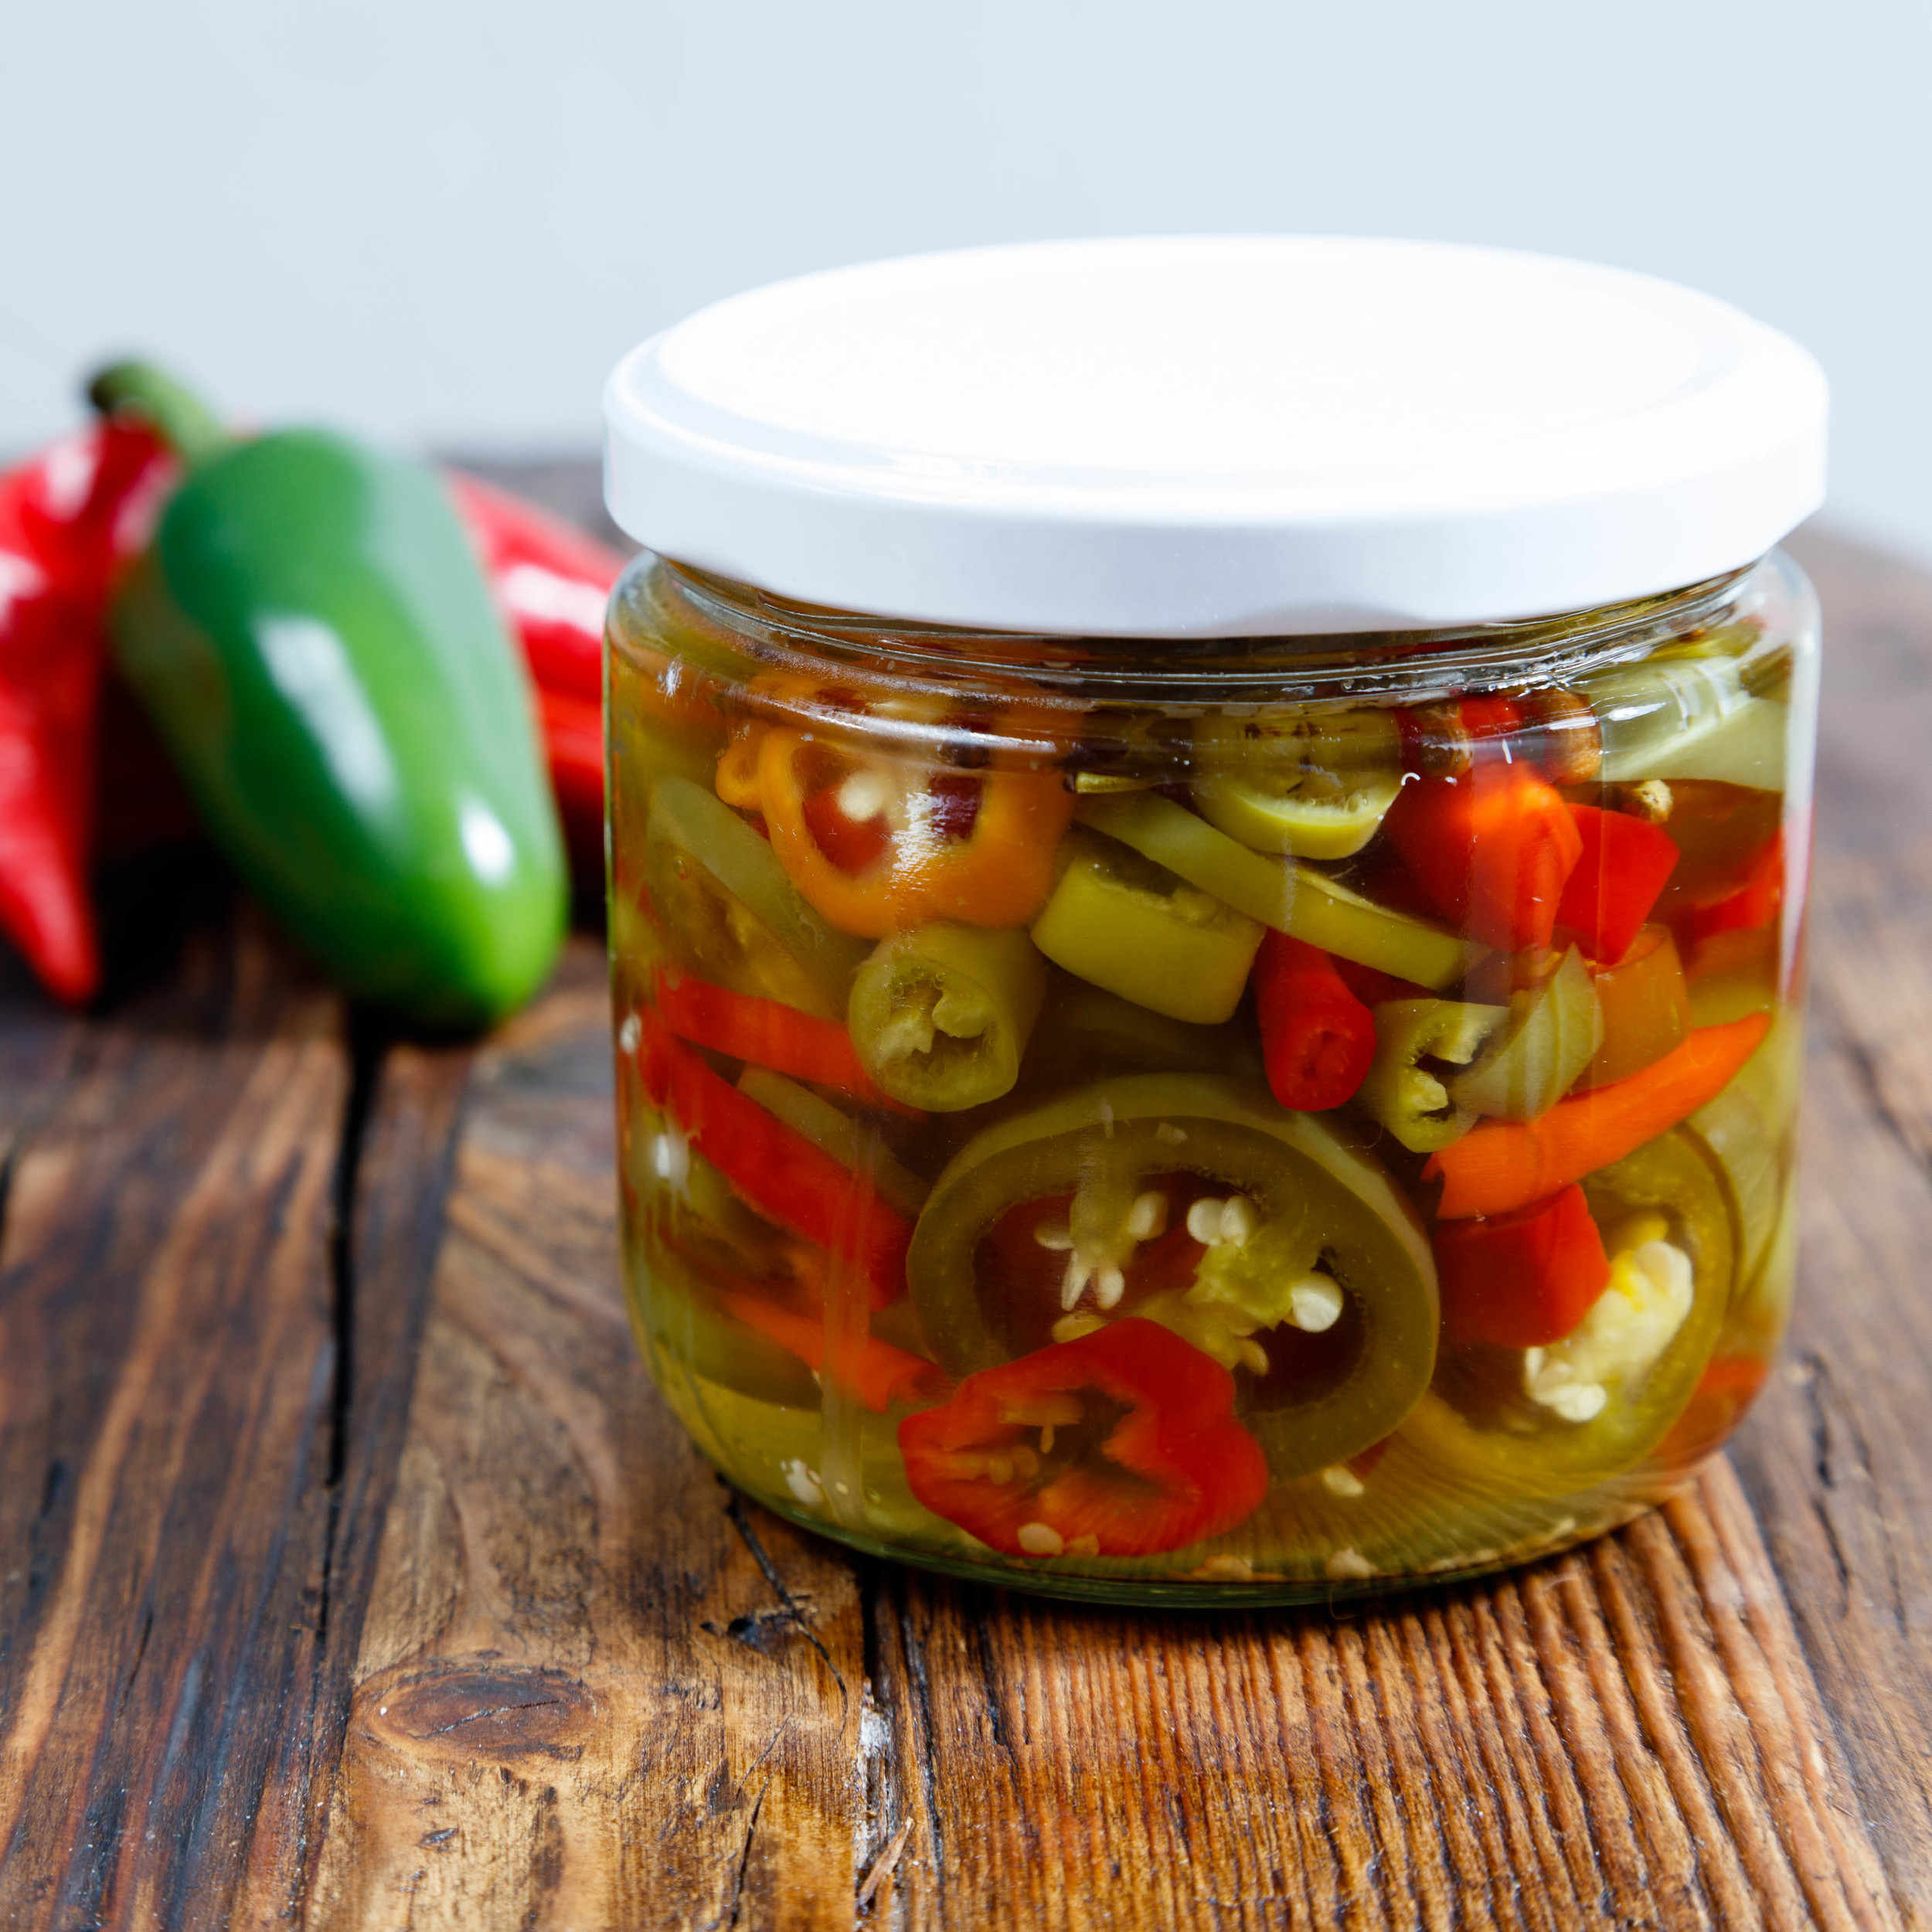
Last Sunday I went to my local Farmer's Market looking for chili peppers. I have been wanting to pickle chilies for so long. Last year I grew my own, but I used them all in my cooking, leaving no leftovers to pickle. I returned home with a bag filled with habanero, jalapeño, serrano, thai and a no-name red chili pepper. I made a new batch of hot hot sauce and then it was time to pickle the rest.

I like my pickled chilies to be slightly salty and not overly sweet. The sweeter ones are more difficult to pair with dinner. I think I got the right mix of sweet, salty and tanginess to my take in this batch.  

Makes 2 medium jars.

Ingredients:

  • 300 g mixed chili peppers (jalapeño, serrano, thai, habanero), sliced
  • 500 ml vinegar
  • 85 g sugar
  • 2 tablespoons salt
  • 2 bay leaves 
  • 1 teaspoon coriander seeds

Directions:

Bring the vinegar to a boil, add all the sliced chili peppers, and bring it all to a boil. Remove the chilies using a slotted spoon. Place the chilies in 2 cleaned and sterilized* glass jars. 

Add sugar, salt, bay leaves and coriander seeds to the vinegar, and bring it to a boil again. Make sure that sugar and salt is dissolved before pouring the hot vinegar over the chilies. Put the lids on the jars, and wipe the jars clean. Let the pickled chilies cool.

The chilies will keep for at least a month. I only make small batches and keep them in the refrigerator. 

Serve the chilies on sandwiches, as hot snacks or where ever you need a kick to your food. 

Enjoy!

*You need to clean the jars and sterilize them by soaking them in boiling water. It goes the same with the lids. Submerge the lid for a few minutes in a bowl of boiling water. 

Salmon in Red Wine Sauce

Dinner, Fish & seafoodTove Balle-PedersenComment
Salmon in Red Wine Sauce

Salmon in Red Wine Sauce

I had this dish at my best friends house, when we both lived back home in Denmark. Whenever I make this I can't help thinking about her cozy home, and her sweet sweet family. I really miss my Danish friend, that I grew up with and her family. I miss living an hour apart from her. Being there for each other whenever we needed each other. Even though we both live in the US, Texas feels like a world away from California. Love you M.

Normally you would use white wine with fish, but the salmon really pairs well with red wine too. I love making this for smaller dinner parties. It is fairly quick to make, and brings on bold flavors, and pairs perfectly with a couple of bottles of good red wine

Serves 4.

Ingredients:

  • 4 salmon pieces, serving size, skin and bones removed

  • ½ yellow onion, finely chopped

  • 300 g mushrooms, quartered

  • 1 fish stock cube, or a good splash of concentrated fish stock

  • 500 ml red wine, the better the wine, the better the sauce

  • salt and pepper to taste

  • corn starch dissolved in cold water to thicken the sauce

Directions:

Put onions, mushrooms and fish stock, in a large sauté pan and place the salmon pieces on top. Pour in the red wine, so it almost covers the salmon. Put a lid on the pan and bring the liquid to a boil. Turn down the heat and bring it to a slow simmer. Let it simmer for about 8-10 minutes until the fish is done, and has turned opaque pink. Be careful not to overcook the salmon.

Remove the salmon with a slotted spoon, careful not to brake the fish. Let the liquid come to a boil again and thicken the sauce with some corn starch dissolved in a little cold water. 

Serve the salmon with sautéed spinach and rice.  

Enjoy!

Rundstykker version II

Breakfast, Bread, BrunchTove Balle-Pedersen9 Comments
Rundstykker

Rundstykker

Rundstykker is a classic breakfast roll sold at all baker's shops in Denmark. In my family we had rundstykker on Saturday or Sunday morning. We would walk or bike to our local baker's shop down the street. Most weekends there would be a long line of people waiting in line for the breakfast rolls and newspaper. The last 10-12 years the baker's shops are more rare. Most grocery stores and gas stations sell cheap bake-off bread. (Bake-off bread: Half baked bread from big bread producers, finished off in the small stores.) People will still line up for good quality bread from the good baker's shops. 

I finally got the crumb right for these rundstykker. The crust is almost right, if you eat the bread not yet cooled completely, you'll have a nice crisp crust, like it should be. In my family we do like the warm rolls, and it is hard to resist the smell of freshly baked bread. 

Makes 8 rolls.

Ingredients:

  • 3 g live yeast, or 1 g dry yeast

  • 300 ml water, finger warm

  • 25 ml milk

  • 10 g salt

  • 450 g all-purpose flour

  • poppy seeds for sprinkling

Directions:

Dissolve the yeast in the water in  a large plastic bowl. I used a dough-rising bucket

Mix the rest of the ingredients in. You just have to mix the dough until all the flour is wet. Let the dough ferment in the bucket, lid on, on the kitchen counter over night or 7-10 hours.

Gently pour the dough onto a well floured surface. Fold the somewhat wet dough into it self until the surface is firmed up, and the surface got a good tension. Divide the dough in 8 (about 100 g pr roll), roll the dough into a round ball, brush the dough with water and dip it in poppy seeds. Place the rolls on a baking sheet lined with parchment paper.

Let the rolls rise for 30-60 minutes, loosely covered with plastic wrap. I raised my rolls in my oven on the proof-setting.

Preheat the oven to 450℉ (230℃).

Place the rolls on the lower rack in the oven. Splash about ¼ cup of water in the bottom of the oven, and close the oven quickly. You need the steam to get the best oven spring and crust. Bake the rolls for about 22 minutes, until golden.

Let the rolls/rundstykker cool before serving.

Enjoy!


Coconut Macaroons - kokosmakroner

Cake, CookiesTove Balle-Pedersen1 Comment
Coconut Macaroons - kokosmakroner

Coconut Macaroons - kokosmakroner

I love cocos macaroons aka kokosmakaroner. I love the crispy crust and the sweet soft center. And the cookie just get better when dipped in a good chocolate. Everything gets better with chocolate. 

We learned to make these macaroons in home economic in school, well we learned a simpler version, but this recipe adapted from Food52, elevates the simple macaroon to a whole new level.

Makes 12-16 small cookies.

Ingredients:

Cookies:

Dipping:

  • 150 g dark chocolate (I used valrhona)

Directions:

Cookies:

Put all ingredients in a large heatproof bowl, I used a stainless steel bowl. Place it on the top of a pot with boiling water, taken off the heat. Stir the mixture until the egg starts to thicken and turn opaque. Remove the bowl from the pot, and set aside for about 20-30 minutes. This gives the coconut time to absorb the liquid.

Preheat the oven to 350℉ (180℃). Line a baking sheet with parchment paper.

With wet hands form 10-12 ball, and place them on a parchment paper lined baking sheet.  Shape the balls to peaks. 

Bake the cookies for 5 minutes, you just want the tips to begin to color. Lower the heat to 325℉ (165℃). Continue to bake the cookies for another 10-15 minutes until golden brown with darker edges. 

Let the cookies cool completely on a wire rack before gently removing them from the parchment paper.

Dip the macaroons in tempered chocolate. The macaroons will keep in an airtight container for up to a week.

Enjoy!

Skagen Kakaosnitter - Cocoa Bites from Skagen

Brunch, Cake, Desserts, CookiesTove Balle-PedersenComment
Skagen Kakaosnitter - Cocoa Bites from Skagen

Skagen Kakaosnitter - Cocoa Bites from Skagen

These cocoa bites or bars, is a classic cake you will find at many baker's shops in Denmark. But they are really pretty easy to make, and the taste is so much better. I made these with the traditional raspberry jam, but I think a more tangy jam will work even better, with the sweet cake. 

The finished bars can be frozen, or will hold up for 3-5 days in an airtight container.

Makes 12-15 bars.

Ingredients:

Crust:

  • 300 g all-purpose flour
  • 150 g butter
  • 125 g sugar
  • 2 eggs
  • ½ teaspoon vanilla paste

Layer:

  • 3-5 tablespoons raspberry jam

Topping:

  • 100 g melted butter
  • 300 g sugar
  • 4 tablespoons unsweetened cocoa
  • 200 g shredded unsweetened coconut
  • 3 eggs 
  • ½ teaspoon vanilla paste
  • 1 teaspoon espresso or strong coffee

Directions:

Preheat the oven to 435℉ (225℃). Line a 9x13-inch pan with parchment paper. You can use a larger pan, this will just make the cocoa bites thinner.

Crust:

Mix all the ingredients for the crust to a dough, form the dough to a flat square, wrap it in plastic wrap and let it rest in the refrigerator for 10 minutes. Roll the dough out to the size of your pan, and transfer in into the pan. Bake the crust for 5-10 minutes until light golden. Let the crust cool in the pan.

Topping:

Mix the topping while baking the crust. 

Spread a thin layer of jam on the cooled crust, and pour the topping on top, and spread it in a even layer, all the way to the edges. 

Bake the cake for another 15-20 minutes.

Slice the cake into small bars, with a sharp knife. 

Enjoy!