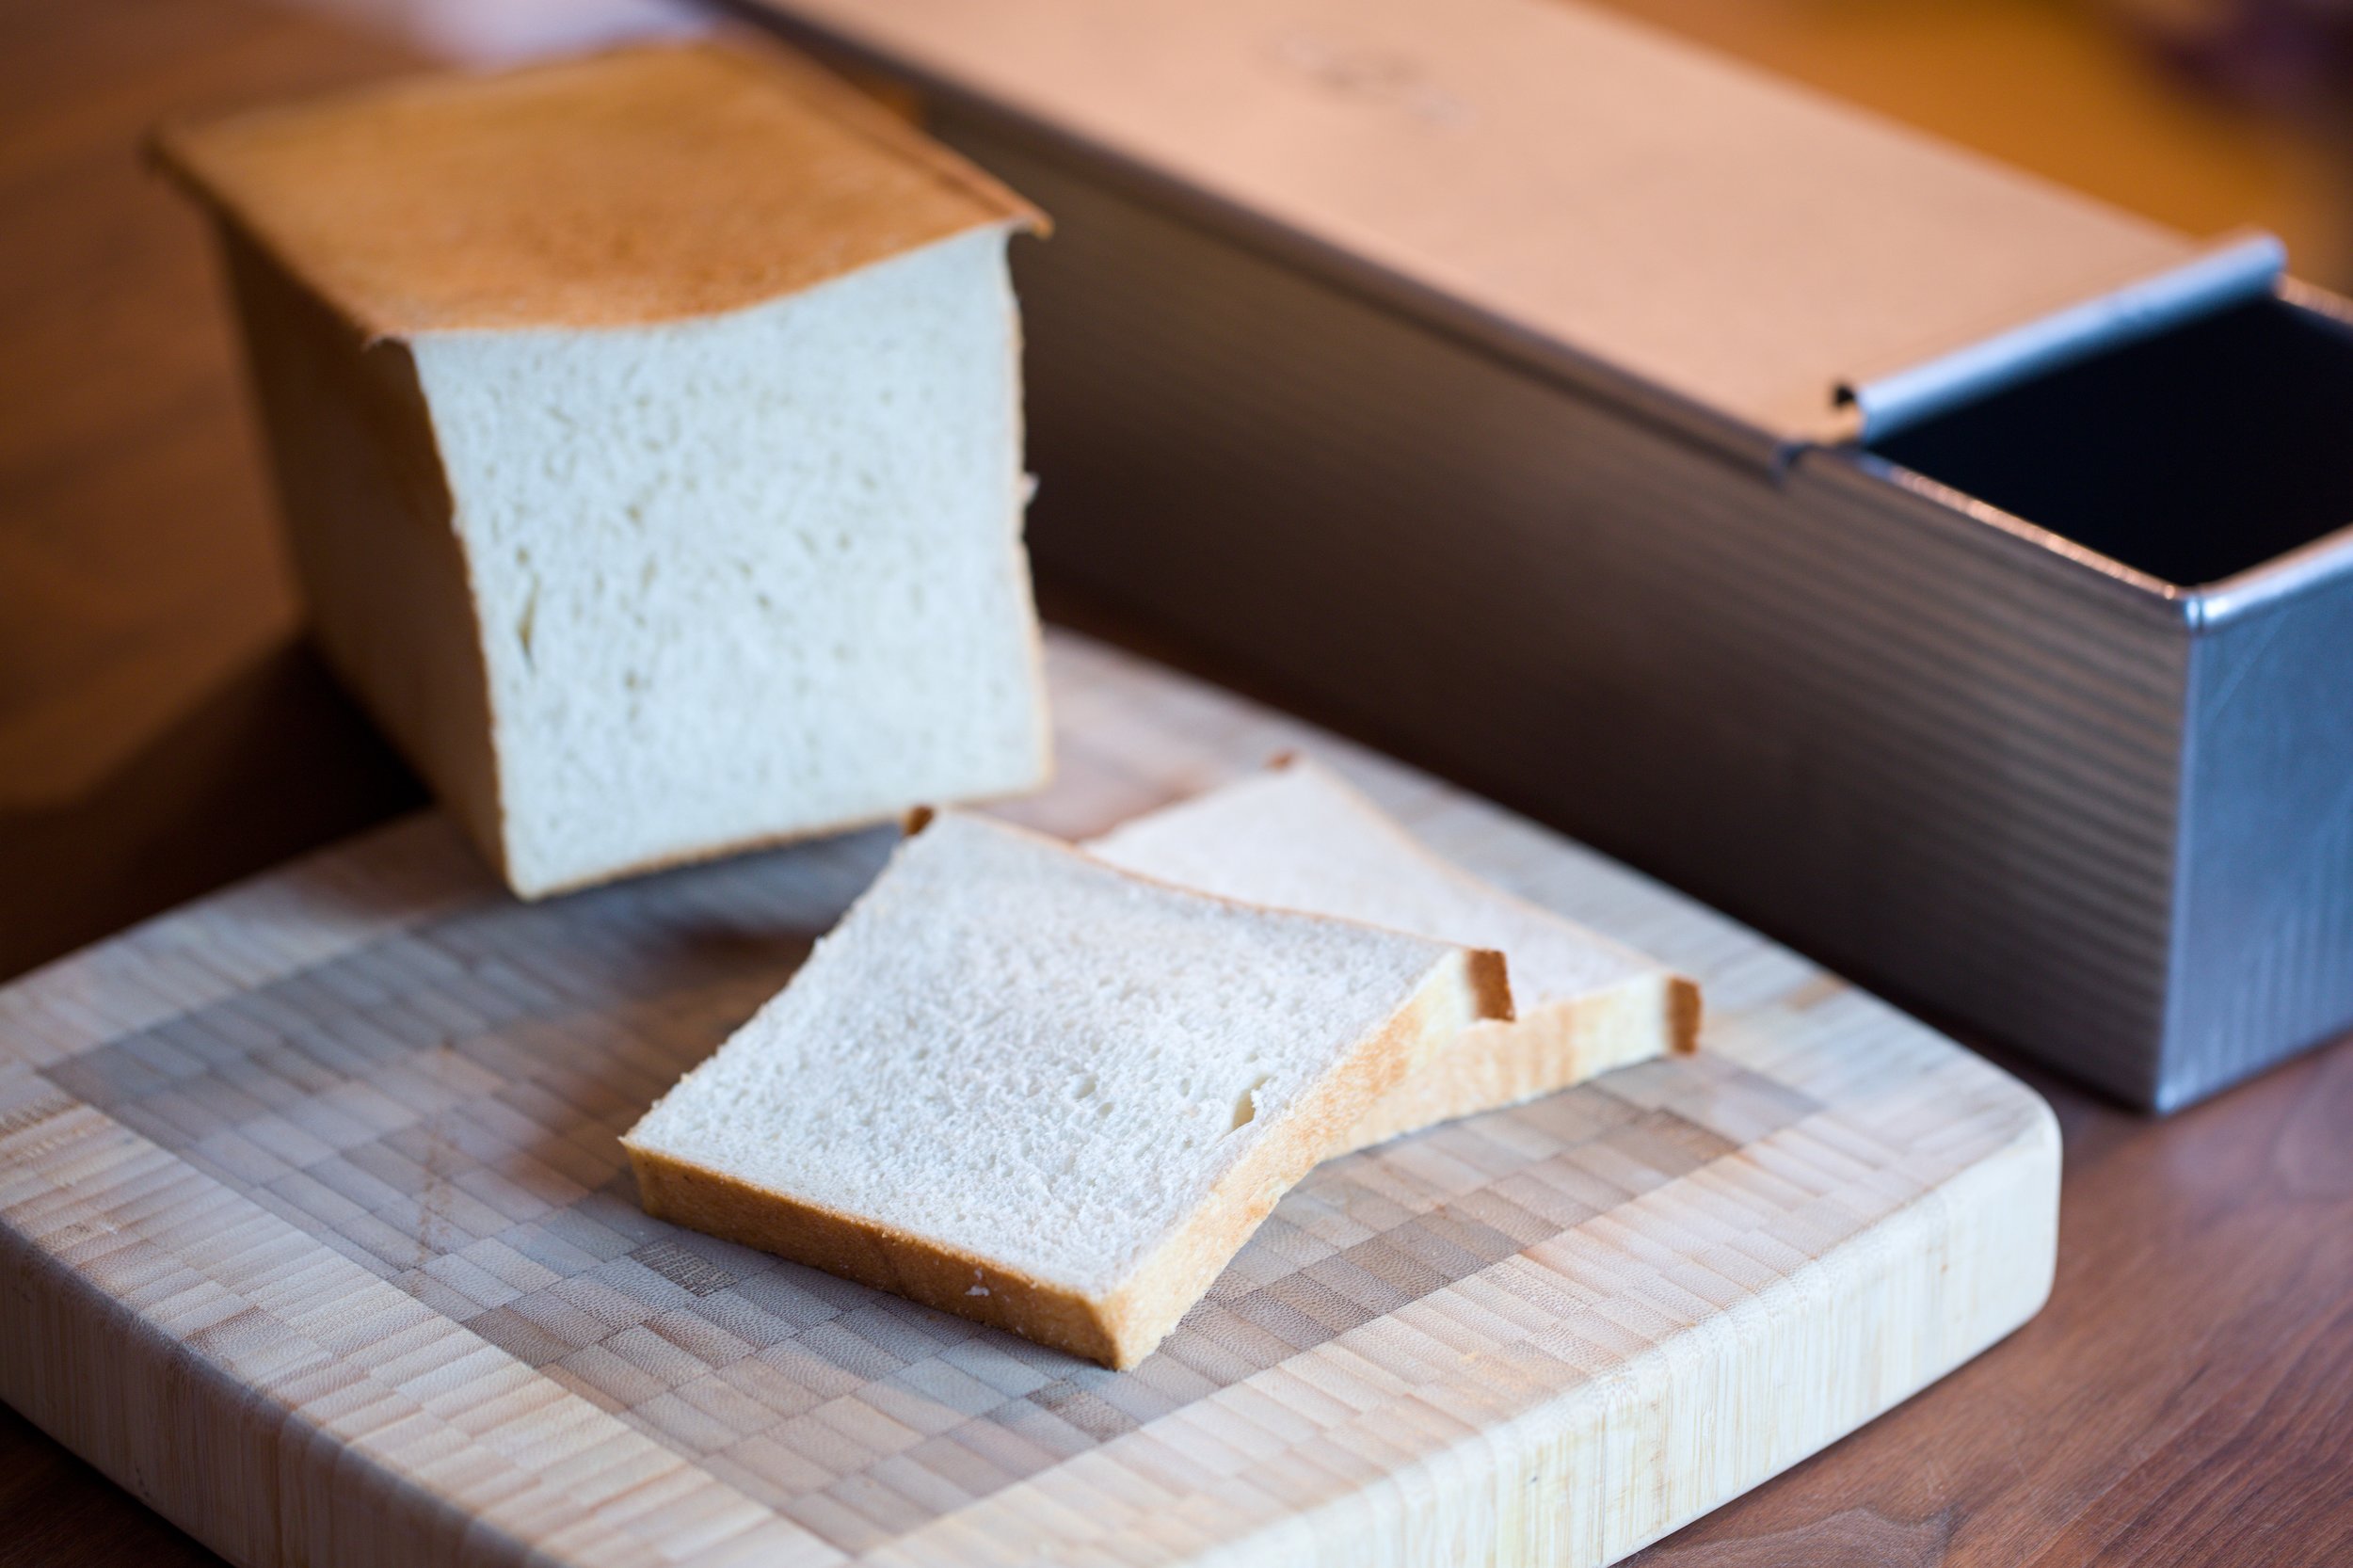
Artichoke Parmesan Sourdough Bread
This bread is a take on the garlic artichoke bread from Pescadero's Arcangeli Market, but in a sourdough version. The original bread is really yummy. My neighbor introduced the bread to me, and it paired perfectly with cheese, charcuterie and some red wine. But I felt it could benefit from the sourdough texture. And boy was I right?
I baked my test loafs last Friday, being the first sourdough bread baked in my 'new' oven. (I have had this oven for almost a year, but who is counting??).
I decided to share the great bread with my neighbors, who introduced me to the original, as a thank you. I do believe they liked it.
Makes 2 loafs.
Ingredients:
Leaven:
2 tablespoons mature sourdough
200 g warm water (80℉/26℃)
100 g whole wheat flour
100 g all-purpose flour
Dough:
700 g warm water (80℉/26℃)
200 g leaven
900 g all-purpose flour
100 whole wheat flour
16 g salt
50 g warm water (80℉/26℃)
Filling:
340 g well drained artichoke hearts in water, quartered
100 g grated parmesan
Topping
italian spiced
chopped garlic
olive oil
Directions:

Draining the artichokes.
Leaven:
Day 1, morning: The morning before you plan to make the dough, feed the sourdough starter. Mix the sourdough starter from your refrigerator in water, and add flours. Mix well so you don't have any lumps of dry flour. I do this in the container that I keep my sourdough starter in. Let rest on the counter for 8-10 hours.
Day 1 - night: Mix 200 g leaven with water and flours. Mix well so you don't have any lumps of dry flour. Let rest overnight on the kitchen counter.
Drain the artichokes: quarter them, and place them on paper towels, to dry them as much as possible. Keep them in the refrigerator overnight.
Day 2, morning: To test leaven's readiness, drop a spoonful into a bowl of room-temperature water. If it sinks, it is not ready and needs more time to ferment and ripen. If it floats, it's ready to use. As it develops, the smell will change from ripe and sour to sweet and pleasantly fermented.
Make the Dough:
Pour the warm water into a large mixing bowl, adding leaven, stir to disperse. Save your leftover leaven. It will be your sourdough starter for next time you bake. Add flours and mix dough with your hands until no bits of dry flour remain. Let rest covered with a tea towel on your counter for 30 minutes. Add salt and remaining 50 grams warm water. Transfer to a medium plastic container or a glass bowl. Cover with kitchen towel. Let rest for 30 minutes.

Adding small amount of filling, when folding the dough.
Folding:
I use the folding technique from the basic country bread a la Tartine during the fermentation. Instead of kneading the dough I stretch and fold the dough, which helps build up the gluten network. The rise is temperature sensitive. As a rule, warmer dough ferments faster. Robertson tries to maintain the dough at 78℉ to 82℉ to accomplish the bulk fermentation in 3 to 4 hours. I ferment my dough in my oven on the proof setting, 85℉/29.5℃.
Fold dough, repeating every 30 minutes for about 2½ to 3 hours. To do a fold: Dip one hand in water to prevent sticking. Grab the underside of the dough, stretch it out, and fold it back over itself. Rotate container one-quarter turn, and repeat. Do this 2 or 3 times for each fold. After the first fold, let the dough rest covered for 30 minutes. Add a little of the cheese and artichoke on top of the dough, before the next 4-6 foldings, to incorporate the filling into the dough. After the 3 hours, the dough should feel aerated and softer, and you will see a 20 to 30 percent increase in volume. If not, continue bulk fermentation for 30 minutes to 1 hour more.
Gently pull the dough out of container using a dough spatula onto an unfloured surface. Lightly flour the top of the dough and use a bench knife to cut the dough into 2 equal pieces. As you cut the first piece, use the bench knife to flip it over, so the floured side now rest on the work surface. Do the same with the second piece of dough.
While working with the dough you want to incorporate as little flour as possible. Work each piece into a round using scraper and one hand. Tension will build as the dough slightly anchors to the surface as you rotate it. By the end, the dough should have a taut, smooth surface. Dust tops of rounds with flour, cover with a tea towel, and let rest on the work surface for 20 to 30 minutes. During this stage, (bench rest), each round will relax and spread into a thick pancake shape. The edges should appear fat and rounded, not flat or "dripping" off the edge. If the dough is flat or the dough is spreading too much, the dough has not developed a strong enough gluten network during the bulk fermentation. To correct this, shape the dough into a round for a second time and let it sit to rest covered once more.
The final shaping:
To form the loaf's, carefully turn the dough onto a lightly floured surface with the floured side down, using the bench knife. Now the underside is facing up. Be careful not to deflate the dough. This final shaping builds up tension inside each loaf, so it holds it's form and rises substantially when baked. This is called "oven spring."
Fold the third of the dough closest to you up and over the middle third of the round. Stretch out the dough horizontally to your right and fold this right third over the center. Stretch the dough to your left and foldt this third over the previous fold. You are now starting to get a neat package. Stretch out the third of the dough farthest from you and fold this flap toward you, over the previous folds, and anchor it in place with your fingers. Then grab the dough nearest to you and wrap it up and over, while rolling the whole package away from you, that the smooth underside of the loaf now is on the top and all the seams are on the bottom. Let the shaped loaf rest on the counter for a minute. Fold the other loaf the same way.
Line two baskets with clean tea towels generously dusted with flour. Using the dough scraper, transfer each round to a basket, smooth side down, with seam centered and facing up. Let rest at room temperature (75℉ to 80℉), covered with towels for 3 to 4 hours before baking.
Baking the Bread:
20-40 minutes before you are ready to bake the bread, preheat oven and dutch/French oven to 500℉ (260℃), with rack in lowest position.
Flip one bread into heated dutch/french oven. Score top twice using a razor blade matfer lame. Cover with lid. Return to oven, and reduce oven temperature to 450℉ (232℃). Bake for 20 minutes.
Carefully remove lid and continue to bake until crust is deep golden brown, 20 to 25 minutes more.
Transfer loaf to a wire rack. It will feel light and sound hollow when tapped. Mix the topping and spred it on top of the hot crust, then let the loaf cool. Letting the bread cool, is the hardest thing.
To bake the second loaf, raise oven temperature to 500℉ (260℃), wipe out dutch/French oven with a dry kitchen towel, and reheat with lid for about 10-20 minutes.
Enjoy!