Sweet • Sour • Savory

Food blog on scandinavian style food done right.

Green Asparagus Soup

Dinner, SoupTove Balle-Pedersen1 Comment
Green Asparagus Soup

Green Asparagus Soup

Asparagus soup is white, right? I always thought so. The frozen and canned asparagus soup I've seen in Danish stores where all white. But why not use the tasty green asparagus for soup? It could be a healthier option than the white creamed soup that I've always known.

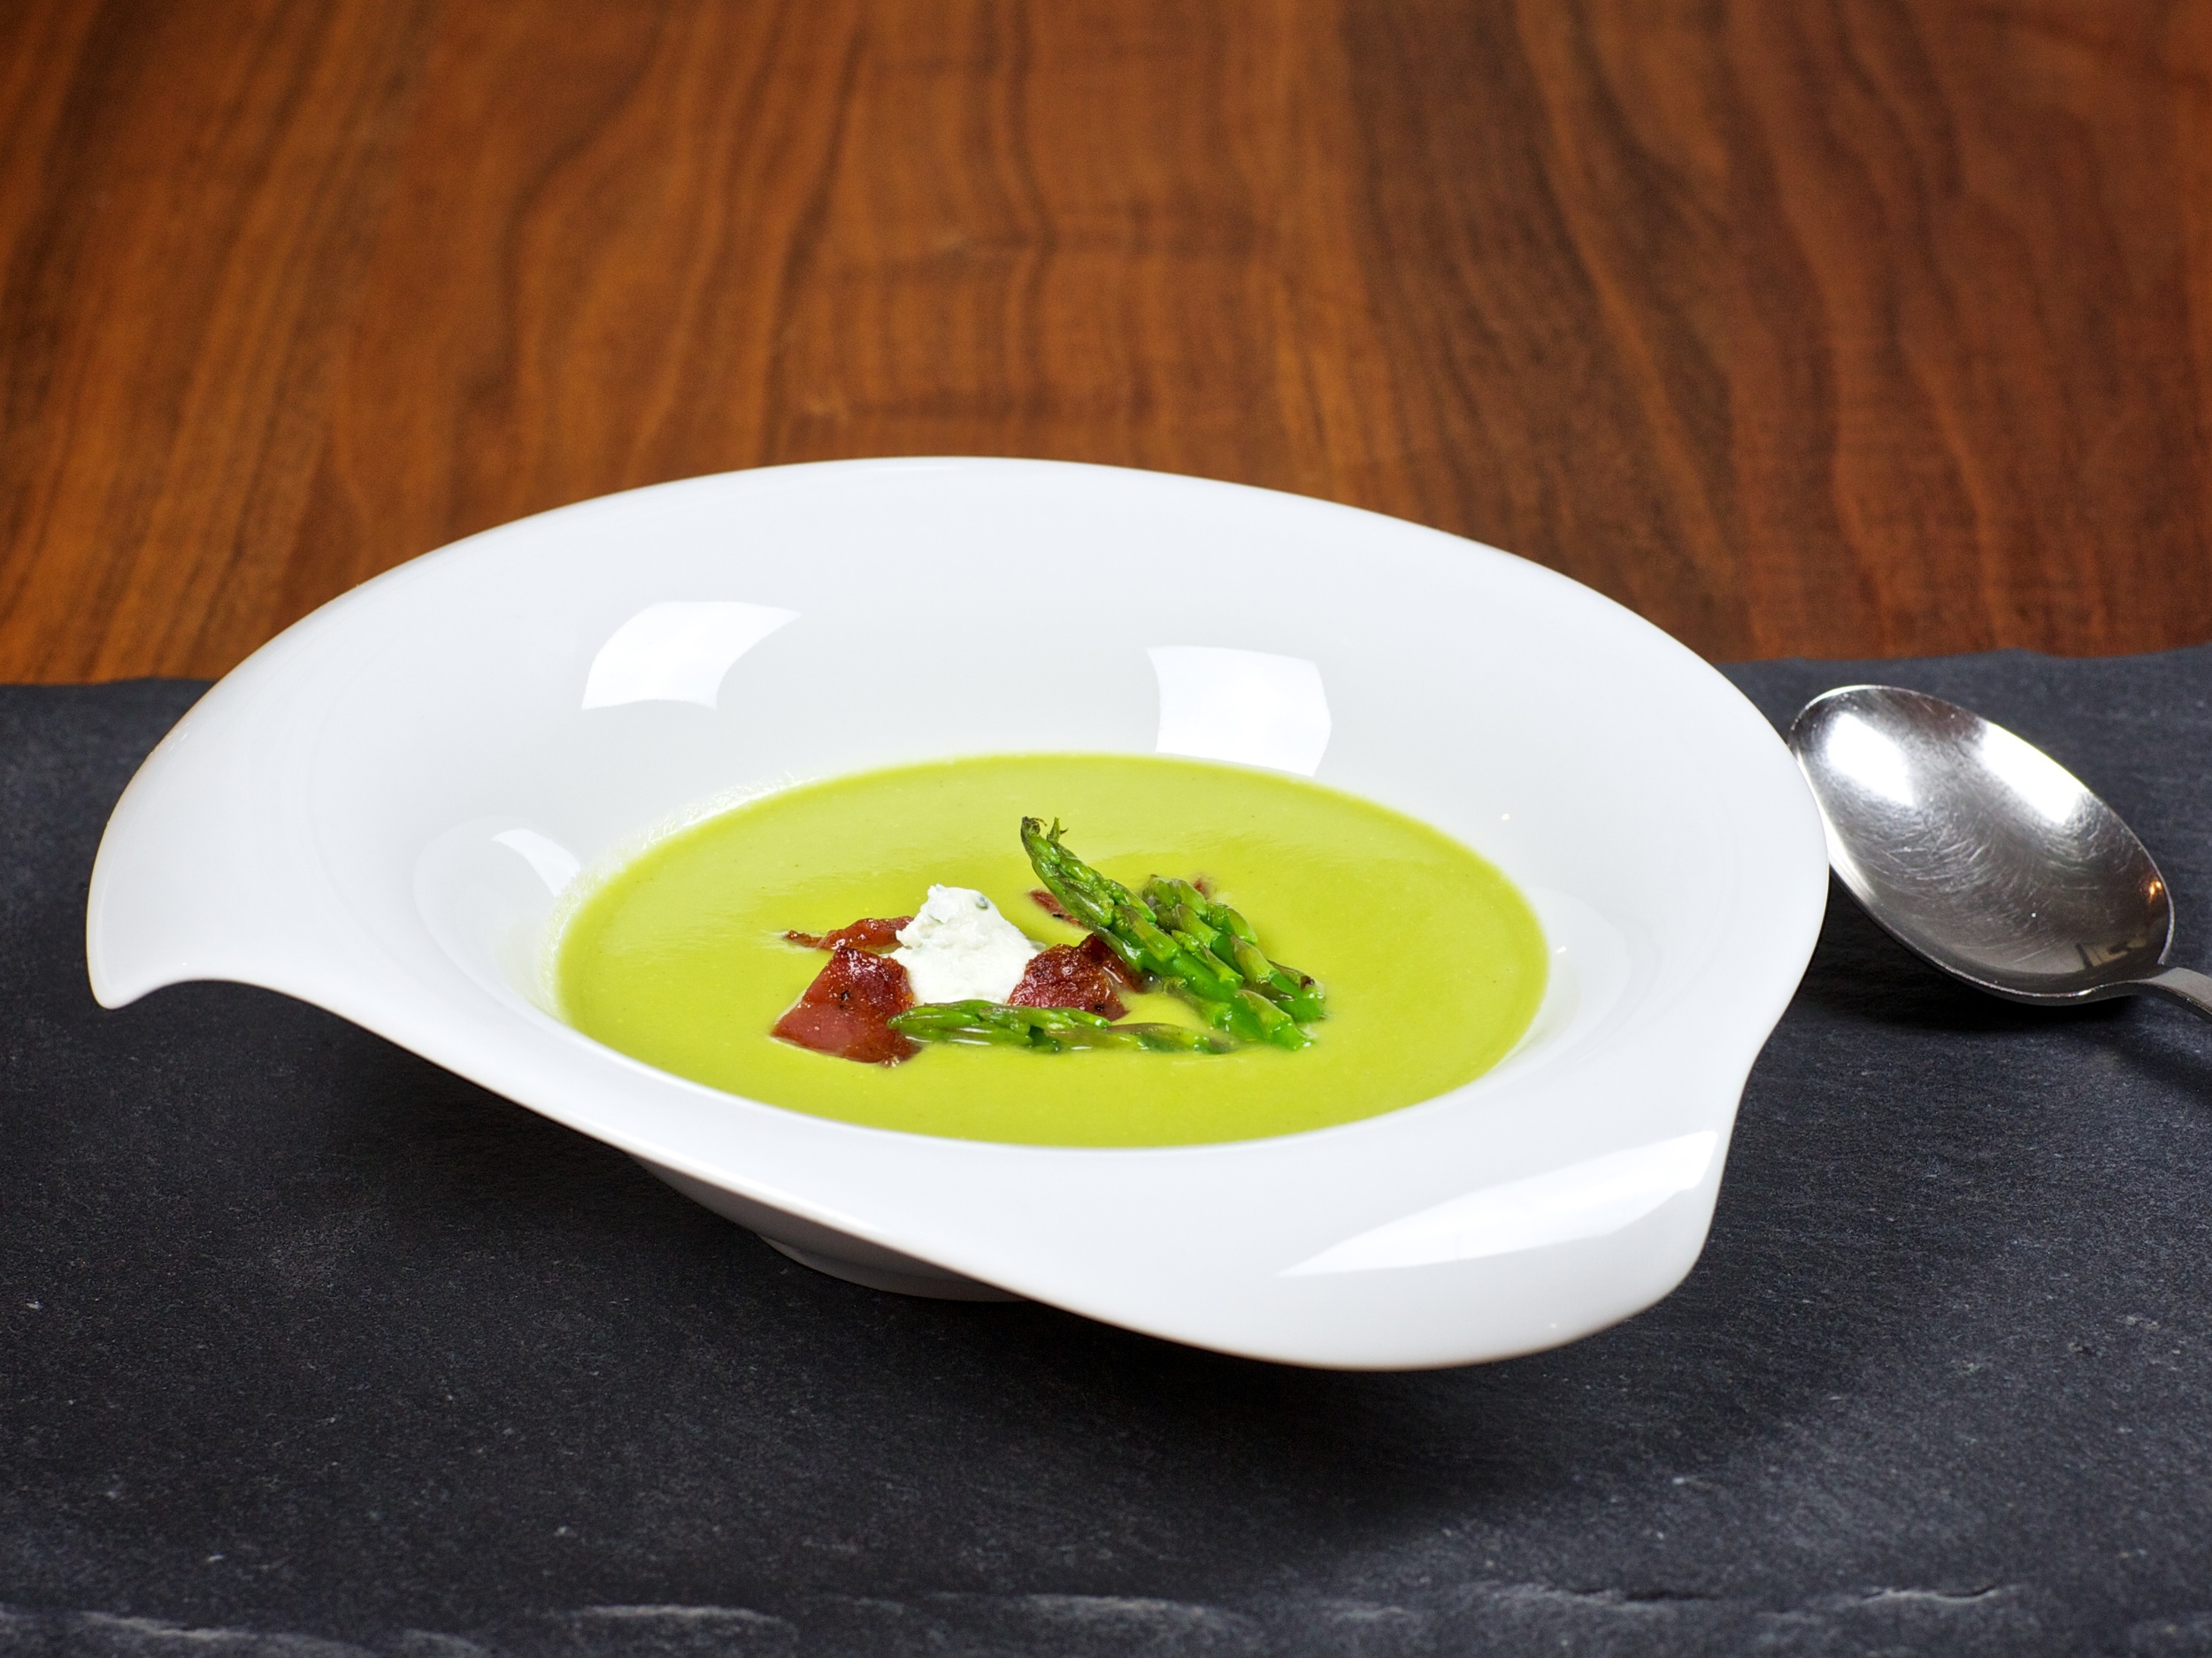
I got the inspiration from Giada de Laurentis cook book "Weeknights with Giada" where she made a green asparagus soup with goat cheese as a topping. I tweaked the recipe to fit my taste and this is my take on it:

Serves 3-4

Ingredients: 

Soup: 

  • 2 teaspoon butter

  • 150 g Leeks

  • 2 cloves of garlic

  • a pitch of yellow mustard seeds

  • 2 bunches of asparagus

  • 1/4 cup white wine

  • 2-3 tablespoons chicken base (Better than Bouillon reduced sodium)

  • 1 quart boiling water

  • 1/4 cup heavy whipping cream (optional)

  • 1-2 fresh squeezed lemon juice

  • Salt and pepper to taste

Toppings: 

  • dry chorizo, thinly sliced and fried to crispy

  • asparagus tops (save some of the tops, and fry them briefly)

  • Goat cheese mixed with finely chopped fresh basil and a splash heavy whipping cream.

Directions: 

Temporary Poster-2.jpg

In a 4- to 5-quart Dutch oven, heat the butter over medium-low heat. When hot, add the leeks and the mustard seeds, cook, stirring constantly until softened, about 3 to 4 minutes, be careful not to get any colour on the leeks. Add wine, stock, water, asparagus. Bring soup to a simmer and cook until the asparagus are tender about 7-10 minutes.

Blend the soup smooth with a immersion blender or a regular blender. Be careful when working with hot soup in a blender.  If you need a new blender, consider a Vitamix. They are expensive, but they are worth all the money. They can liquefy almost anything and makes soup and margaritas so smooth and creamy. But the best part, you can blend hot soups without having to clean the soup of all your kitchen cabinets afterwards. Just saying. ;)

Season the the soup with salt, pepper and lemon juice.

Serve the soup hot with the toppings. Enjoy! 


Danish Hindbærsnitter

CakeTove Balle-Pedersen3 Comments
Hindbærsnitte.

Hindbærsnitte.

Hindbærsnitter or 'raspberry bars' is a cake made of a shortcrust pastry, like the one you will use for a pie crust. Between the two layers of pastry there's a filling of a good raspberry jam. The cake is topped with an icing and colorful sprinkles.

You'll find hindbærsnitter in almost every bakery shop in Denmark. The quality may varies greatly, mostly because the bakeries doesn't make hindbærsnitter daily.

Hindbærsnitter has been one of my favourite cakes growing up. Even though that I, as an adult, don't like cakes to sweet, these hindbærsnitter will always be have a special place in my cake loving heart.<3

When you make these you'll find out that they won't keep, they will evaporate! 


Ingredients:


Pastry:

  • 2 teaspoon vanilla paste

  • 75 g confectionery sugar

  • 150 g butter, room temperature

  • 250 g All-purpose flour

  • 1 teaspoon baking powder

  • 50 g water (1/2 dl)

Filling:

  • 200 g raspberry jam, in a good quality


glaze:

  • 225 g confectionary sugar

  • a little bit water

Topping:

  • colorful sprinkles

Directions: 

Pastry:

Using a stand mixer with paddle attachment, mix together sugar, flour, butter, vanilla paste and baking powder. When the butter is mixed in well add the water, a little at a time, you might not need all of it. Be careful not to over mix the dough. Wrap the dough in plastic wrap and refrigerate dough for about 30 minutes.  

Rolling out the dough and when it's baked.

Rolling out the dough and when it's baked.

 Generously flour your counter, then place the chilled, unwrapped dough on the flour and flour the top of the dough. Roll you dough into a 8x12-inch (20x30 cm) rectangle. Re-flour your surface as needed, continually lifting and rotating your dough to make sure no parts are sticking. Lift the dough on to a parchment paper lined baking sheet. Cut the dough to a perfect rectangle and down the middle, so you get two 4x12-inch pieces.  Bake them at 400°F (200°C) for 10-12 minutes. They should be very light browned and look a bit undercooked. Cool the cakes completely. My rectangles were a bit to brown, an cracked a bit when I sliced them.

Spread an even layer of raspberry jam on one of the rectangles, put the other one on top to make a sandwich.  

Put the confectionary sugar in a pot over low heat. Slowly heat the sugar and add water until it becomes a thick paste. The icing should not be hot, just a bit warm, so it will dry quicker. Spread a thin layer of the icing on the sandwiched cake, and put sprinkles on top. Slice the cake into the desired size with a sharp knife. The cake tends to break a bit in this process if the cake is baked too much.

Serve the cake with a cup of the or coffee.


Cauliflower and Parmesan Salad.

Salad, SidesTove Balle-PedersenComment
Cauliflower and Parmesan Salad.

Cauliflower and Parmesan Salad.

I still get a lot of inspiration from Denmark. I have been watching the danish tv-show "Price Inviterer" where 2 brothers invite danish celebrities to cook with them. It's a show as much about the story behind the person as the food they are making. A few weeks ago I watched the show with Christian Blitz, a Master in Science in Human Nutrition. He served a salad with cauliflower parmesan cheese. I had to try this, the combination sounded so good.

So heres my take on this quick & easy salad. Now there is no excuse for not having a healthy salad as a side tonight.

Ingredients: 

  • 1 cauliflower
  • parmesan cheese
  • 1 glass capers

Dressing: 

  • extra virgin olive oil
  • lemon juice
  • salt & pepper

Directions:


Cut the raw cauliflower and parmesan in very thin slices on a mandolin. Drain the capers. 

Arrange the cauliflower slices on a large plate and put the parmesan on top. Sprinkle with capers. 

Mix the dressing, and pour it over the salad.  

Serve immediately.


Danish Liver Pâté - Leverpostej

Lunch, MeatsTove Balle-Pedersen1 Comment
Danish Liver Pate.

Danish Liver Pate.

I have had liver pâté all my life, well after I started eating solid foods. I love this stuff.

If you are danish, you'll have an open faced sandwich with liver pate in your lunch box from kindergarden and up. Because we are raised on open faced sandwiches with liver pâté. We will eat it for lunch with sliced cucumber or pickled beets on a weekday, but it's also served at holidays with crispy bacon and sautéed mushrooms. The liver pâté came to Denmark in 1833-1847, and was sold to the very wealthy. It became more common after the bacon export surged and the excess of pigs liver grew, making the liver pâté affordable for most people.

My mom made her own liver pâté, but she didn't grind the liver herself, she bought a frozen liver mixture and added onion, eggs, milk and spices. Much easier but it's not an option here in the US, to my knowledge at least.

Danish people are like al others, most of us doesn't like to eat liver. But even people who hates liver, can love liver pâté - it's a whole different thing. 

Making liver pâté is not a pretty process. The liver mixture looks kinda gross. Grinding the liver is a messy process. But It's worth the effort in the end. I always make a big batch, and freeze the unbaked pâté in small loaf pans. That way you can have a fresh baked pate for lunch or dinner within an hour.

(See other version here.)
Makes 5 small liver pâtés.

Ingredients:


  • 875 g liver (I use calf/veal liver)
  • 135 g fat (I use pork back fat)
  • 2 small onions
  • 3  eggs
  • 1 cup heavy whipping cream
  • 2/3 cup milk
  • 3 tablespoons all-purpose flour
  • 3,5 teaspoons salt
  • 1 teaspoon pepper
  • 25 g anchovies paste

Directions: 

Pass the fat and then the liver through a meat grinder at the finest setting, and mix it together. Now pass the mixture through the meat grinder again alternating with the onions.  Add the rest of the ingredients and mix it well.

Pour the mixture in small aluminum loaf pans.  

Bake the liver pâté in water bath at 360°F (180°C) for about an hour. 

You can freeze the uncooked pâtés and bake them, when needed. 

Enjoy!

Chickpea and Carrot Salad a la Thomas Keller

Salad, SidesTove Balle-PedersenComment
Chickpea and carrot salad a la Thomas Keller.

Chickpea and carrot salad a la Thomas Keller.

This is an easy salad, when you have soaked and cooked the chickpeas. When you make it from dried, in stead of canned, chickpeas you'll get the a better texture. But no matter what its a good and healthy salad.
 

Thomas Keller hit another home run with this one.

Ingredients:

  • 1/2 cup dried chickpeas.

  • salt

For boiling:

  • 6 cups water (or enough to cover chickpeas with 2 inches)

  • 1 medium leek, white and light green parts only, cleaned

  • 1 bouquet garni

  • 1/2 onion, peeled

  • 1 small carrot, peeled

For the salad: 

  • 2 tablespoons extra virgin olive oil

  • 2 bay leaves

  • 2 garlic cloves, skin left on, smashed

  • 2 thyme sprigs

  • 1 cup finely julienned carrots

  • freshly ground pepper

  • 1 tablespoon chopped italian parsley

  • 1,5 tablespoon fresh lemon juice


Direction: 


Soaking:  Soak the chickpeas in 3 cups of water for 12 hours

bouquet garni: leek outer leave thyme, italian parsley sprigs, bay leaves and peppercorns

Drain the chickpeas, put then in a large saucepan, and ad water, leek, bouquet garni, onion and carrot,  and bring it to a boil. Reduce the heat to a simmer for about 45 minutes, or until the chickpeas are tender.

Pour the chickpeas and their liquid into a large shallow container and let cool. Once they are cool, remove and discard the bouquet garni and vegetables and season with 1/2 teaspoon salt. The chickpeas can be covered and refrigerated in their liquid for 2-3 days.

If you use caned chickpeas,C here where you start. 

When ready to assemble the salad, drain the chickpeas in a colander. 

Combine the olive oil, bay leaves, garlic, and thyme in a large skillet and heat over medium heat until the oil is hot. Add the julienned carrots and toss in the oil for about 1 minute to cook them slightly. Add the chickpeas and season to taste with salt and pepper. Toss the chickpeas for 1 to 2 minutes, then transfer to a bowl let cool. 

The salad will keep in the refrigerator for a day. 

Just before serving, remove  bay leaves, garlic, and thyme and stir in parsley and lemon juice.


The Danish Version: 

Kikærte og