Sweet • Sour • Savory

Food blog on scandinavian style food done right.

Desserts,Sweets and Candy

Danish Pancakes version 2 - Crepes

Brunch, Desserts, DinnerTove Balle-PedersenComment
Danish pancakes.

Danish pancakes.

Danish pancakes are thin like crepes, and is kinda of a dessert. But in my family we occasionally had pancakes for dinner. Maybe not an healthy option, but it was not on a regular basis.

I like my pancakes to be soft like the ones my mom made, but if you want the edges to be a little crispy (the edges mostly) then add a tablespoon regular beer, like a Pilsner. My mom didn’t do that, maybe because we rarely had any beer in the house, so I don’t do that either.

Right now this is my favorite recipe for Danish pancakes. I often make a double portion, and save the extra in the freezer, for an easy treat another day. When freezing fold each pancake in quarters, with parchment paper between each pancake, so you easy can defrost one or two at a time.

Makes 10-12.

Ingredients:

  • 4 eggs

  • 400 ml milk

  • 1 teaspoon vanilla bean paste or extract

  • 4 tablespoons sugar

  • 165 g all-purpose flour

  • 1 pinch salt

Directions:

Add all the ingredients to the blender and blend it until a smooth batter. If you don’t have a blender, just whisk it by hand, until you get a lump free batter.

Heat a skillet over medium heat. Brush the skillet with a small amount of butter. Using a ladle, pour just enough batter to cover the bottom of the pan, tipping it to coat evenly. Place pan back on heat and cook until batter is set and turned light brown. Flip the crepe with a spatula and cook the other side for additional 30 seconds to 1 minute. Transfer cooked crepe to a plate and continue with the rest of the batter, brushing the pan with more butter as needed and stacking finished crepes on top of each other.

Serve the crepes with sugar, jam, or even ice cream.

Enjoy!

Mrs. Cross’s Christmas Syrup Cake - Sirupslagkage

Cake, Christmas, Desserts, HolidayTove Balle-PedersenComment
Mrs. Cross’s Christmas Syrup Cake - Sirupslagkage.

Mrs. Cross’s Christmas Syrup Cake - Sirupslagkage.

This type of cake was one of my mom’s favorites. She always told a story about getting a syrup layer cake at a friends house, where the buttermilk came from their own cows. Maybe my mom’s childhood food memories were tied to fond memories like my own. The syrup cake were not tied to Christmas in my home, but by adding the orange jam and chocolate is leans itself towards Christmas. My mom served hers with a sprinkle of powdered sugar on top, the chocolate ganache make it more decadent.

Ingredients:

Batter:

  • 125 g dark syrup

  • 75 g sugar

  • 75 g butter

  • 250 g all purpose flour

  • 1 teaspoon baking powder

  • ½ teaspoon backing soda

  • 1 teaspoon cinnamon

  • ½ teaspoon ground cloves

  • ½ teaspoon ground allspice

  • ½ teaspoon ground ginger

  • 150 ml buttermilk

Filling:

  • 5-6 heaping tablespoons Orange jam

Buttercream:

  • 250 g butter, salted and room temperature

  • 250 g confectionary sugar (powdered sugar)

  • 1 teaspoon vanilla bean paste

Chocolate ganache:

  • 200 ml heavy whipping cream

  • 200 g dark chocolate, finely chopped, I used Valrhona

  • 10 g butter

Garnish:

  • orange zest strips

Directions:

Preheat the oven to 355℉ (175℃).

Batter:

Melt butter, sugar, and syrup in a sauce pan, remove from heat, and let it cool for a few minutes. Mix the dry ingredients, and add it to the warm mixture, together with the buttermilk. Pour the batter into a 8-9-inch (22cm) springform, the bottom lined with parchment paper. And bake it for 30-35 minutes. Let the cake cool completely, before removing from the form.

Buttercream:

Cream the butter with the sugar for about 8-10 minutes, until it’s white and fluffy. Mix in the vanilla.

Ganache:

In a saucepan heat the cream to an almost simmer, remove it when small bubbles start forming at the edges. Pour it on top of the chopped chocolate and add the butter. Let it sit for about 30 seconds before you start stirring the mixture. This will give the chocolate time to start melting. Stir the ganache until it is smooth, glossy homogeneous.

Assembly:

Using a serrated knife, slice the cake horizontally in 2 layer, using gentle sawing motion. Spread the orange jam in a even layer on the lover part of the cake. On top of that spread all the buttercream in a thick even layer. Place the top part of the cake on top of the buttercream. Give it a little press to make the buttercream come out to the edge. Pour the ganache over the top of the cake, it’s ok if the ganache drips over the edges. Sprinkle with some orange zest on top, befor the ganache sets.

The cake will benefit from sitting a few hours or even overnight in the refrigerator before serving.

Enjoy!

Coffee Creme Brûlée

DessertsTove Balle-PedersenComment
Coffee Creme Brûlée

Coffee Creme Brûlée

Creme Brûlée is one of my favorite desserts, when made right. The custard have to be velvety smooth with a nice crusty caramel on top. I like my Creme Brûlée to be a thin layer of custard, this gives the best custard to caramel ratio for my taste. This recipe is just perfect. Thank you David Lebovitz.

If you want a vanilla custard instead for coffee you can replace the instant coffee and kahlua with 1 teaspoon vanilla bean paste. The paste might color the custard a bit.

Makes 4.

Ingredients:

  • 330 ml (1 ⅓ cup) heavy whipping cream

  • 160 ml (⅔ cup) whole milk

  • 50 g (¼ cup) sugar + extra for caramelizing

  • 1 pinch salt

  • 4 large egg yolks

  • 1 tablespoon instant coffee powder, I used Seabright from Verve

  • 2 teaspoons Kahlua coffee liqueur

Directions:

Preheat the oven for 300℉ (150 ℃).

Place the 4 shallow gratin dishes on a high-rimmed baking sheet and set aside. Boil some water in a kettle, to get it ready, for when the custard goes into the oven.

Heat the cream, milk, sugar, salt in a saucepan over medium heat, until all the sugar has dissolved. Whisk the egg yolks together in a bowl large enough to hold both eggs and milk/cream mixture. Gradually add the warm cream mixture in the yolks while stirring, until the cream is completely incorporated. Do not whisk vigorously, you don’t want to create foam. Mix in instant coffee and kahlua. Strain the mixture into a jug or measuring cup with a sprout, trying to create as little foam on top as possible. I removed the little foam, that did come on the surface with a spoon.

Gently divide the mixture between the 4 dishes, removing any foam created on the surface before placing the baking sheet in the oven. Pour enough hot water in the baking sheet, so it reaches halfway up the sides of the gratin dishes. Bake the dishes for 20-25 minutes, until they are just set, watch them closely the last few minutes. You are looking for a slight quiver when you try to jiggle them. Be careful when you remove them from the oven. I used a blaster to remove most of the water, and then used some kitchen towel to lift the dishes. Chill the custard in the refrigerator until you are ready to serve them.

Just before serving, sprinkle the custards with an even layer of sugar, about 1½ teaspoon for each is what you need. Working on one custard at a time, use a blowtorch to wave the flame over the custard until the sugar melts and becomes brown, make sure that the caramel spreads all over the top, but handle it with care, because the melted sugar is extremely hot. Serve immediately.

Enjoy!

Flødeboller - Cream Puffs

Sweets and CandyTove Balle-Pedersen1 Comment
803AEED4-3C8C-42C1-A245-1C798A23BB8F.jpeg

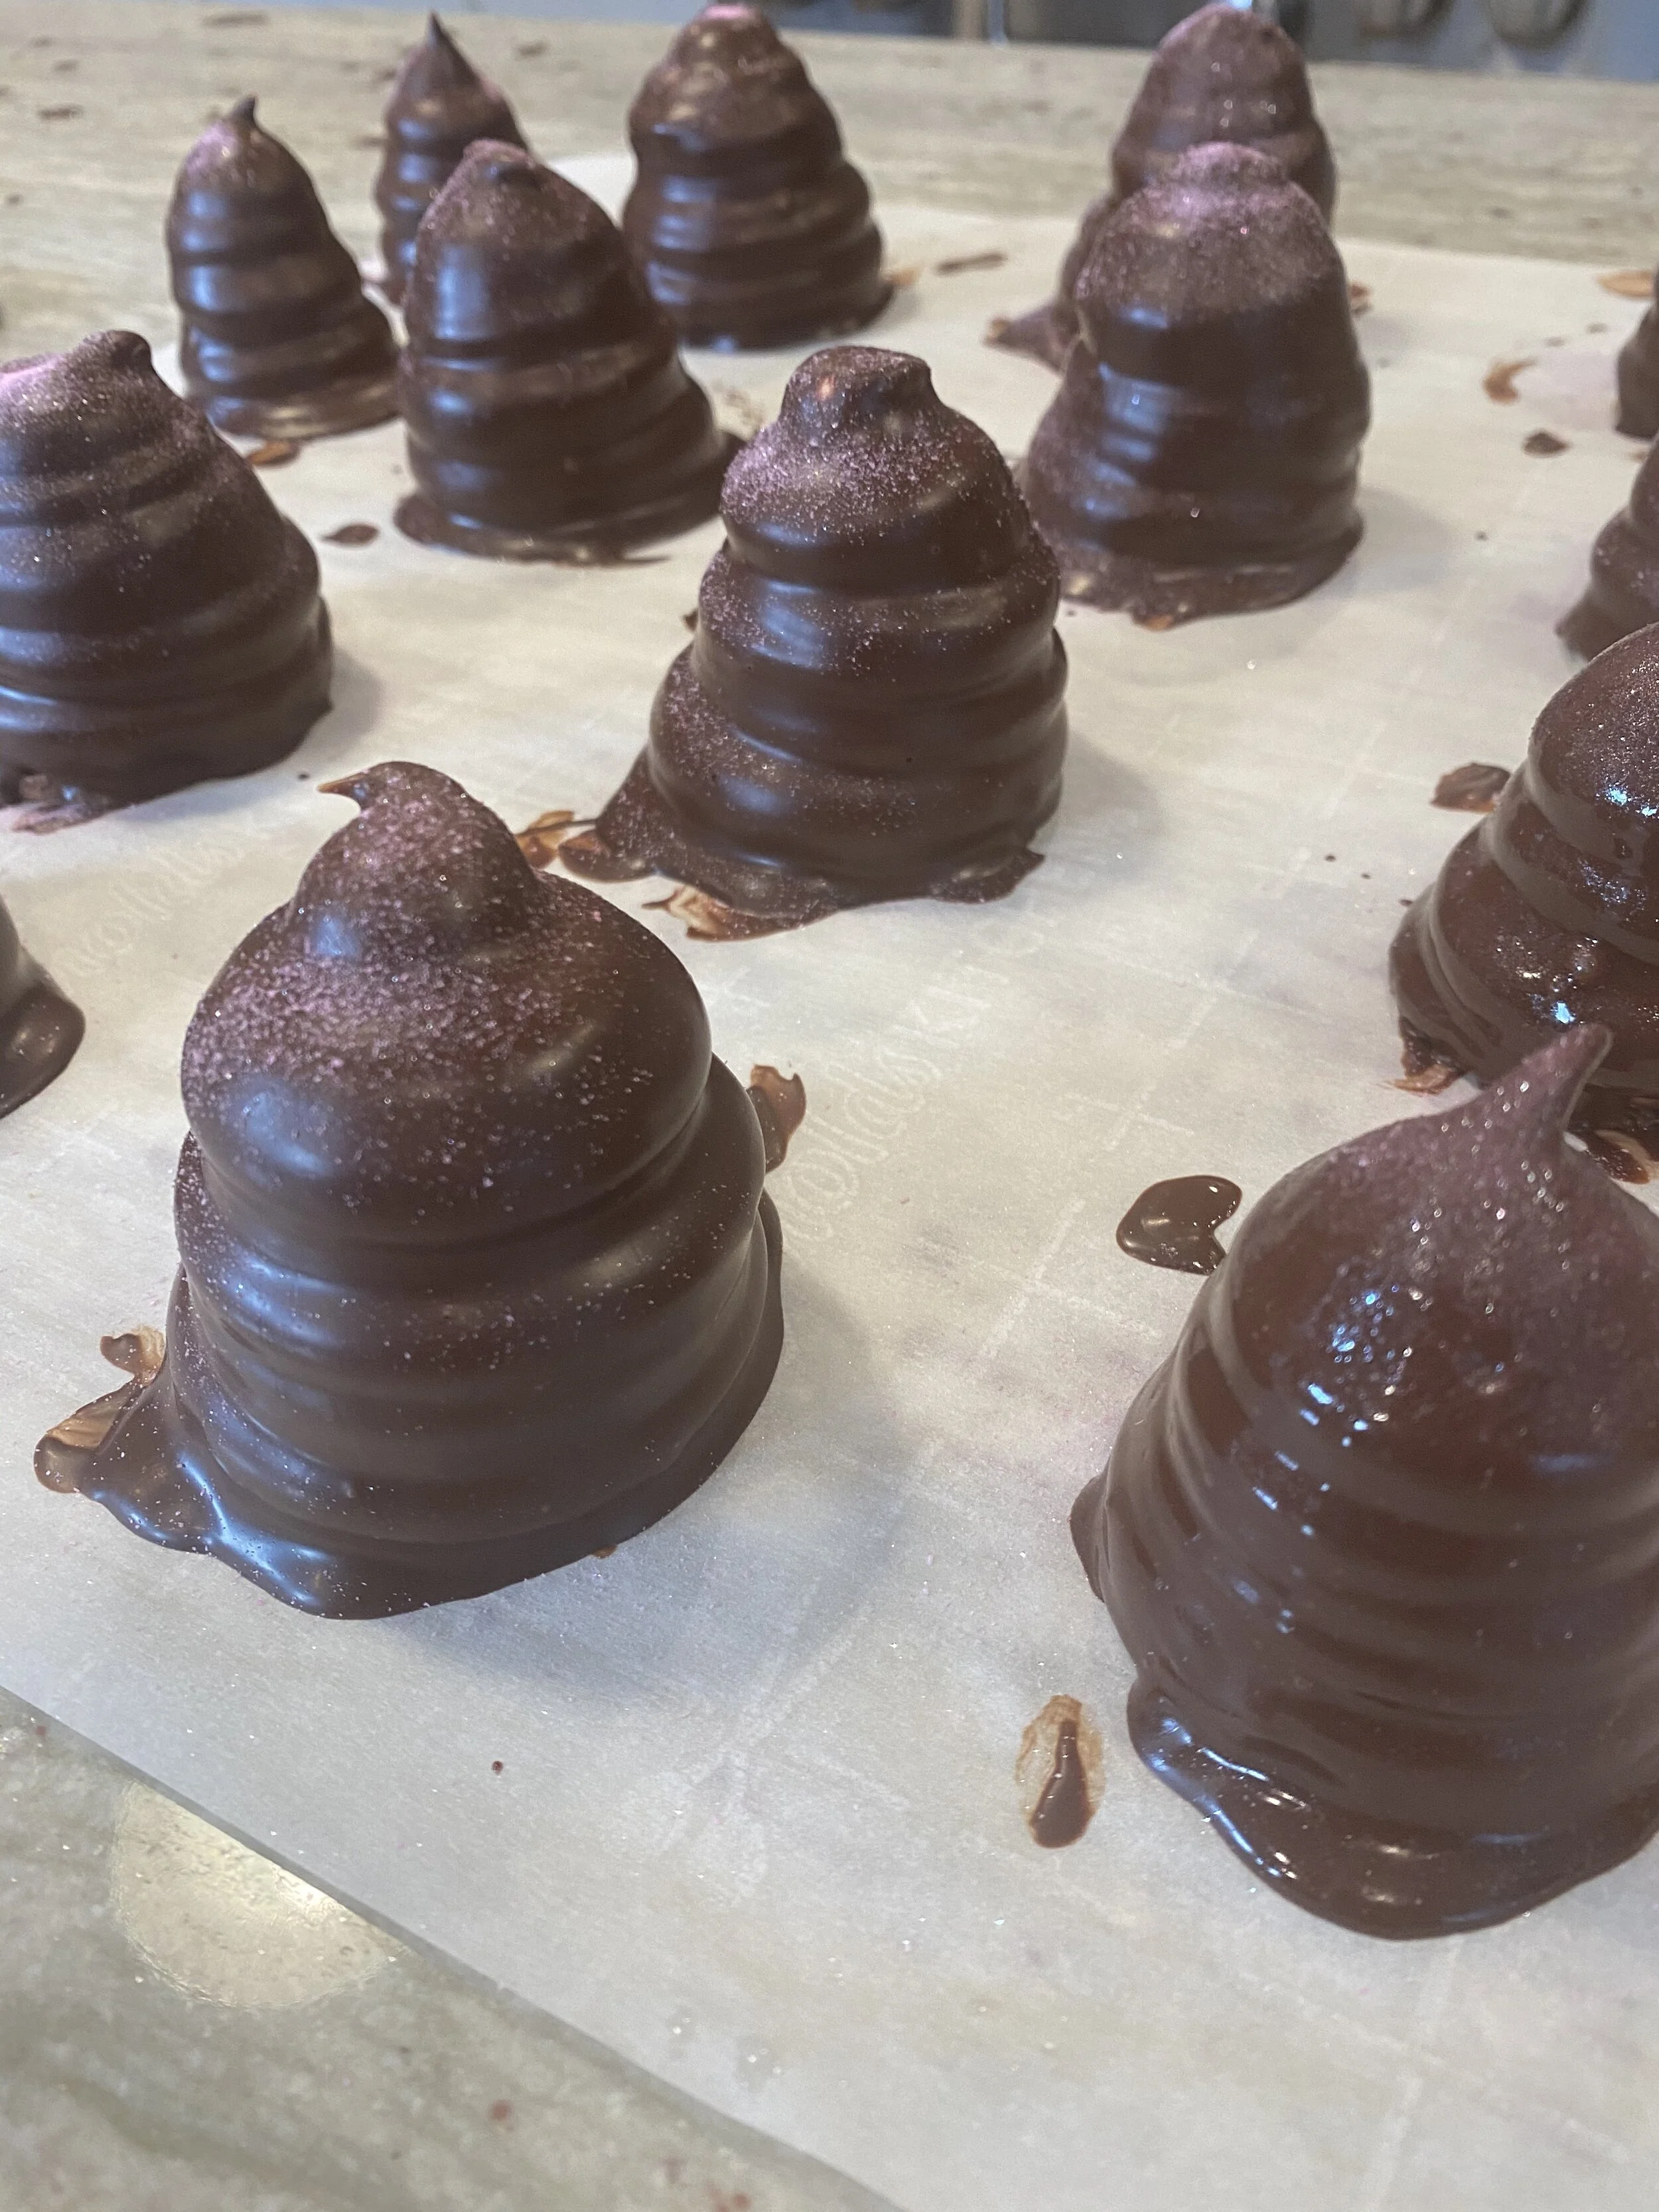
Flødeboller (Cream Puffs) are classic Danish treats. When I grew up, it were the go to treat we handed out in school at our birthdays. But it were there store bought kind,

The past 15-20 years flødeboller began to be popular again, and now in a Gourmet version with a marzipan base. An along side came the possibility to make the at home. Here is my version of Flødeboller.

Ingredients:

Makes 18-20.

Base:

  • 200 g marzipan/almond paste with about 63% almonds

Filling:

Chocolate coating:

  • 200-250 g dark chocolate, a good one I used Valrhona

  • 30 g cocoa butter

Directions:

Preheat the oven to 350℉ (180℃).

Cut the marzipan log into 20 slices. Place them on a baking sheet lined with parchment paper. Bake the marzipan for 5-7 minutes until they are golden brown, let them cool completely.

Filling:

When making meringue it is very important that there are no fat residue on your bowl and whisk, otherwise the egg whites won't get fluffy.

Whisk the egg whites until they just turn fluffy, add the 3 tablespoons of sugar and whisk until stiff peaks. Meanwhile heat sugar, syrup and water in a saucepan. Bring it to a boil and keep it simmering until it reaches 243℃ (117℃). this will take a while.

A487FC70-E813-4B3C-B0AB-9C59751304C7.jpeg

Pour the scolding hot syrup into the egg whites while whisking. The meringue becomes pretty warm, but keep whisking for 12 minutes, until the meringue is room temperature. Mix in the vanilla bean paste.

Add the meringue to a piping bag with a plain round tip. Pipe the meringue in a high peak.

Let the flødeboller sit on the kitchen counter for at least an hour to dry out the surface. This makes it so much easier to cover in chocolate.

Temper the chocolate.

Pour the Chocolate into a glass or cup, large enough to dip the flødebolle top into. Dip the flødebolle into the chocolate, all the way, just reaching the cookie bottom. Raise the flødebolle just over the surface of the Chocolate, and let some of the excess chocolate run off for a few seconds. Place the flødeboller on a piece of parchment paper to let the chocolate dry. Sprinkle with desired sprinkle just before the chocolate dries completely.

Store the flødeboller at 16℃/61℉, they will only keep for a few days. Not really sure for how long, because they evaporates in my house.

Enjoy!

B2B7A118-7EF0-444B-BF07-9A8906001088.jpeg


Truffles with Orange Zest

Christmas, Holiday, Sweets and CandyTove Balle-PedersenComment
Truffles with Orange Zest (I used a cutie for the photo, I was all out of oranges.)

Truffles with Orange Zest (I used a cutie for the photo, I was all out of oranges.)

These truffles are melt in your mouth delicious. well they will melt in your hand too, so its a delicate chocolate. If you want them to be easier to handle when serving, you can use the truffle/ganache as a filling in chocolates, but may turn up the orange flavor a bit.

I used a cutie for the photo, I was all out of oranges.

Makes 20-30 small truffles.

Ingredients:

  • 175 ml heavy whipping cream

  • 175 g dark chocolate, I used Valrhona

  • 1 organic orange, the zest of

  • 1 tablespoon orange liqueur like Grand Marnier - optional

  • unsweetened cocoa powder, I used Valrhona

Directions:

Chop the chocolate finely, and set aside. Zest the orange, and set it aside. Line a small loaf pan with parchment paper, and set it aside.

Heat the cream to the boiling point in a small saucepan. Pour the hot cream over the chocolate and stir it until alll the chocolate is melted and the ganache becomes shining. Stir in the orange zest and liqueur. Pour the ganache into the prepared loaf pan and set in the refrigerator for 1-2 hours to firm up. Cut the truffles up in bite-size squares and cover them with cocoa powder. Store the truffles in an airtight container in the refrigerator.

Enjoy!