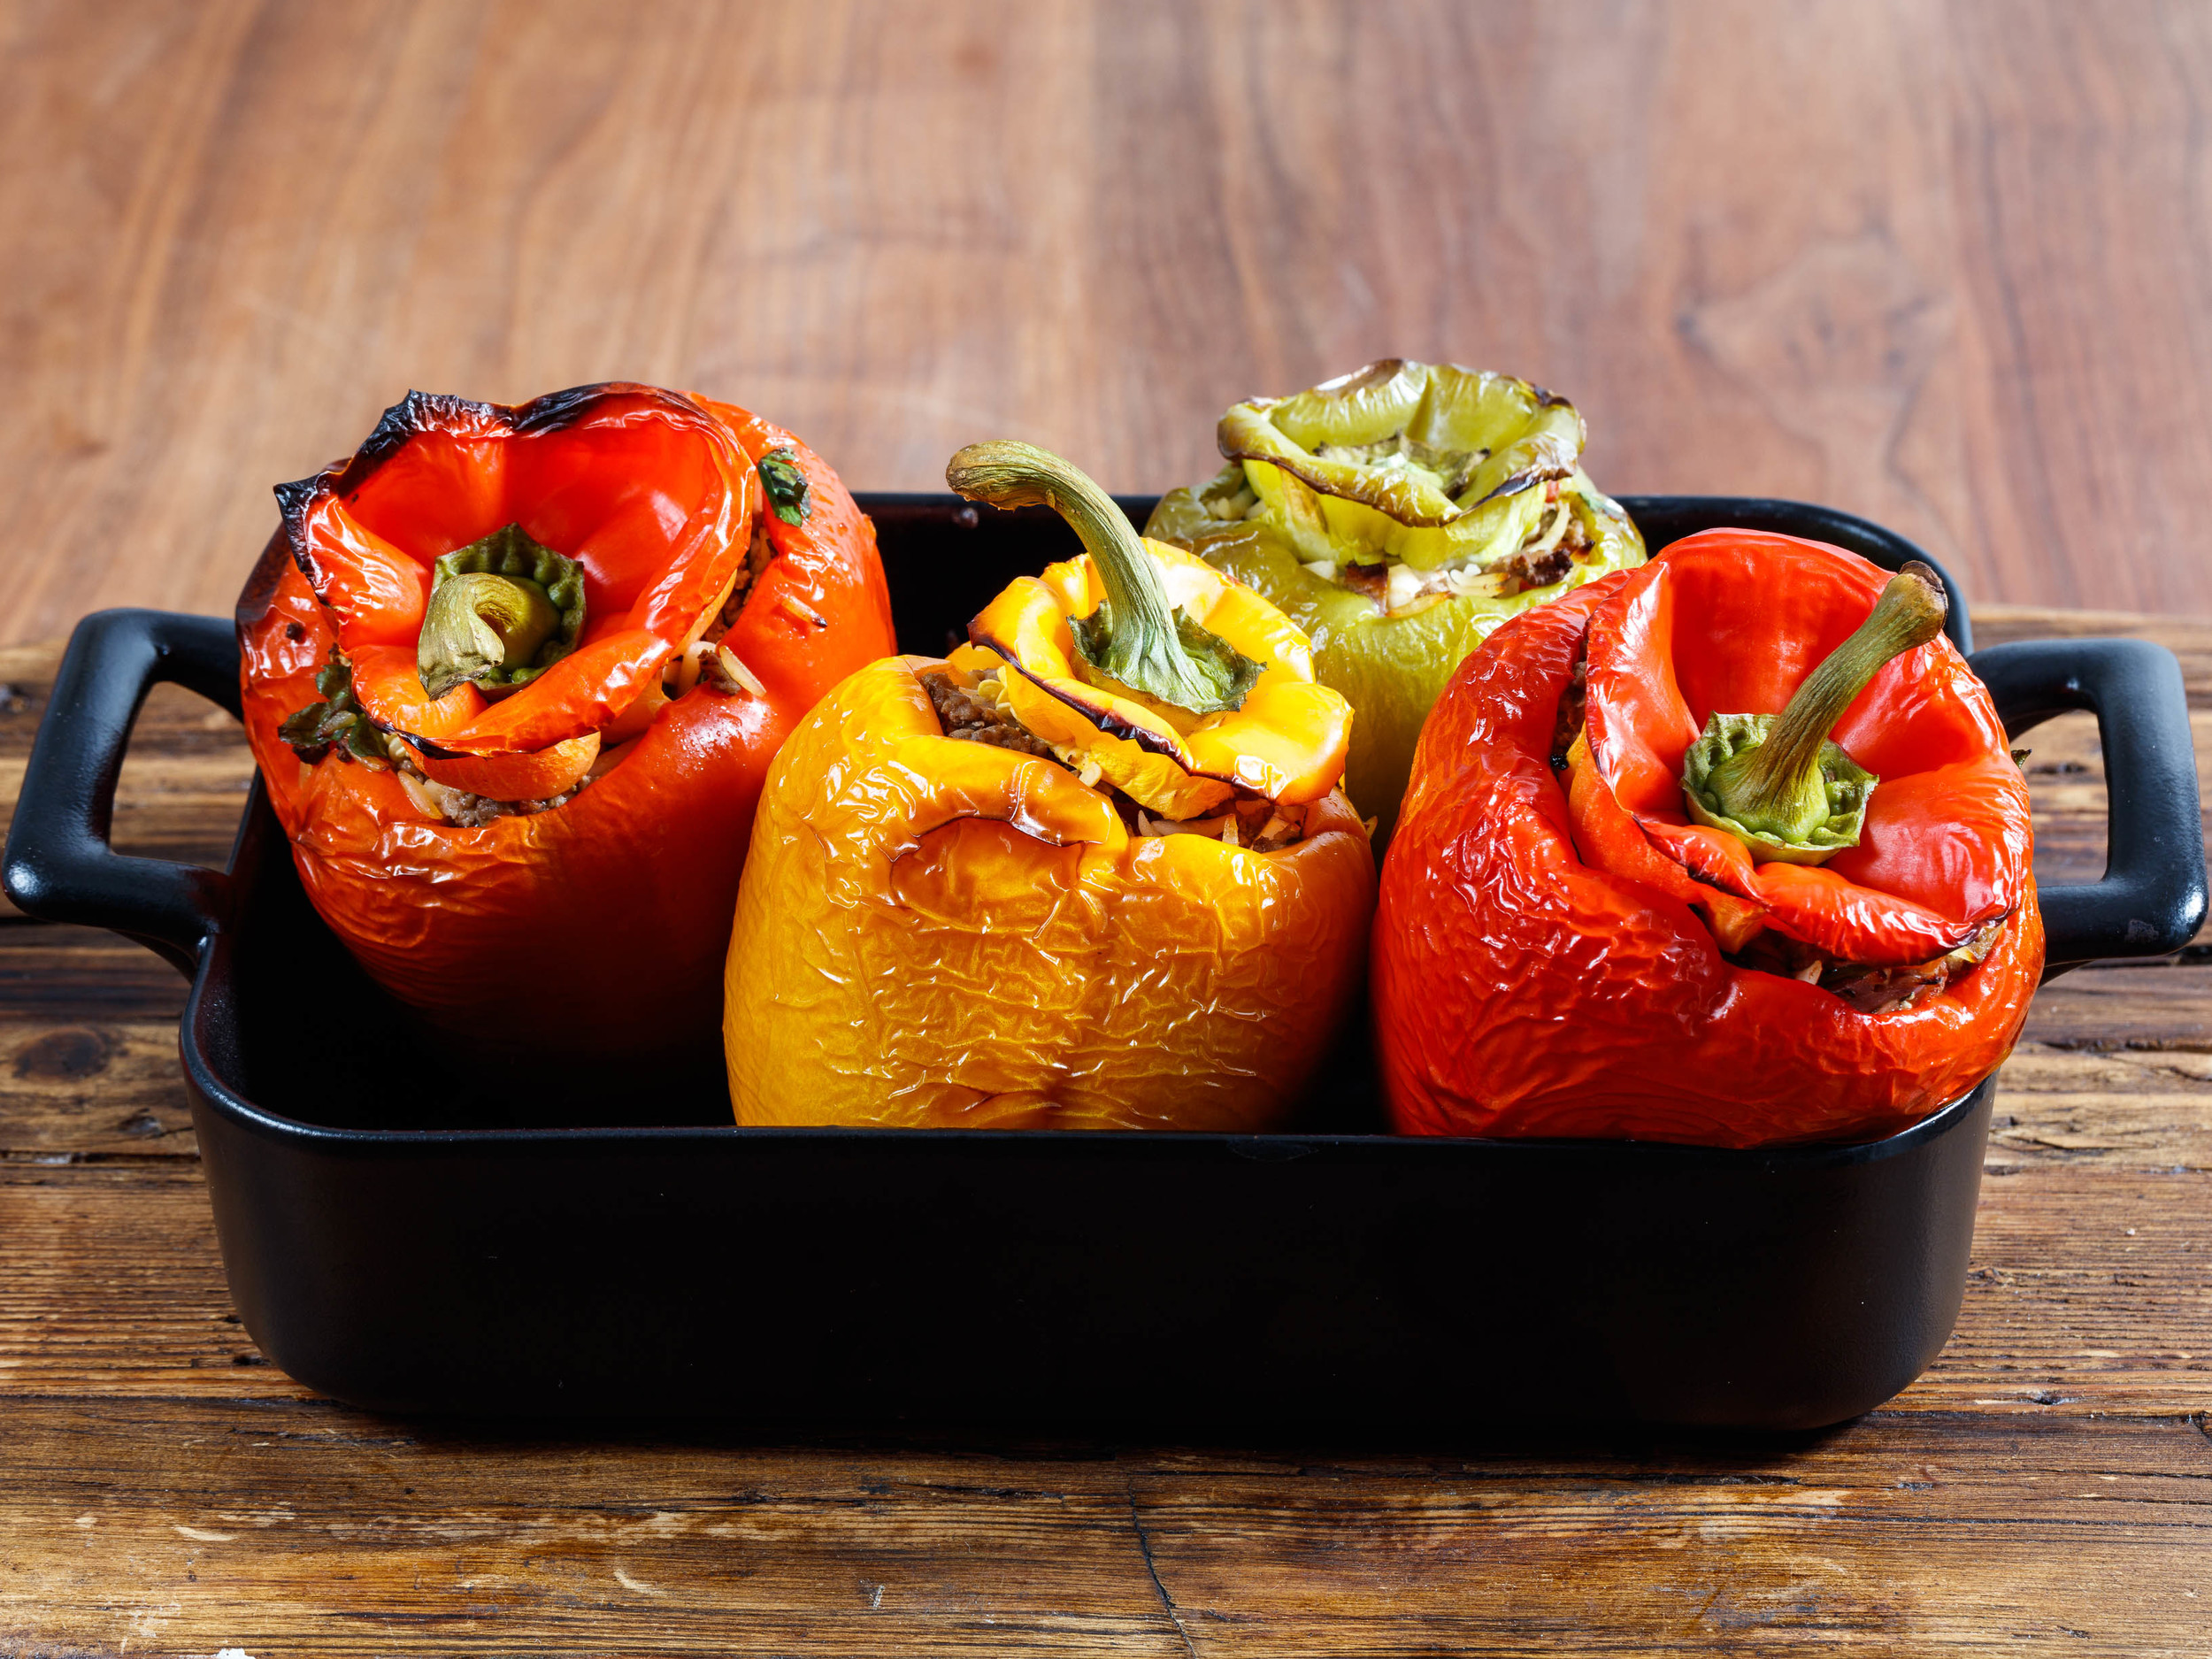
Greek-Style Stuffed Peppers
These stuffed peppers were really delicious. The peppers were sweet and perfectly roasted, but without getting mushy and bland. The filling was soft and flavorful. I don't like when the filling comes out like a little hard meatball. This gives me flashbacks to bland stuffed cabbage (kåldolmer) dinners in my childhood. The greek flavors is just as vibrant as the colors of the beautiful roasted peppers.
Serves 3-4
Ingredients:
- 100 g orzo
- 1 red onion, chopped
- 2 garlic cloves, minced
- 450 g (1 pound) ground lamb
- 1 teaspoon oregano
- 1 teaspoon chopped, fresh mint leaves
- 1 little handful Italian parsley, chopped
- 1 can diced tomato, drained
- 10-12 pitted kalamata olives, chopped
- 3 tablespoons crumbled feta cheese
- salt & pepper to taste
- 4 bell peppers
- olive oil
Directions:
Cook the orzo according to the package, I used the liquid drained from the tomatoes in the cooking water.
Prehaet the oven to 400℉ (200℃).
Sauté the onions until translucent, add garlic and meat and brown it. Remove from the heat. Mix in spices, herbs, tomato, feta, olives and the cooked orzo, season with salt and pepper.
Cut the tops of the peppers, and remove the seeds. Coat the outside with olive oil, and place them in an ovenproof dish. Fill the peppers and place the top on the peppers as small lids. Bake the peppers for 30-40 minutes until the peppers are tender, but still holding up.
Serve the peppers with a simple greek salad, containing greens, cucumber, red onions, tomatoes, olives and feta.
Enjoy!