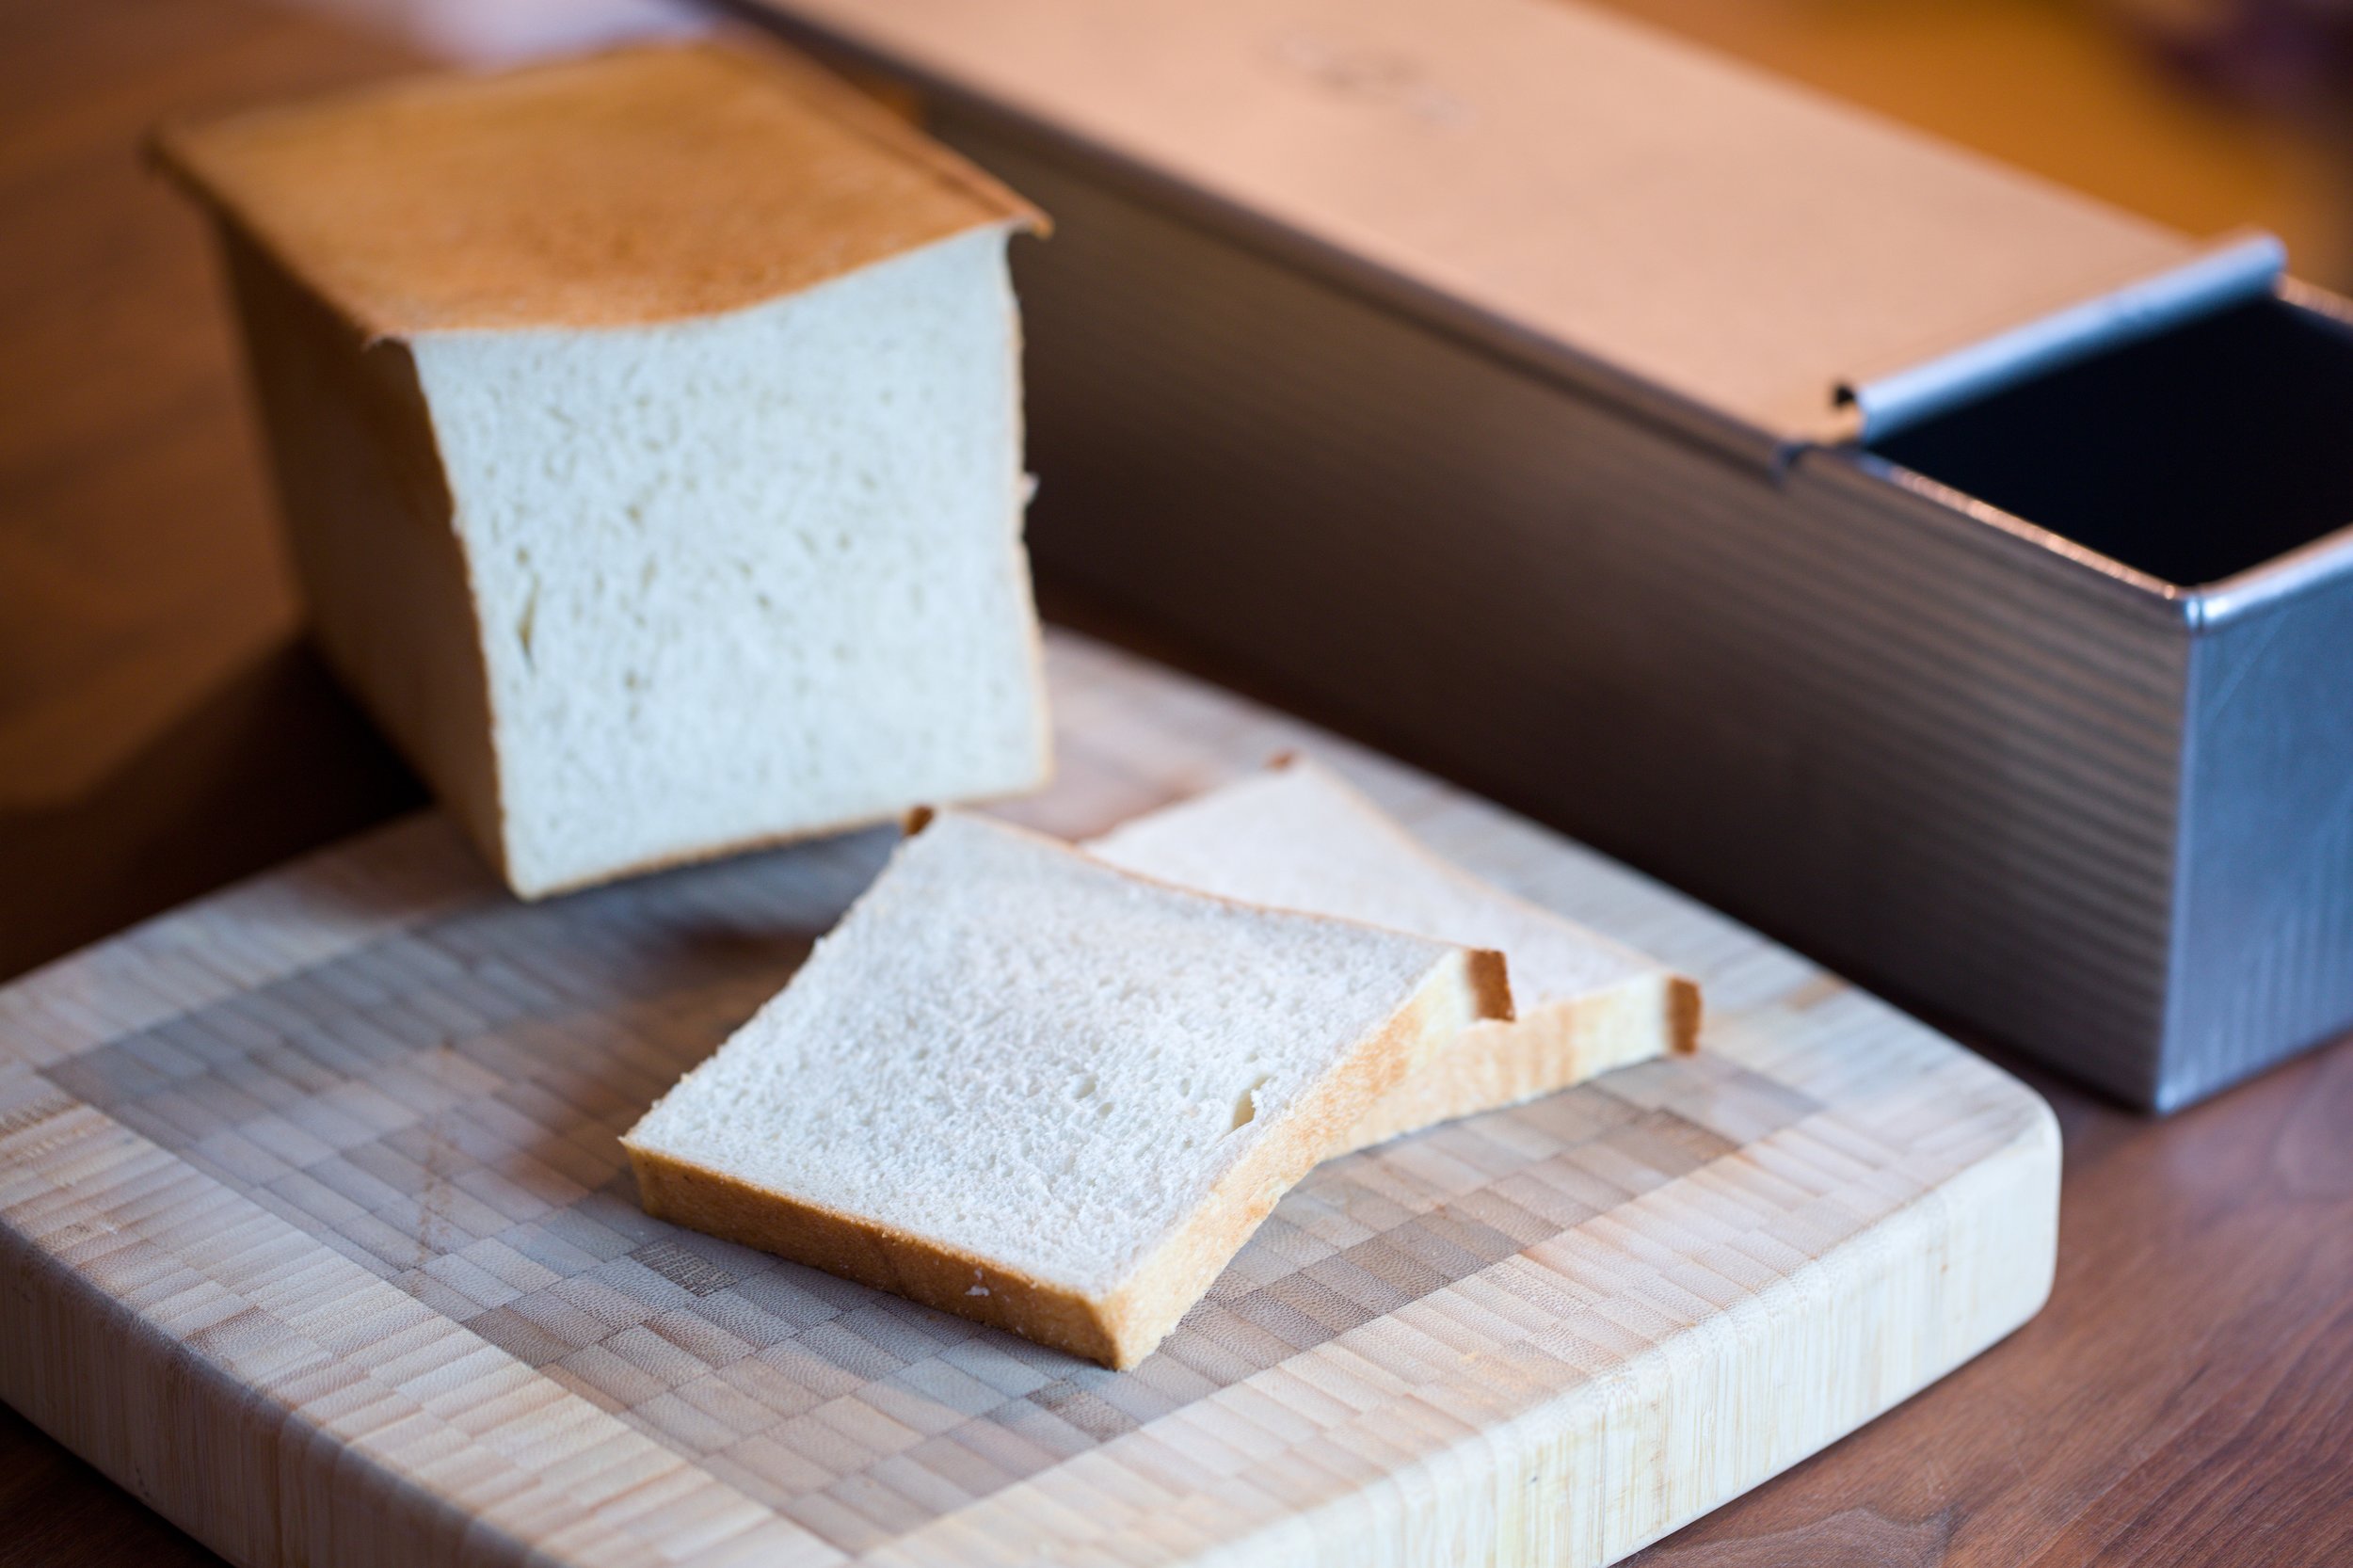
Pullman Sandwich Loaf
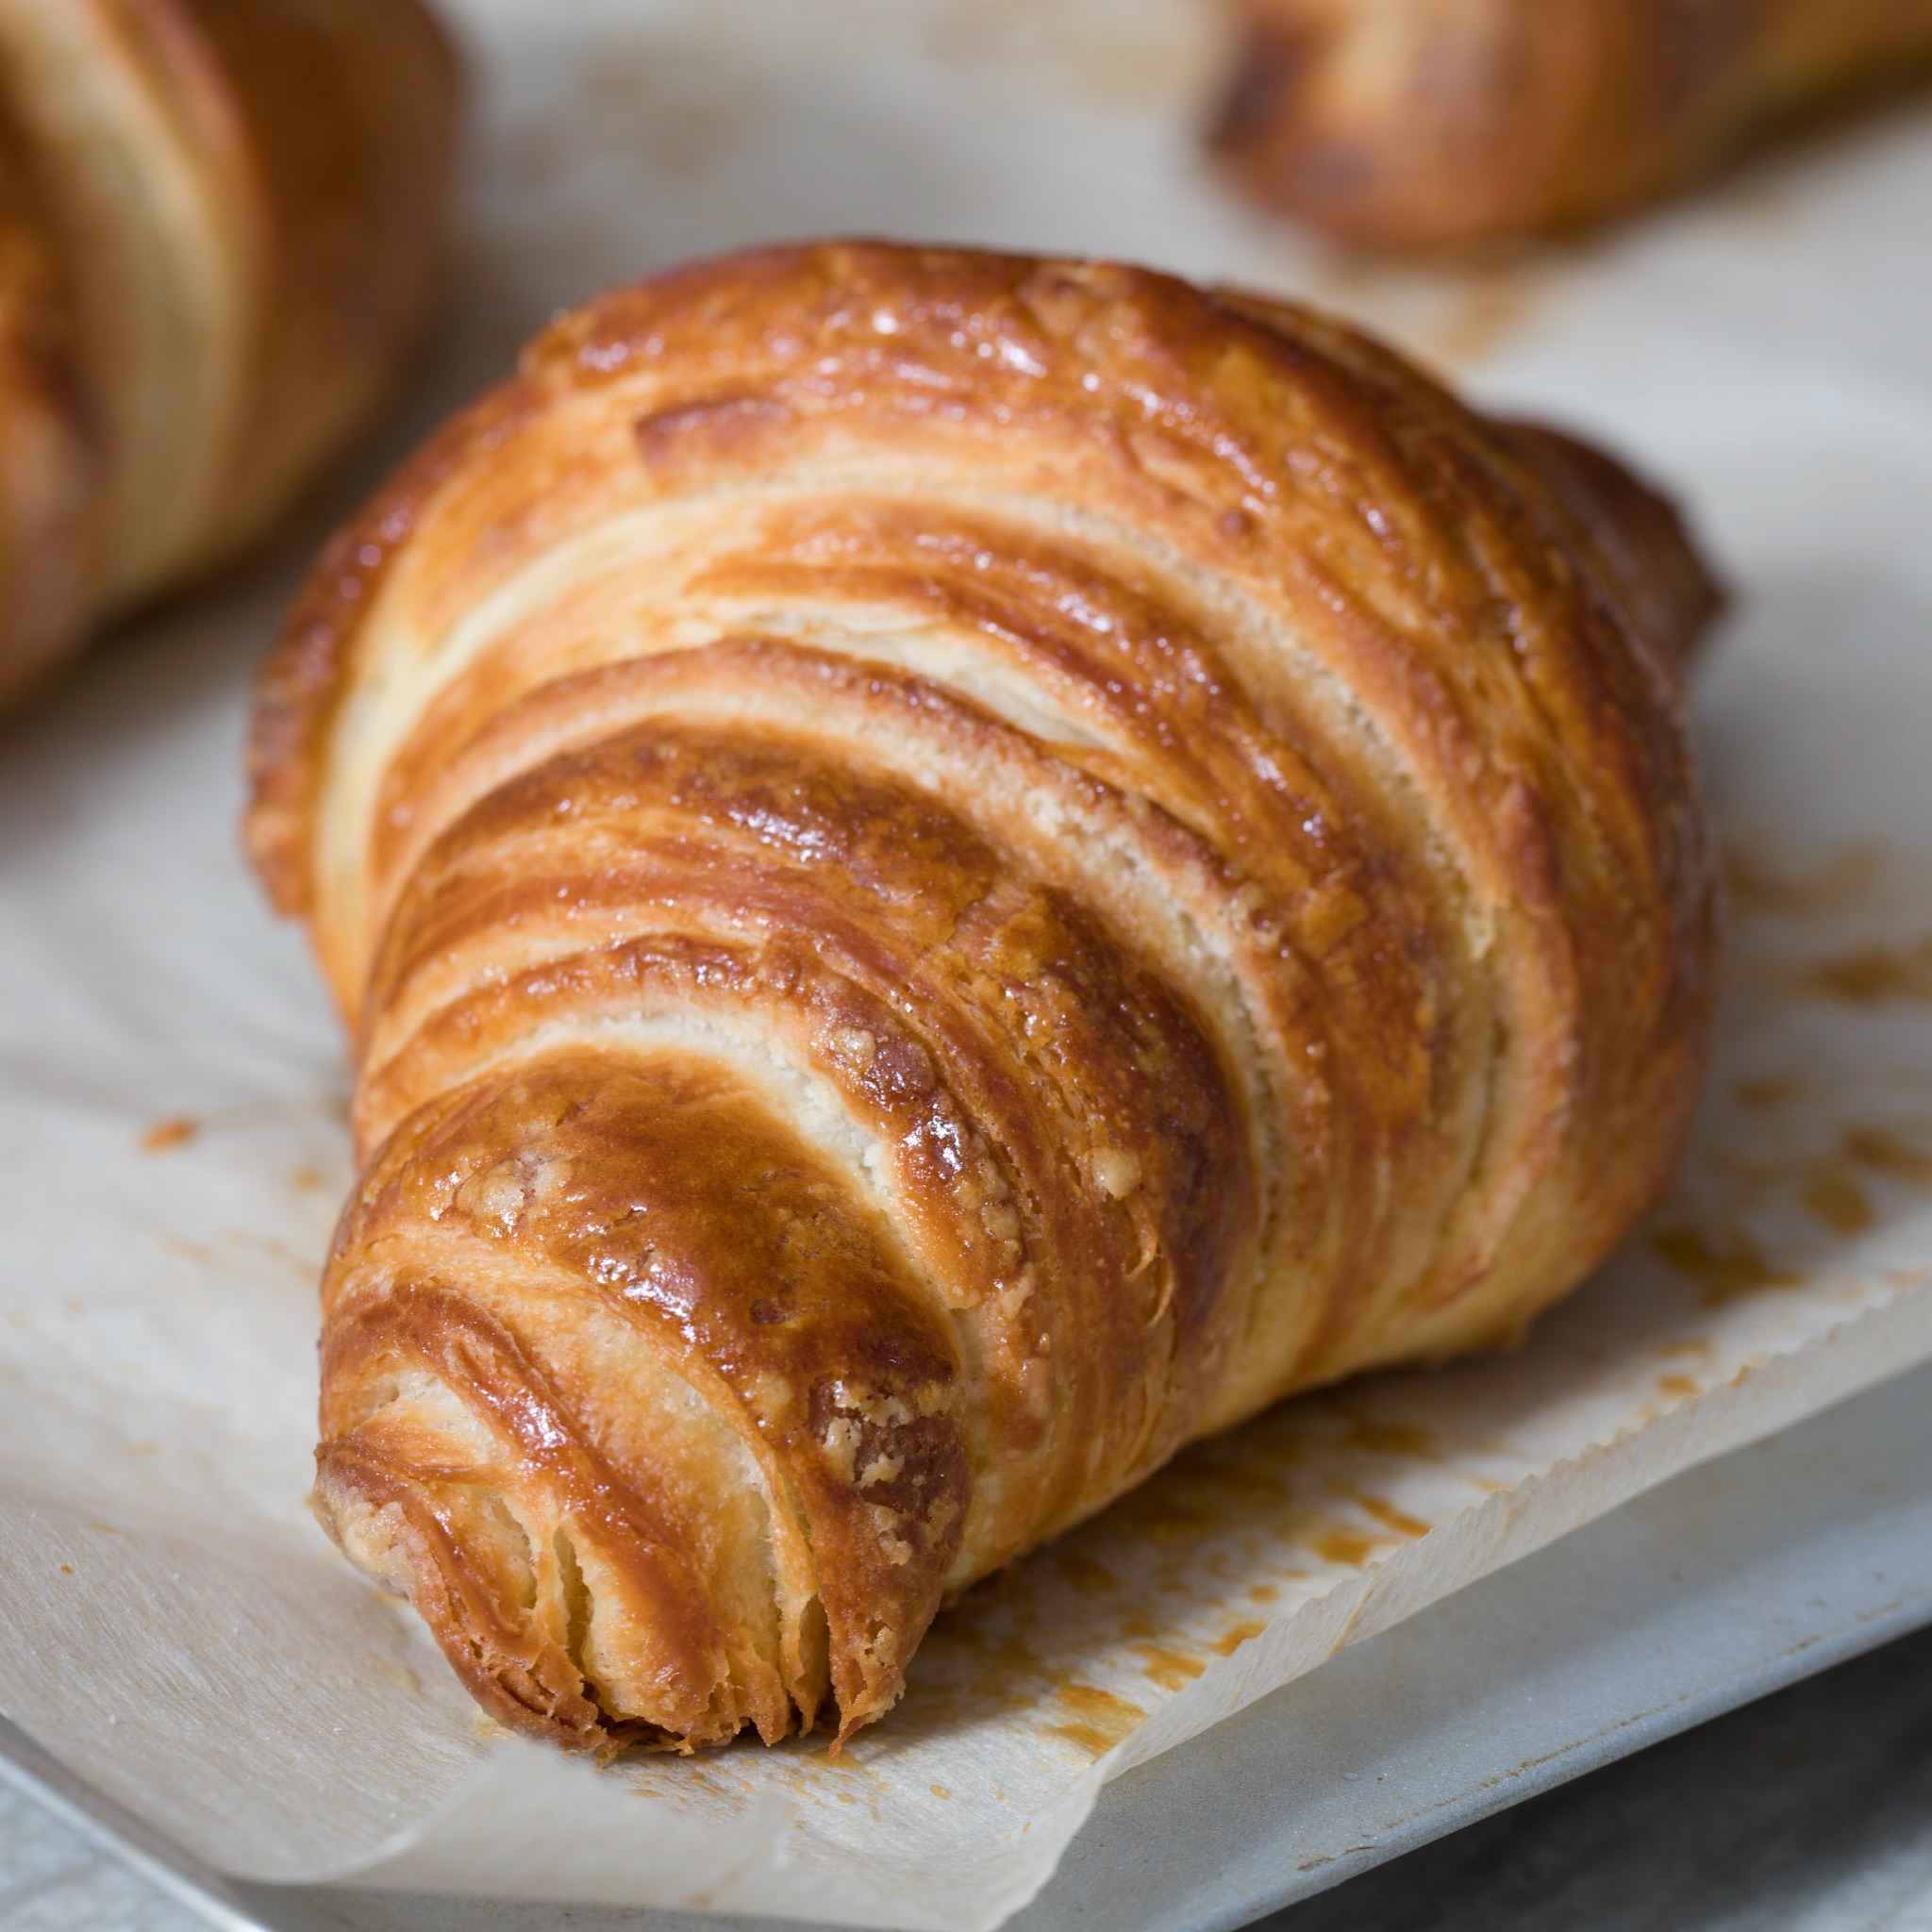
We have all bought sandwich bread in the stores. And you might ask why spend so much time baking this simple loaf. But this loaf is not your average sandwich bread. This is a feather light sweet soft loaf. And compared to most store bought loafs, this bread is filled with ingredients you actually can pronounce. We used the bread to make simple sandwiches in a panini press. And compared with store bought, the slices of the bread didn't flatten under pressure. Well worth the effort.
Ingredients:
- 450 g all-purpose flour
- 100 g Ølandshvedemel (you can use all-purpose flour or bread flour)
- 6 g dry yeast
- 32 g sugar
- 11 g fine salt
- 285 ml water
- 1 egg
- 25 g butter, salted and room temereature
- 80 g cream cheese
- egg wash
Directions:
Spray a large bowl and the pullman loaf pan with non-stick spray, set aside.
Combine all the ingredients except the egg wash in the bowl for a stand mixer. Knead 4-5 minutes on low speed to form the dough. Keep kneading on medium low for another 15 minutes.
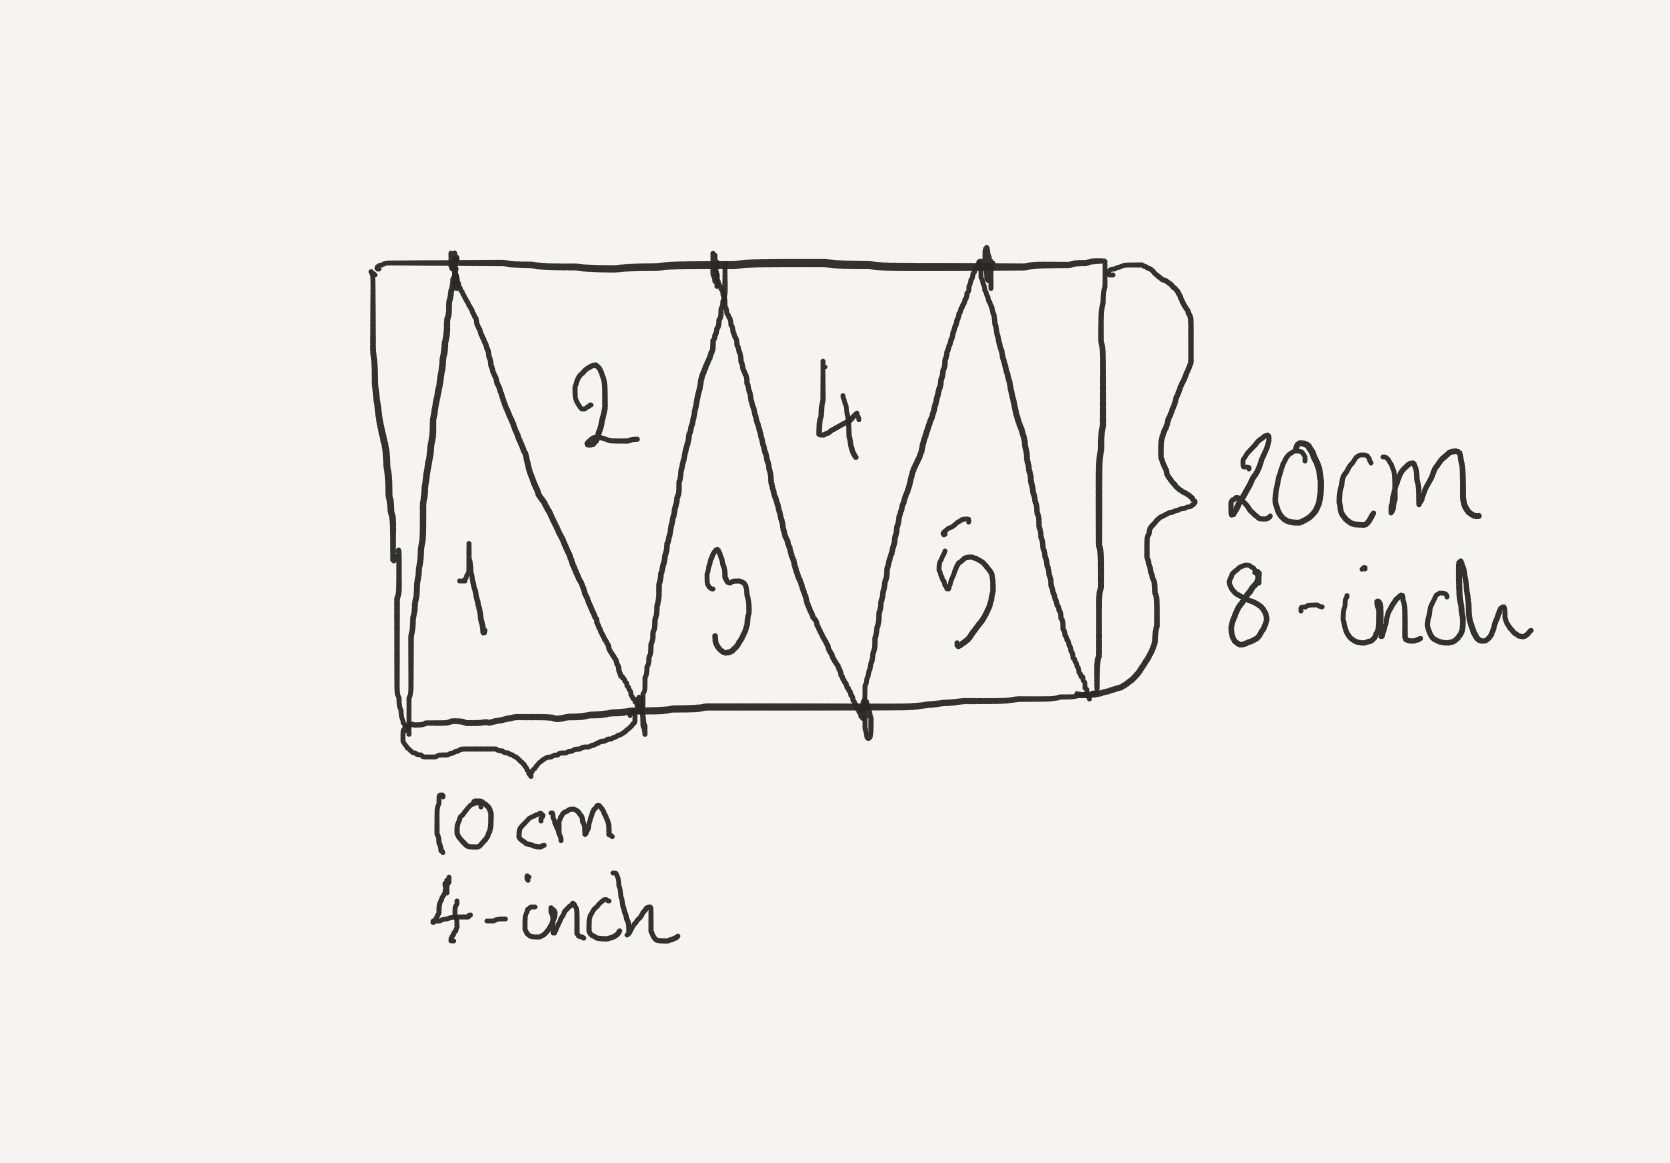
Turn the dough out on a lightly floured surface. Stretch the dough by making 2-3 letter folds* turning the dough a quarter each timer, building up the surface tension on the dough. Place the dough seam side down in the sprayed bowl. Let the dough rise covered for 15-20 minutes.
Gently turn you dough out onto a lightly floured surface, seam side up. Weigh the dough, so you only shape 1 kg (a little over 2 pounds). Gently pat it to remove any large air bubbles, and form a rectangle. Make another letter fold, but only in one direction. You want to build up the surface tension, that will help you get a better ovenspring. Elongate the loaf, so it fits the length of the pan. Make 1-3 folds, until you have a tight loaf with a good surface tension, ending up with a loaf shaped as a cylinder. Place the loaf in the pan, seam side down. Brush the top with egg wash. Slide the lid onto the pan, leaving ad slid open, so you can peek inside. Let the loaf proof for 2-2½ hours until the loaf barely reaches the top.
Preheat the oven to 375℉ (190℃).
Close the lid of the pan. Bake the loaf for 25 minutes. Carefully remove the lid of the pan, and bake the bread for another 10 minutes until the top is deep golden brown, and the loaf is baked through.
Turn the bread out onto a wirerack to cool completely.
Slice the bread thinly.
Enjoy!
* Letter fold: Dough folded in thirds, like you would do a letter going into an envelope.