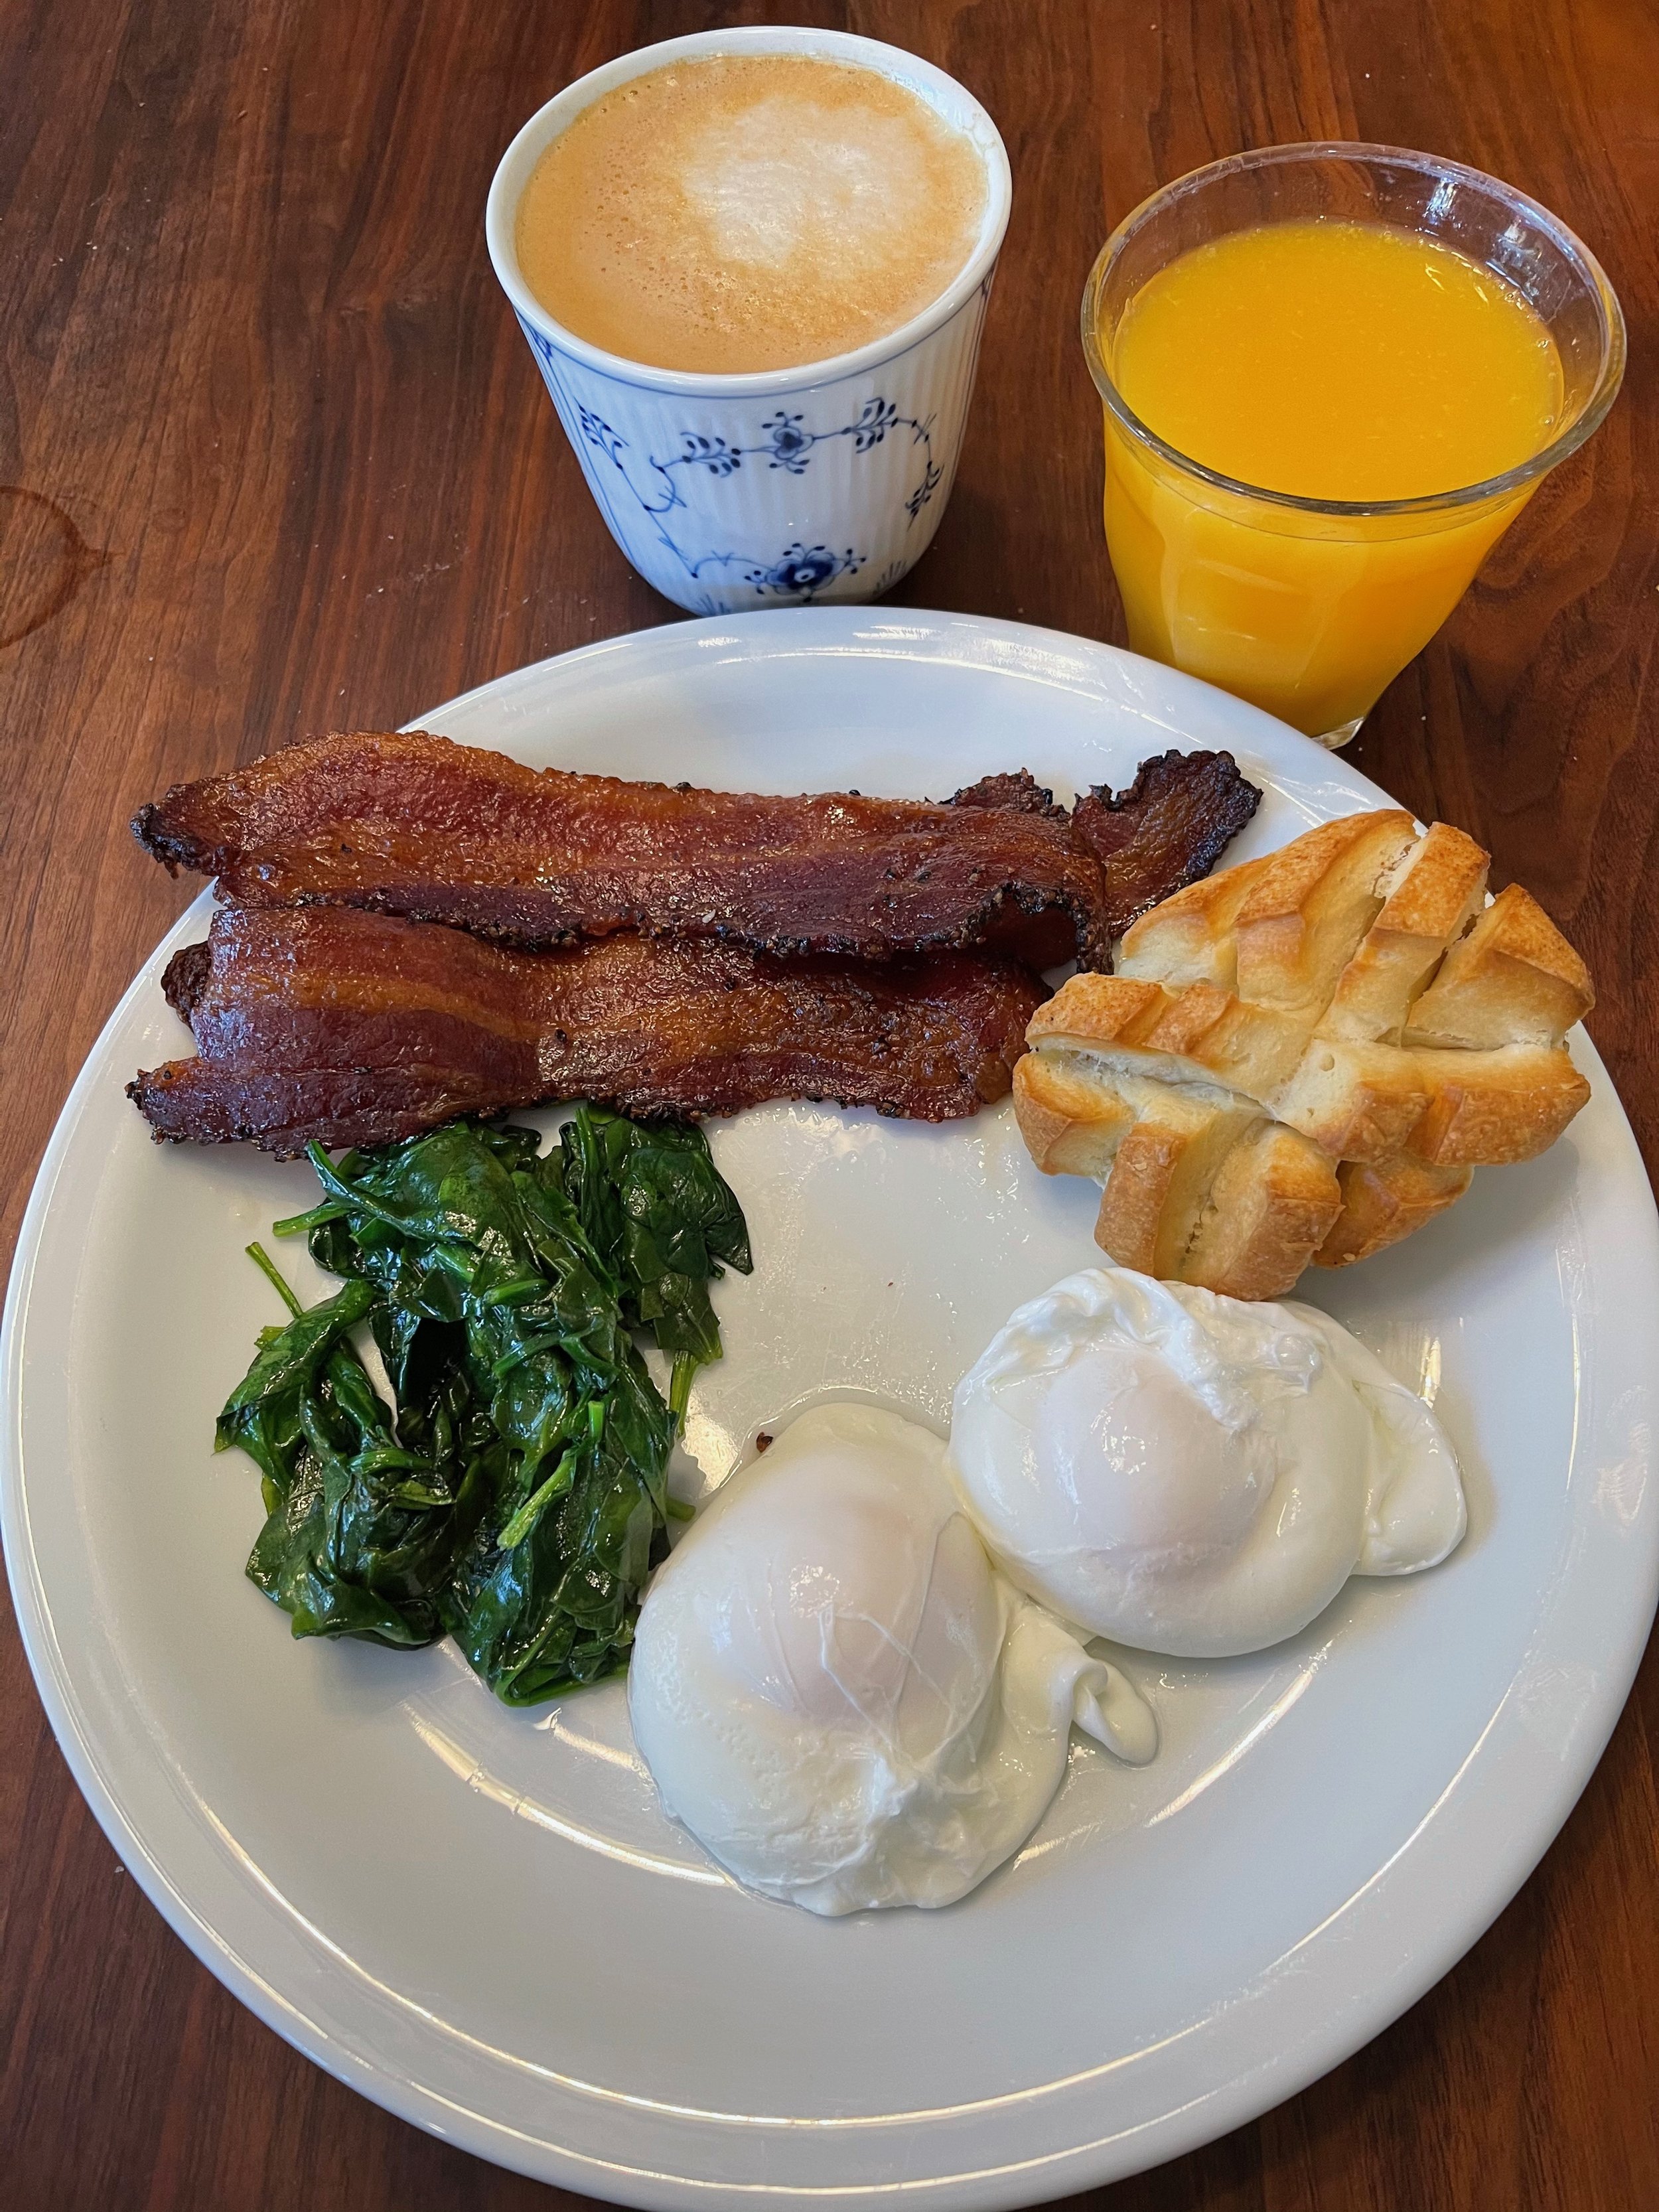
Sweet • Sour • Savory

Food blog on scandinavian style food done right.

technique

Poached Eggs version 2

Breakfast, Brunch, techniqueTove Balle-PedersenComment

Poached Eggs.

I really love poached eggs, but it’s kinda a new love. Before we moved to California, it wasn't really a thing for me. Back then I preferred soft boiled eggs. But a poached egg is pretty much a naked soft boiled egg 😆, so maybe I didn’t change much 😳

I thought I had found a foolproof method, but it was hard to make more eggs at a time, when making a whirlpool in the pot. So with this newer (to me) method, I’m able to make 4 eggs at the same time. And I perfected this method to fit my family.

I use my thick bottomed sauté pan, it is wide and shallow, and works perfect.

Eggs in general: When you want poached eggs, you need to use fresh eggs. When you crack the egg you can tell that you have a fresh egg, when the yolk is firm and plump, and the white consist of two parts: a gelatinous mass around the yolk and a runnier liquid.  As the egg ages, the white becomes more runny.  So the runnier the white, -  the older the egg. 

If you don't want to crack the eggs to figure out the freshness, here's a quick guide:

Place your eggs in a cup or bowl of fresh water

  • If the egg sinks and lays flat on the bottom, it's very fresh.

  • If the egg sits on the bottom at an angle,it's a bit older.

  • If the egg stands on end but still sits on the bottom, use for baking.

  • If the egg floats, it is old and you don't want to use it.

Serves 2-4

Ingredients:

  • 4 eggs

  • 2 tablespoons vinegar

Equipment needed:

  • Shallow saucepan with cover

  • Slotted spoon

Directions:

Crack the eggs into a cup each.

Bring the water to a boil, add the vinegar.

Turn off the heat.

Gently place the eggs in the pan with some space between them. Put on the lid.

Set the timer for 4 minutes when you have placed the first egg in the water.

Remove the eggs from the water with a slotted spoon in the same order as you put them in.

Serve immediately. Alternatively, place the egg in an ice bath and refrigerate up to 8 hours. Reheat in warm water just before serving.

Enjoy!


Homemade Vanilla Bean Paste

Vegetarian, vegan, technique, Spices, Preserve, Frostings & FillingsTove Balle-PedersenComment
Homemade Vanilla Bean Paste

Homemade Vanilla Bean Paste

When I first moved to California, one of the things I had a hard time finding, was vanilla beans. In Denmark I never used vanilla extract, only real vanilla beans or vanilla sugar. So I always got vanilla beans sent to me in Care Packages. Eventually I discovered vanilla bean paste, and used that for most things, except for vanilla wreaths and our Christmas dessert Risalamande. Here I wanted the truer delicate vanilla flavors from the beans. Around the month of December you can find ok vanilla beans, but they aren’t as thick and plump, as the onc’s I got from Denmark. Somehow I got dragged into a vanilla cult, and now i buy the most beautiful thick and plump vanilla beans to a reasonable price online. Access to great vanilla beans, made me want to try making my own vanilla bean paste without any extract, and this recipe from Karas Couture Cakes is the most clean recipe i have found.

Makes about 250-300 ml (8½-10 fl oz)

Ingredients:

  • 16 whole vanilla beans

  • 250 g water

  • 300 g sugar

  • 50 g glucose

Directions:

Cut off the ends of the beans, you can save these, dry them and use them for vanilla sugar.

1DD60AAE-A62E-4A6F-8858-194DF2CAF4DF.jpeg

Chop the beans into a 1/2-inch (~1cm) long pieces. Using a food processor, spice grinder or Vitamix blender, grind the beans with about half the sugar. Work in batches, so you don’t overheat machinery or the vanilla and sugar mixture. You are looking for a grey/brown sandy looking mixture.

In a medium saucepan mix the rest of the sugar, water and glucose, and heat it to a boil, let it boil for a few minutes. Add the vanilla sugar mixture to the saucepan, and let it boil for another 2 minutes, before removing from the heat.

Strain the vanilla through a fine meshed sieve, and use a flexible spatula to massage as much of the paste through the sieve. You can save this pulp and use it to make extract or vanilla sugar. I didn’t do that as I allready had some extract brewing and didn’t need more.

Pour the vanilla bean paste into clean scolded glass containers, and close the lids tightly when completely cooled. Store the vanilla bean paste in a dark place like a pantry.

DO NOT REFRIGERATE

Use vanilla bean paste in cakes, custard, ice cream, and where you would use vanilla sugar or extract.

Enjoy!

Medisterpølse - Danish Pork Sausage

Christmas, Dinner, Meats, Pork, techniqueTove Balle-Pedersen3 Comments
Fried Medisterpølse - Danish Pork Sausage

Fried Medisterpølse - Danish Pork Sausage

Happy First Friday in December. I better start upping my game. Normally I get stuff ready for the blog for December. But this year have been different. Somehow the holidays sneaked up on me - again. But this time we have guest staying here for the past few weeks. So yet again I’m late to the Christmas preparations. But I will be posting christmasy stuff as I get to it.This medisterpølse have been on my blog - to-do list for the longest time. So with this happy December from me to you. 🎄

Medisterpølse/julemedister/christmas medister or Danish pork sausage is something I had very often for weeknight dinners. I was easy to make, and its was on the cheaper end of meats. During November and December the sausage get another seasoning, adding cloves making it more christmasy. This is what I was aiming for here, and I think I’ve succeeded.

Christmas medister is served warm on an open-faced sandwich with pickled red cabbage on Danish rye bread at Danish Christmas luncheons.

Making sausages is a labor entensive process, but the final product is well worth it. Another pro is that you know what's in the sausage.

Makes 3-4 medisterpølser.

Ingredients:

  • 1 kg (2¼ pound) pork (could be a cheaper cut like shoulder)

  • 200 g (½ pound) fatty pork belly

  • 1 onion

  • 1¼ teaspoon salt

  • 1 teaspoon ground cloves

  • 1 teaspoon ground nutmeg

  • 2 teaspoons ground allspice

  • ½-1 teaspoon fresh ground black pepper

  • 3 tablespoons potato starch

  • 2 egg whites

  • about 300 ml chicken stock, ice cold

  • 2-3 meter (yards) sausage casing.

Directions:

Make sure that all your ingredients are cold.

Cut meat, pork belly and onion in pieces that can go into the meat grinder. Grind it all 2 time on the corse setting. Add all the spices, potato starch and egg whites and mix it well. Start adding the cold chicken stock a little at a time. You want the mixture to be soft but by no means runny.  Put the mixture into the refrigerator to rest for 30-40 minutes. 

Rinse the casings in plenty of cold running water. Let tap water run through the casing. This way you’ll fine any holes in the casing. 

Take a little dollop of the mixture and fry it on a small skillet, and tast it, when its cooked completely. This way you can taste the mixture, without tasting the raw meat. Season the mixture with salt, pepper and other spices.

Use a sausage filler to fill up the casing. There are many different model on the marked, but follow the instructions for the one you have. 

But here is some general TIPS:

  • Use nozzle that fits your casings. 

  • Wet the tip of the nozzle with a tiny amount of meat mixture, this will help you getting the casing onto the nozzle. 

  • Put all the casing onto the nozzle

  • let the casing sit close to the tip, this will ease your sausage making.

  • Do NOT tie a knot on the casing, this will just trap a lot of air.

  • Gently pull and squeeze the casing while filling it with the meat mixture.

  • Do NOT fill the casing too much, you are aiming for a soft sausage, the mixture will expand when heated.

Traditionally medisterpølse is made as one big sausage, but of course you can make smaller sausage links. Let the sausage rest for about 30 minutes in the refrigerator before cooking.

Raw Merdisterpølse - Danish Pork Sausage

Raw Merdisterpølse - Danish Pork Sausage

How to cook a medisterpølse? This is a matter og taste or believes. Some would boil or lite simmer the sausage for about 10 minutes before pan-frying it. My mom never did that. She pan-fried it directly, and it worked just fine. The casing rarely split open.

I pan-fried it directly in butter on medium heat for 15-18 minutes until fully cooked, turnip the sausage a few times.

Another option is to put some water and butter in the pan, and place the raw sausage in the pan and then heat the whole thing up. Turning the sausage ones before the water evaporate, and the frying starts. This way you are pre-boiling and frying the sausage in 1 step, and no need for additional pots and pans.

Serve medisterpølse/pork sausage with boiled potatoes, pickled red cabbage and maybe even some pan-gravy. (Pan-gravy is made in the pan where you cooked the sausage, by adding some stock (water used to boil potatoes) and some milk/cream, then thickend, seasoned and colored with gravy browning).

Enjoy!

Pickled Cucumbers

condiments, Dinner, Preserve, Snacks, technique, Vegetables, vegan, VegetarianTove Balle-PedersenComment
Pickled Cucumbers

Pickled Cucumbers

My parents grew their own vegetable in their large vegetable garden, and of course my mom made sure to preserve the large amount of produce by pickling and freezing. We all loved my moms pickled cucumbers, with our dinner or on the open faced sandwiches. Especially on liverpate. So when I found crown dill and pickling cucumbers at my local grocery store, I had to try my moms old recipe. I have a hard time learning that the pickled cucumbers in my world are called pickles here in the States, but eventually I might learn to accept it. 😉

5-8 jars.

Ingredients:

Brine:

  • 200 g salt

  • 2 liters (68 oz) water

Pickling:

  • 1500 g pickling cucumbers

  • 1250 ml vinegar

  • 780 g sugar

  • 13-15 slices fresh horseradish

  • 5 teaspoons yellow mustard seeds

  • 1 teaspoon fennel seeds

  • 2 teaspoon black peppercorns

  • 8 crown dill (1-2 in each jar)

  • 6-8 dried red chilies

Direction:

Combine the salt and water in a pitcher and stir until the salt has dissolved. Rinse the cucumbers thoroughly and snip off the blossom end stem. Prick cucumbers with a table fork. Set aside. Pour the salt water over the cucumbers. Place a plate on top to keep the cucumbers submerged. Let stand 12 hours in the refrigerator. Drain the cucumber and place them in scolded* jars. Add horseradish, dill and the spices to the jars.

I sliced 4 of the cucumbers in thick slices for some more spicy pickles. I placed the slices in 2 smaller jars with 1 fatalii chili in one and 1 habanero chili in the other. HOT HOT HOT  🌶 🌶 🌶  

Boil the vinegar with the sugar, and pour it in the jars, making sure to cover the cucumbers completely. Place the lid on the jars, not tightening them completely.

After 2 days, drain out the vinegar and let it come to a boil, maybe adding more vinegar and sugar. Pour the vinegar over the cucumbers again, adding new horseradish and/or sodium benzoate. Seal the jars tight. Do not boil the horseradish.

*You need to clean the jars and sterilize them by soaking them in boiling water. Same goes for the lids. Submerge the lid for a few minutes in a bowl of boiling water. Rinse jars and lids with alcohol like strong vodka or cognac. 

These will keep for a few months at room temperature, but you can keep them in the refrigerator  too. In my house they won't last long.

Romsnegle - Rum Rolls

Bread, Breakfast, Brunch, Cake, Holiday, techniqueTove Balle-Pedersen1 Comment
Romsnegle - Rum Rolls

Romsnegle - Rum Rolls

Romsnegle is a stable at a Danish baker's shop, much like the regular danish (spandauer). This is much like a cinnamon roll made with puff pastry dough and with another filling and icing. Same, - but totally different. This sweet filling pairs so well with the (imitation) rum icing. Ohh so yummy.

Making these rolls with puff pastry makes for a flakier and softer roll. Of cause this is a time consuming bake. But well worth the effort.

The Danish pastry is a laminated yeast dough much like the French croissant. There are many ways to make this lamination. The amount of layers are different from country to country and from baker to baker. You get the flaky layers by folding sheets of dough with butter. 

One of the more important things in puff pastry is the butter. You want to use a european style butter. The European butter contains less liquid and more milk fats than American butter. Most people opt for unsalted butter, but I always use salted butter in my baking.

There are different kinds of folding/turning when it comes to pastry and croissant dough:

Letter fold or Single turn: Dough folded in thirds, like you would do a letter going into an envelope. (I did this for this recipe.)

1. Turn: makes 3 layers of butter

2. Turn: makes 9 layers of butter

3. Turn: makes 27 layers of butter.

Book fold or double turn: Dough folded to the middle and folded again on the middle like a book. This makes 4 layers per fold or turn as they are called.

1. Turn: makes 4 layers of butter

2. Turn: makes 16 layers of butter

3. Turn: makes 64 layers of butter

Some people claim that any more layers than 3 turns using a letter fold, will make the dough like a brioche instead of providing the flaky layers. The 3 turns makes 27 layers. You can mix the folding methods to get the amount of layer you want.


Makes 20.

Ingredients:

Dough:

  • 375 g all-purpose flour

  • 200 ml milk

  • 25 g live yeast or 2 teaspoons dry yeast

  • 45 g sugar

  • 50 g butter, salted and soft

  • 1 egg

Butter block:

  • 350 g butter, cold (use a European style butter, it contains less water, than the American butter)

  • all-purpose flour for dusting

Remonce:

  • 100 g butter, salted and soft

  • 100 g sugar

  • 70 g marzipan

  • 1 teaspoon vanilla bean paste

  • 1 tablespoon all-purpose flour

Icing:

  • 1 egg white (pasteurized)

  • Confectionery (powdered) sugar

  • 1-2 teaspoon imitation rum

multicolored sprinkles

Directions:

Dough:

Heat the milk to lukewarm (99℉/37℃). Dissolve the yeast in the warm milk. Add the sugar. If using dry yeast, let the yeast wake up for about 5-10 minutes, until creating a foam on top. Incorporate the egg.

Mix in half of the flour, forming a sticky dough. Mix in the softened butter. Finally mix in the rest of the flour and knead the dough until you have at shiny, slightly sticky and elastic dough, for about 3-5 minutes.

Place the dough on a very lightly floured surface. Using a bench scraper and one hand, work the dough into a round. The tension will build as the dough achieves to the surface as you rotate it.

Place the dough back in the bowl and let it rise until doubled in size, for about 60 minutes.

Butter block: 

Place the cold butter on a well floured surface. With your palms press the butter a little flat. Using a rolling pin pound on the butter to flatten it. Fold the butter into its self, and keep pounding and folding until the butter has the same consistency as the dough. You want to end up with a 15x15 cm / 6x6 inch square of soft but still cold butter. If the butter is too warm or too hard, it will be hard to roll it out in the dough, and it might make holes in the dough, instead of the lamination.

Laminating

Laminating

Laminating:

Place dough  on a lightly floured surface, roll 4 wings out from the center, leaving a center (15x15 cm / 6x6 inch), the same size as the butter block.

Place the butter block over the center, fold the wings over the butter, making sure not getting too much flour in between the layers. Turn the dough over, so the seams are facing down.

Roll the dough to a rectangle, 3 times as long as the hight. Keep it lightly floured so the dough do not stick to the surface. Make sure to roll the dough with straight edges. This will ease the folding.

Making a fold.

Making a fold.

1. Turn: Fold the rectangle in thirds, like a letter. Now you have 3 layers of butter. Place the dough in the freezer for about 20 minutes to cool the butter again.

Repeat this 2 times, making 3 turns and ending up with 27 layers of butter. Let the dough rest on the kitchen counter for 10-20 minutes. (If your kitchen is warm, do the resting in the refrigerator.)

Now the dough is ready to use as a puff pastry for sweet or savory dishes.

If you want to make sweet pastries, you want to make the 3. Turn on a surface sprinkled with about 100 g granulated sugar, and sprinkle another 100 g granulated sugar on top. This will make the dough sweeter and more crispy.

Remonce: 

Mix the all the ingredients so you end up with a soft fluffy mixture. You want to have a soft mixture, so you won't rip the dough, while spreading the remonce. The added flour will prevent the filling to ooze out of the rolls while baking.

Making the rolls.

Making the rolls.

Making the rolls:

Turn the dough out onto a lightly floured surface, and roll it to a large rectangle (16x16 inches/40x40 cm).

Spread the filling in a thin layer onto the dough, leaving a thin edge closest to your self, without filling.

Line 2-3 bakings sheets with parchment paper.

Roll the dough into a large log. Cut the log into 20 slices. When you place the slices on the prepared baking sheets, tuck the lose ends under the roll, and give the roll a little press.  Leave a good spacing between them, so they can spread out without "growing" together. Cover the rolls with a tea towel to rise for about 20 minutes.

Preheat the oven to 355℉ (180℃).

Bake the rolls for 14-16 minutes until deep golden brown.

Let the rolls cool completely, before icing.

Enjoy!

Tips:

The unbaked pastry can be frozen just, after shaping, individually, and can be baked straight out of the freezer, just add about 5 more minutes to the baking time.