Sweet • Sour • Savory

Food blog on scandinavian style food done right.

vegan,Vegetables

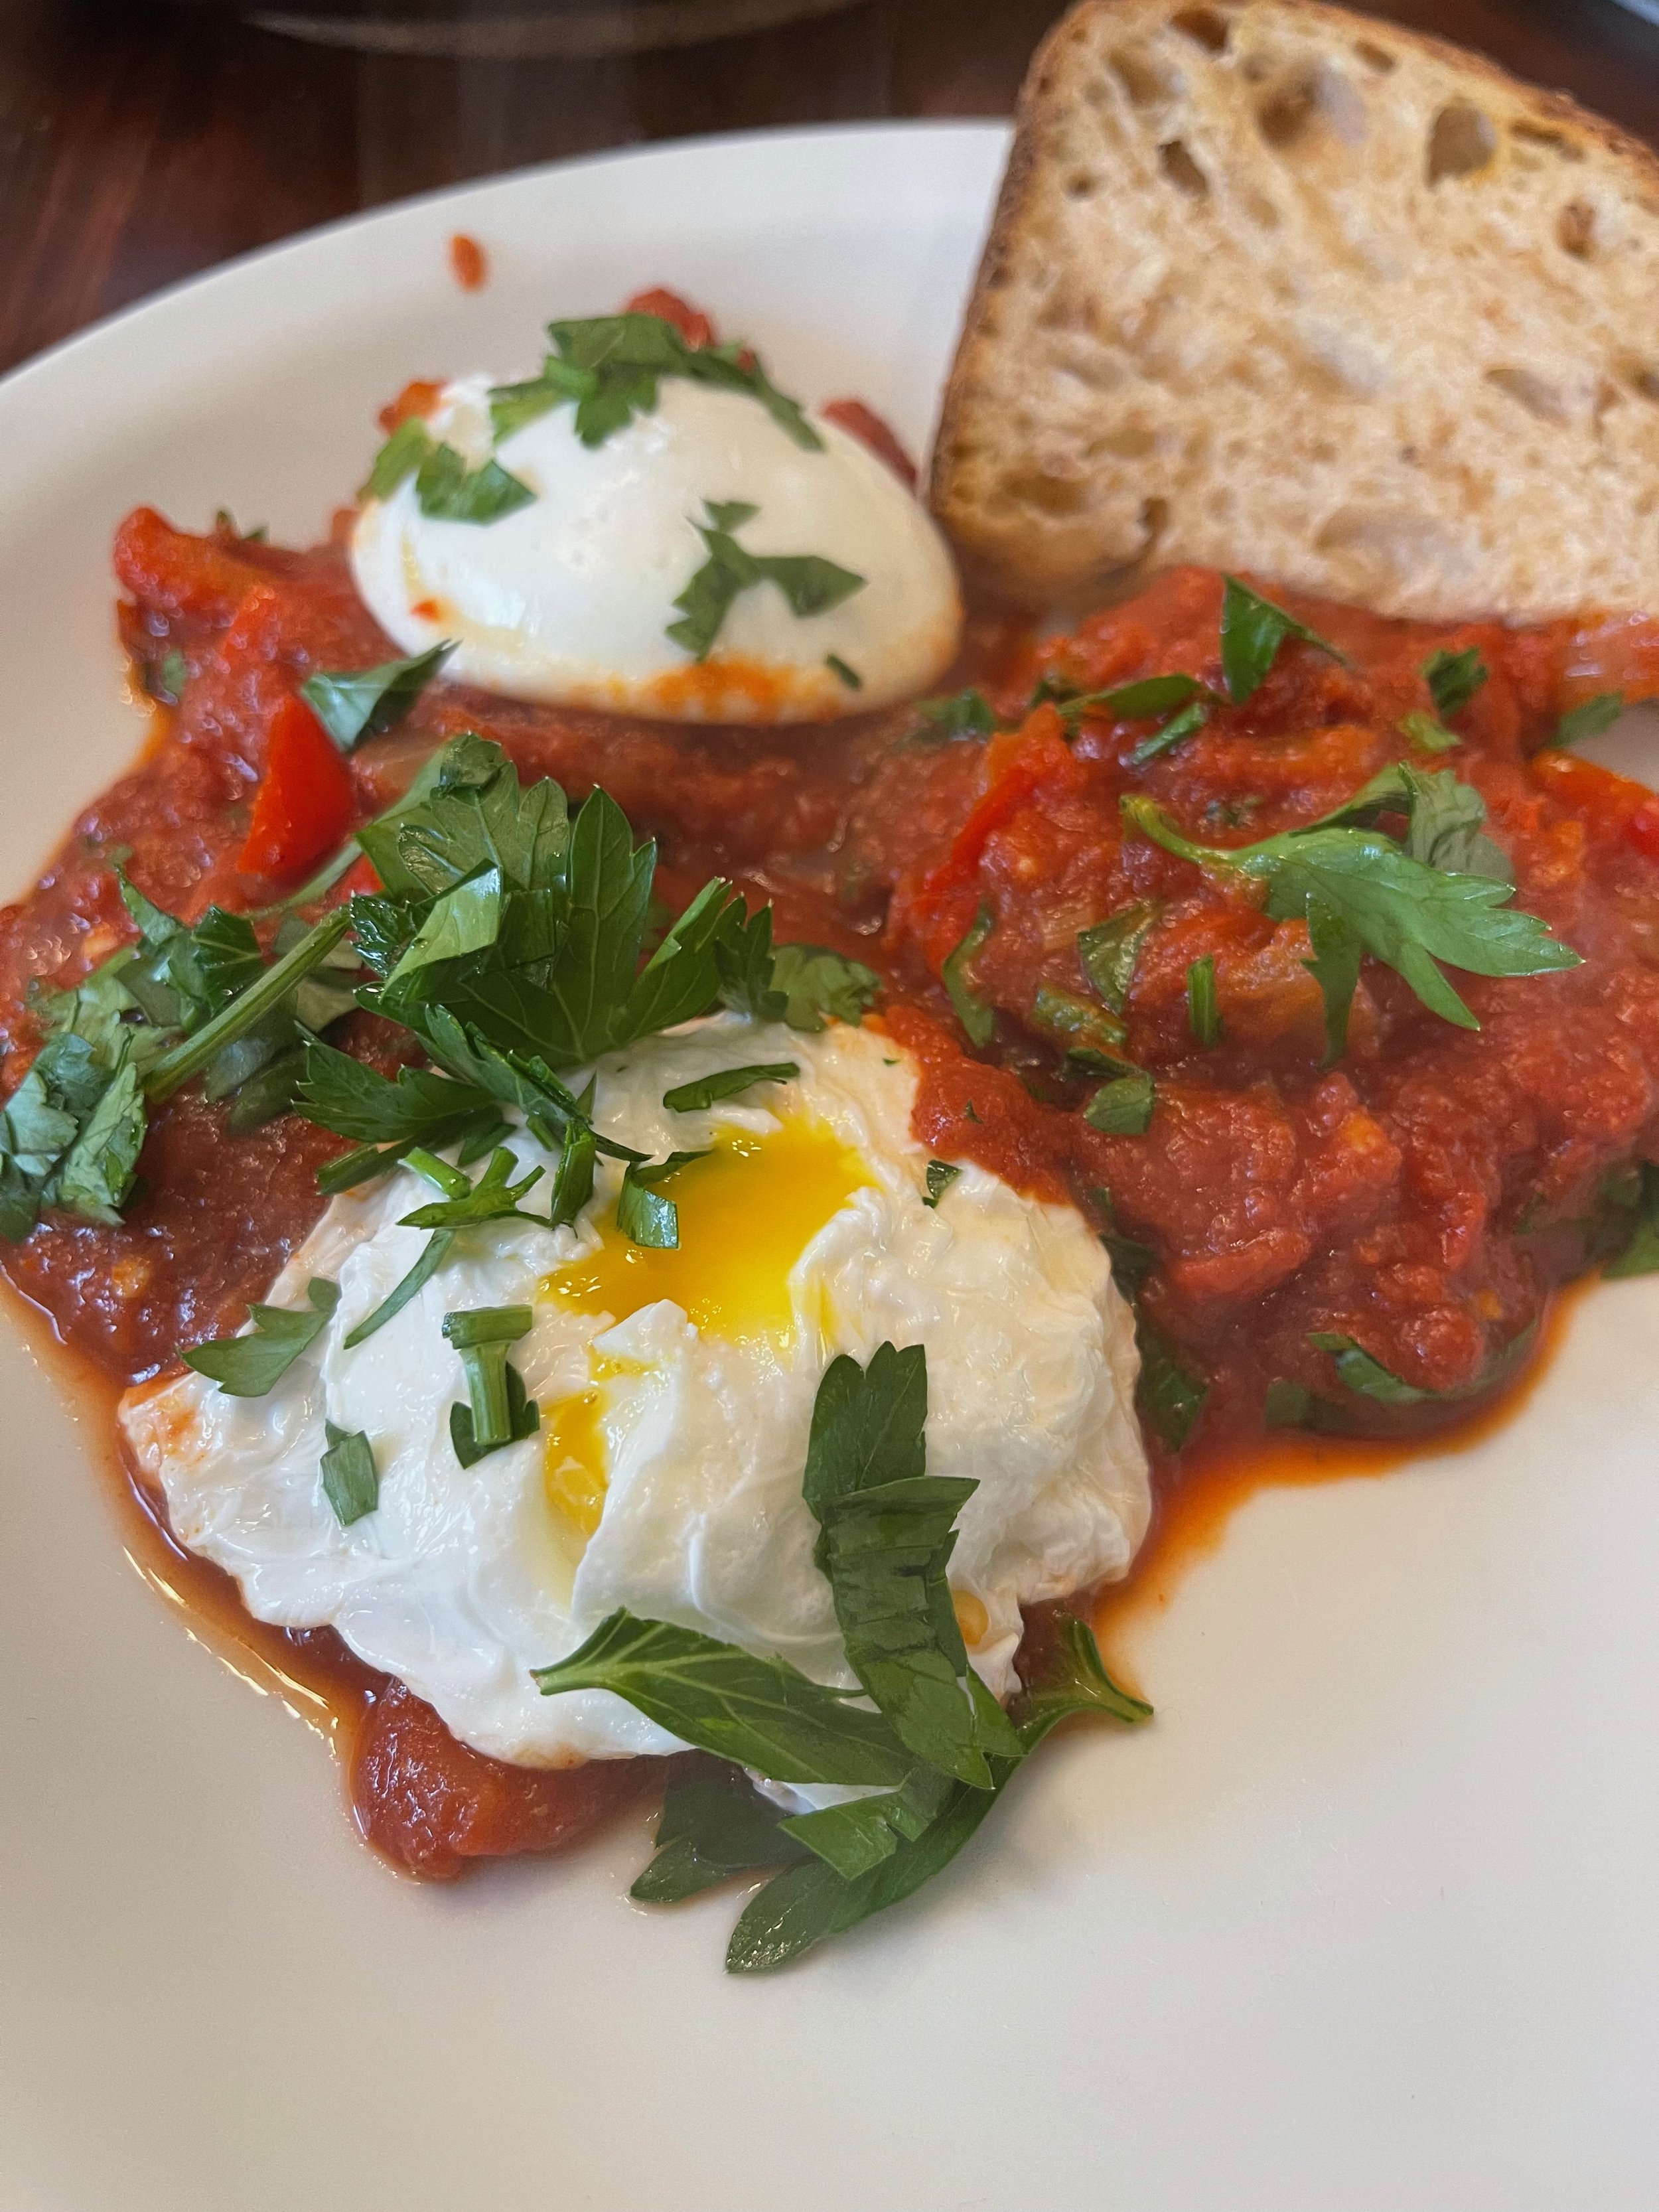
Shakshuka a la the Danes

Breakfast, Brunch, Vegetables, VegetarianTove Balle-PedersenComment

Shakshuka a la the Danes

Shakshuka is a spicy sauce of tomatoes and other vegetables with poached eggs originating from North Africa, Tunisia. I first had it at a humus place, and remember it as kinda bland. But I liked the idea of the dish, and my version of the dish is not even close to bland. After serving this to my husband, it went into his top of breakfast dishes. I poach the eggs separately, so I can make a large pot of the sauce, even adding whatever vegetables I have on hand, and freeze it in smaller portions. By doing this Shakshuka becomes a quick breakfast, just heating the sauce, and poaching the eggs.

Serves 2-3.

Ingredients:

  • 1 onion, diced

  • 1 red bell pepper, diced

  • 2 garlic clove, minced

  • 1 can diced tomatoes

  • 1½ teaspoon cumin

  • ¼ teaspoon cayenne pepper or red chili flakes

  • 1 teaspoon paprika (½ mild and ½ smoked)

  • salt, to taste

Topping

Directions:

In a deep frying pan, heat the oil and cook the onion and bell pepper for around 5 minutes, until the onion is translucent. Stir in the spices and garlic and cook for a couple more minutes. Add the tomatoes and season with salt and pepper to taste. Let the sauce simmer gently for 15 minutes, letting the sauce thicken a bit.

(For the traditional shakshuka make up 4 hollows in the sauce, and crack an egg in each one, cover the pan with a lid and cook for another 5-8 minutes until the desired doneness of the eggs.)

I make poached eggs and serve them on top, because I think it’s easier to control.

Now, with a large spoon, make four hollows at the points of the compass in the mixture.

Just before serving place the poached eggs on top, and sprinkle with chopped chili and parsley.

Serve the dish immediately with a slice of good bread, preferably toasted.

Enjoy!
Lemony Kale and White Bean Soup

Dinner, Poultry, Soup, vegan, VegetarianTove Balle-PedersenComment

Lemony Kale and White Bean Soup

My mom often made kale soup during the winter months, but her soup was made with very fine chopped kale, it was kinda grated. It felt like I was eating the fresh cutting from the lawn, and the cut of meat was very fatty. To be honest, it was far from a favorite of mine, but my mom and dad loved it.

So here many years later, after I have been using kale in green salads, I wanted to try a white bean and kale soup, hoping not to visit my childhood kale soup traumas. Maybe that was why it took me years to muster enough courage to give it a try. As it turned out, this soup was nothing like my moms kale soup, actually it has become one of my favorite winter soups. The different textures and the tanginess of this soup makes all the difference. It makes an appearance on the menu in my house several times a month. It’s easy to make, and you have a comforting, warm, and healthy meal on the table within 25-30 minutes.

Normally I use Lacinato kale also known as Dinosaur, or Tuscan kale, but any kale will do. Just make sure to give it a rough chop, so you have something to chew on. If you want to keep the soup vegan, use vegetable stock and omit the chicken.

Serves 4-6.

Ingredients:

  • 1 tablespoon olive oil

  • 1 large onion, chopped

  • 1 clove of garlic, crushed

  • ½ teaspoon rosemary

  • ½ teaspoon thyme

  • 2 lemon, the juice

  • 2 liter (8 cups) chicken stock (or vegetable stock)

  • 250 g raw chicken tenders, cut bite sized

  • 2 cans cannellini beans, drained (not rinsed)

  • 250 g fresh kale, roughly chopped

Directions:

Heat the olive oil in a heavy bottom pot over medium heat add the onion, and cook them until soft and translucent, you don’t want them to be brown. Add the garlic and cook for a little minute. Stir in the herbs, and add vegetable or chicken stock, lemon juice and chicken tenders. Cover, and bring the stock to a boil. Turn the heat down so it gets to a simmer. After about 15 minutes, season with salt and pepper.

Add the white beans and kale, and let it heat through befor serving. This will give the kale a bright green color, but keep it crispy. Serve the soup hot, with some good bread.

Enjoy!


Hasselback Potatoes

Dinner, Holiday, VegetablesTove Balle-PedersenComment
071630C5-B4AB-4616-82B4-83F26B0A4DD5.jpeg

Hasselback potatoes is a Swedish dish invented in the 1950’s created at the Hasselbacken restaurant in Stockholm. And they were very popular during the 70’s and 80’s, but do no deserve to be forgotten. Personally i love them for their crispy outer and creamy center.

Normally I won’t add any flavors to the butter, but fresh herbs like rosemary and thyme goes really well with the potatoes, as do garlic. If you like another flavor profile, you can use other types of fat or oil, like olive oil and duck fat.

Serves 3-4 depending on the size of the potatoes.

Ingredients:

8-10 potatoes, the size of a golf ball, I used Yukon Gold potatoes

60 g salted butter (About ½ stick)

salt

Direction:

7B48BC0D-9765-429A-8C3D-1445CAE86953.jpeg

Preheat the oven to 400℉ (200℃), and line a large rimmed baking sheet with parchment paper, set a side.
Place a potato up against a handle of a wooden spoon. Slice the potato into thin slices, not cutting all the way through. The handle of the spoon helps you not slicing the whole way through. Repeat with the remaining potatoes.

Place the potatoes on the baking sheet and brush them with the melted butter, making sure to get in between all the slices. Sprinkle with salt. Bake potatoes for about 55 to 60 minutes, brush the potatoes with more butter every 20 minutes. Bake until crisp and tender.

Serve them as a side.

Enjoy!

Homemade Vanilla Bean Paste

Vegetarian, vegan, technique, Spices, Preserve, Frostings & FillingsTove Balle-PedersenComment
Homemade Vanilla Bean Paste

Homemade Vanilla Bean Paste

When I first moved to California, one of the things I had a hard time finding, was vanilla beans. In Denmark I never used vanilla extract, only real vanilla beans or vanilla sugar. So I always got vanilla beans sent to me in Care Packages. Eventually I discovered vanilla bean paste, and used that for most things, except for vanilla wreaths and our Christmas dessert Risalamande. Here I wanted the truer delicate vanilla flavors from the beans. Around the month of December you can find ok vanilla beans, but they aren’t as thick and plump, as the onc’s I got from Denmark. Somehow I got dragged into a vanilla cult, and now i buy the most beautiful thick and plump vanilla beans to a reasonable price online. Access to great vanilla beans, made me want to try making my own vanilla bean paste without any extract, and this recipe from Karas Couture Cakes is the most clean recipe i have found.

Makes about 250-300 ml (8½-10 fl oz)

Ingredients:

  • 16 whole vanilla beans

  • 250 g water

  • 300 g sugar

  • 50 g glucose

Directions:

Cut off the ends of the beans, you can save these, dry them and use them for vanilla sugar.

1DD60AAE-A62E-4A6F-8858-194DF2CAF4DF.jpeg

Chop the beans into a 1/2-inch (~1cm) long pieces. Using a food processor, spice grinder or Vitamix blender, grind the beans with about half the sugar. Work in batches, so you don’t overheat machinery or the vanilla and sugar mixture. You are looking for a grey/brown sandy looking mixture.

In a medium saucepan mix the rest of the sugar, water and glucose, and heat it to a boil, let it boil for a few minutes. Add the vanilla sugar mixture to the saucepan, and let it boil for another 2 minutes, before removing from the heat.

Strain the vanilla through a fine meshed sieve, and use a flexible spatula to massage as much of the paste through the sieve. You can save this pulp and use it to make extract or vanilla sugar. I didn’t do that as I allready had some extract brewing and didn’t need more.

Pour the vanilla bean paste into clean scolded glass containers, and close the lids tightly when completely cooled. Store the vanilla bean paste in a dark place like a pantry.

DO NOT REFRIGERATE

Use vanilla bean paste in cakes, custard, ice cream, and where you would use vanilla sugar or extract.

Enjoy!

Spinach and Feta Pie a la Spanakopita

Lunch, Sides, Vegetables, Vegetarian, DinnerTove Balle-PedersenComment
Spinach and Feta Pie a la Spanakopita

Spinach and Feta Pie a la Spanakopita

This is a simplification of the traditional Greek Spanakopita, a spinach feta pie or hand pie. It’s perfect for a lunch or light dinner. The crispness of the filo dough with the soft creamy filling is a great combination. An absolute favorite in my house.

Serves 4,

Ingredients:

  • 100 g pine nuts, dry roasted

  • 400 g baby spinach

  • olive oil for sautéing the spinach

  • 5 eggs

  • 275 g feta cheese, crumbled

  • 1 lemon, the zest of

  • 1 pinch of cayenne pepper

  • 9-10 sheets of filo dough (Store bought) defrosted according to instruction on packaging

  • ~50 g melted butter for brushing the filo dough

Directions:

Preheat the oven for the 400℉ (200℃).

Take out a 10-inch skillet, and sauté the spinach over medium heat until it is all wilted, take off the heat.

Mix eggs, feta cheese, pine nuts, lemon zest, and cayenne. When the spinach is cooled a bit, add it to the egg mixture. Dry off the pan you used for the spinach, set aside.

Place the filo dough under a damp tea towel, this will help to keep the filo dough soft and workable.

Place a large piece of parchment paper on the kitchen counter. I crumble the parchment paper first, and straighten it out again, this way it’s easier for the parchment paper to fit in the skillet. Brush some melted butter on the parchment paper. Place 4 sheets of the filo dough on top of the parchment paper in a rectangle, you want them to overlap a bit. Gently brush with melted butter, and repeat with 3-4 more layers of filo dough. Carefully transfer the parchment paper with the filo dough into the skillet, so the dough is hanging out over the edges of the skillet. Pour in the egg mixture in an even layer. Gently fold the filo doughs edges in over the filling. Brush the edges with a little more butter, and bake the pie for 18-20 minutes until the dough is golden and crisp, and the filling is set.

Serve the pie warm with a simple salad on the side.

Enjoy!